
Getting started with FormGent is quick and easy. Follow these simple steps to install and activate the plugin, and you’ll be ready to create your first form in minutes.
1. Install FormGent via WordPress Plugin Directory #
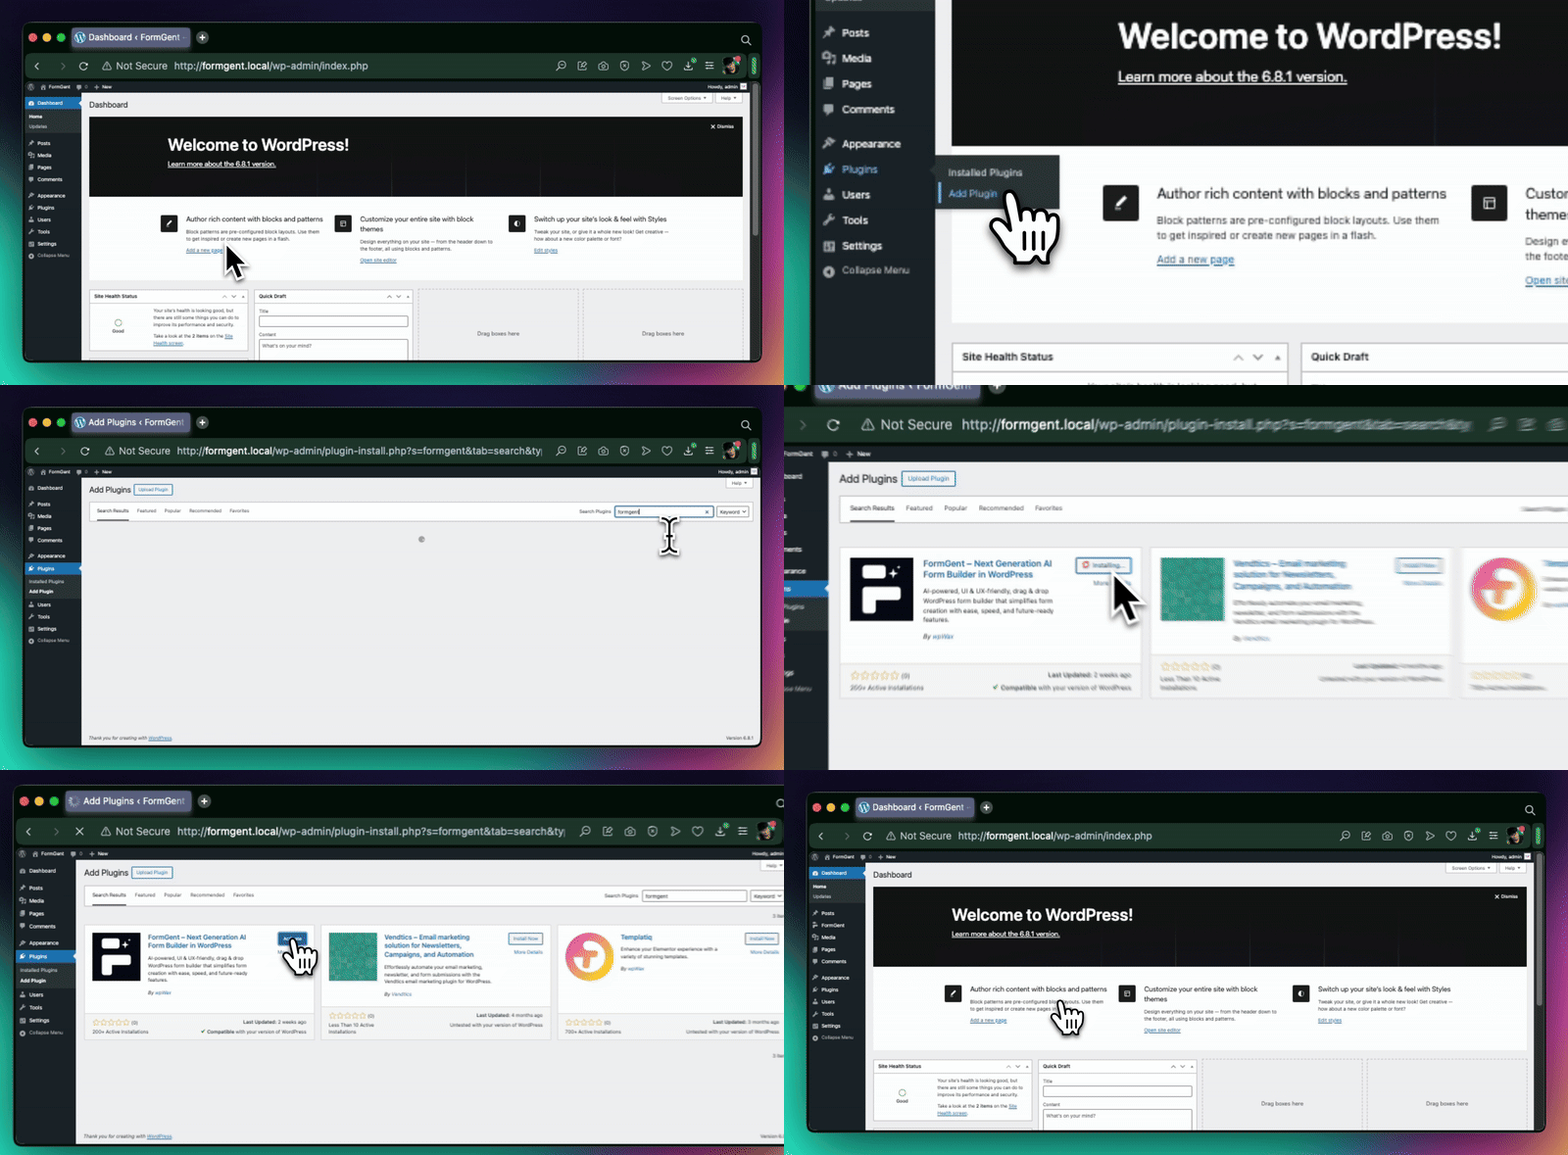
- Log in to your WordPress Admin Dashboard.
- Go to Plugins → Add New.
- In the search bar, type FormGent.
- When you see the plugin, click Install Now.
- Once the installation is complete, click Activate.
2. Install FormGent Manually #
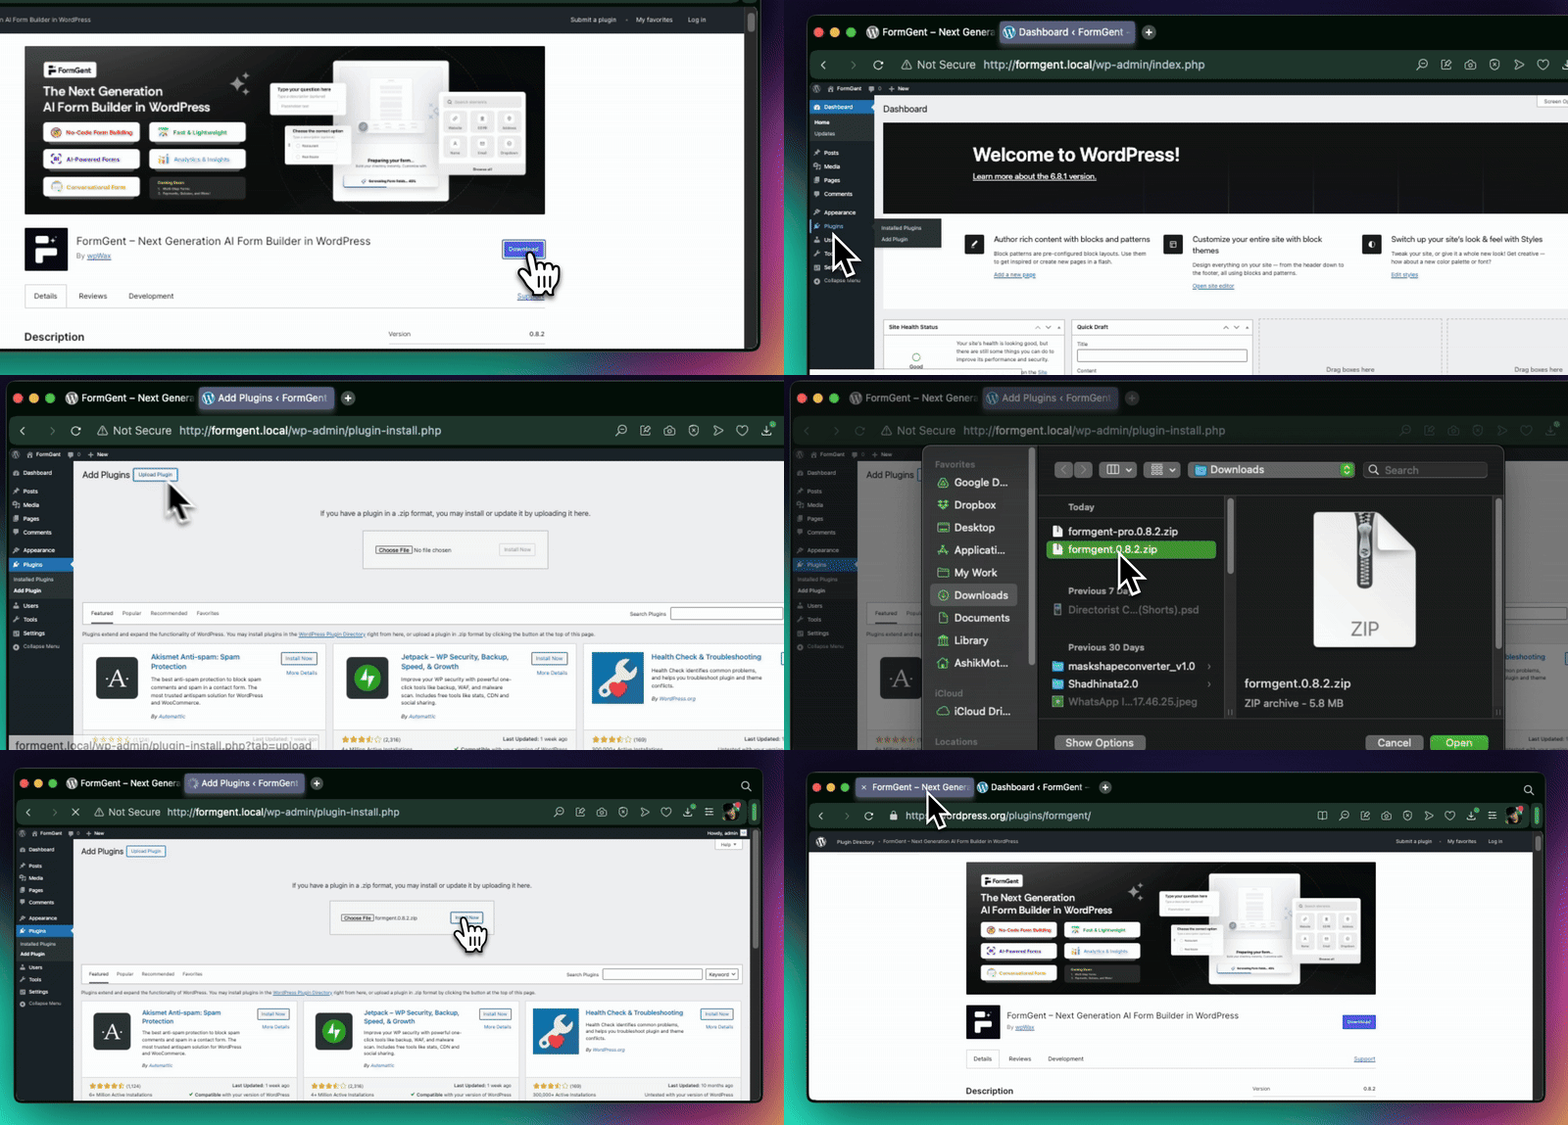
If you prefer a manual installation, here’s how:
- Download the FormGent plugin file from the WordPress Plugin Repository.
- In your WordPress Admin Dashboard, go to Plugins → Add New.
- Click Upload Plugin, then select the downloaded file (
formgent.zip). - Click Install Now, then Activate once the upload is complete.
3. Activate Your Plugin #
After activation, FormGent will appear in your WordPress admin menu. From here, you can access settings, create forms, and explore all its features.
4. License Activation #
If you have purchased FormGent PRO then refer to the license activation doc.
What’s Next? #
Now that FormGent is activated, you’re ready to:
- Configure Basic Settings to customize your experience.
- Create Your First Form and start collecting responses.
- Explore Features like AI-driven suggestions, multi-step forms, and more.


