FormGent’s PDF Generation feature lets you automatically create formatted PDF documents from form submissions and deliver them to users or your team.
Every PDF is generated dynamically using the actual data submitted through the form. No copy-pasting responses into a template. No manual invoice creation. No emailing certificates one by one. Set it up once, and it runs on every submission.
Business – Quote request copy for the customer When a customer submits a quote request, a PDF copy is generated automatically and sent to the site owner for review.
Invoice – Payment, donation, and subscription forms Every paid form submission – one-time payment, donation, or recurring subscription, it can generate an invoice instantly.
Certificate -— Quiz completions and graded forms When used alongside FormGent’s Quiz feature, the Certificate template can include the respondent’s name, score, and grade in a professionally formatted document delivered immediately on submission.
Custom – Anything else Any form that needs a personalized document in your own layout, branding, tone, or format.
PDF Generation is available on FormGent Pro. To get started:
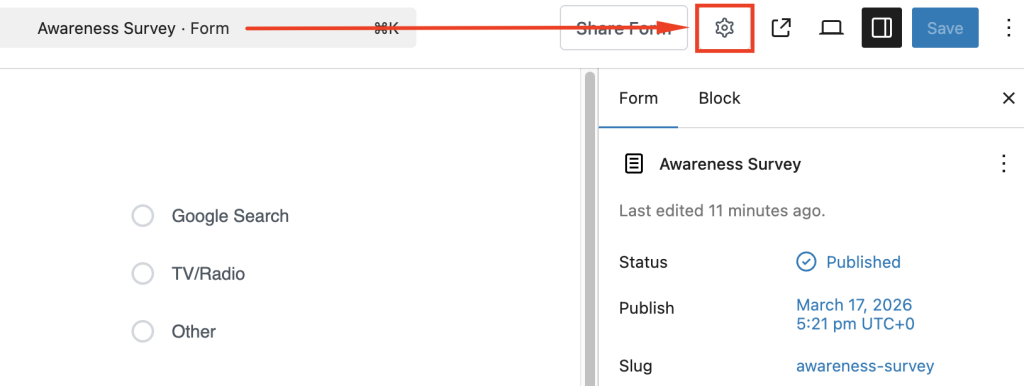
Open any form and go to Form Settings → PDF Generation.
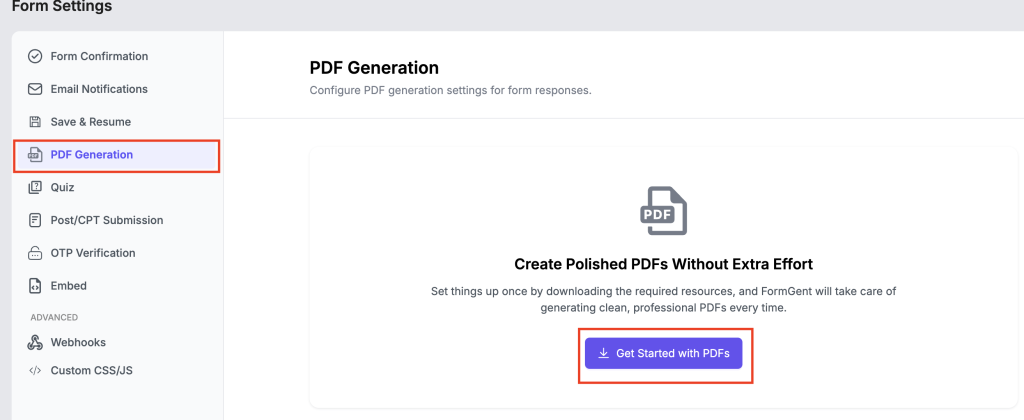
On first use, you will see a prompt: “Create Polished PDFs Without Extra Effort.” Click Get Started with PDFs to download and install the required PDF library.
This is a one-time setup across your site. Once installed, the full PDF Generation interface becomes available for all your forms. Navigate to Single Form Settings guide to find this option.
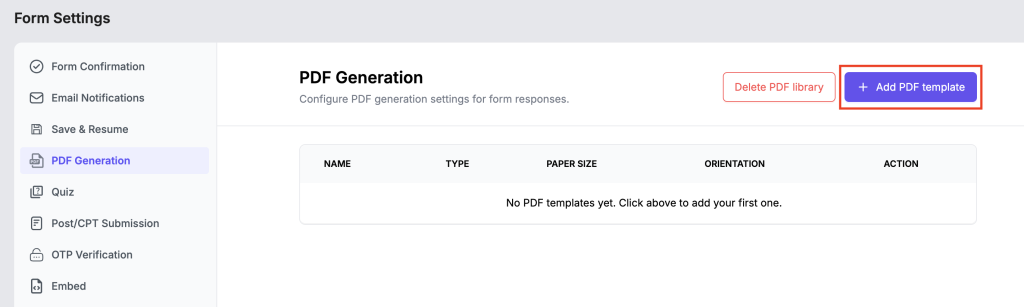
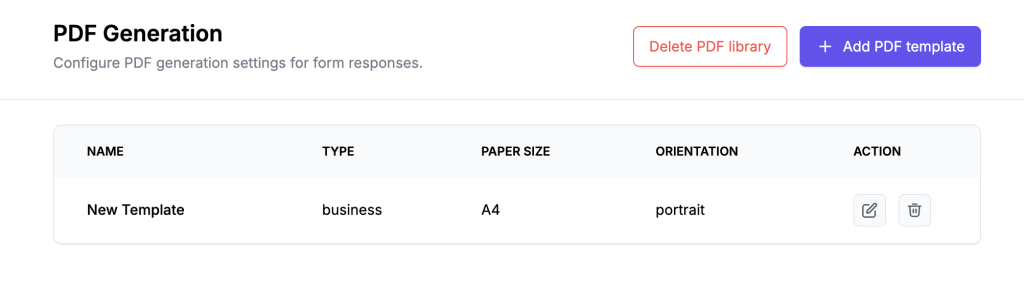
Go to Form Settings → PDF Generation for the form you want to configure. You will land on the PDF Generation dashboard for that form, showing a table with columns for Name, Type, Paper Size, Orientation, and Action.
If no templates exist yet, you will see: “No PDF templates yet. Click above to add your first one.”
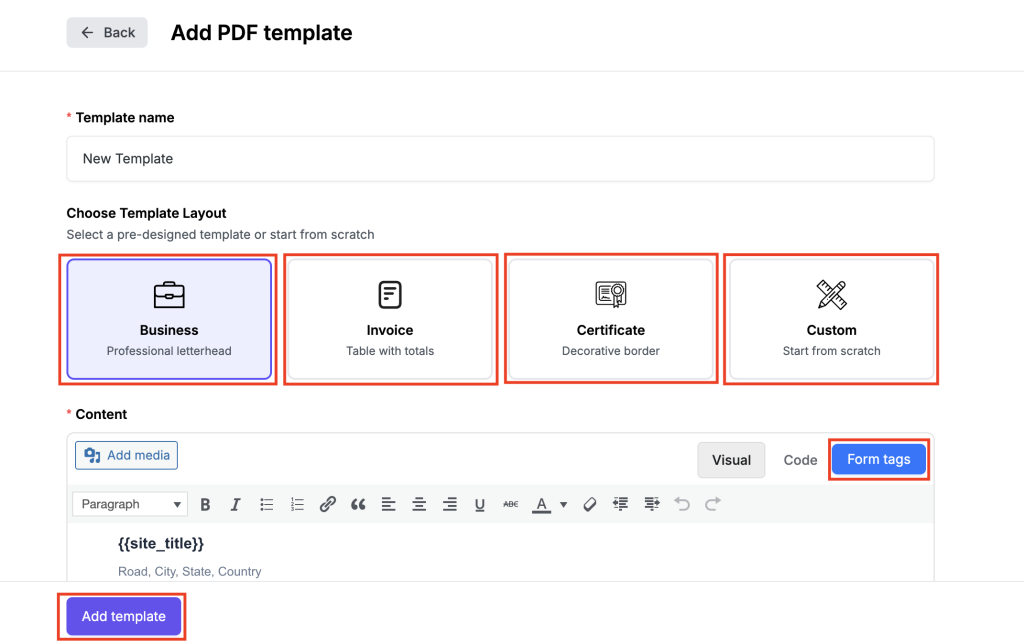
Select one of four pre-designed layouts. The layout you choose loads a starter structure into the content editor which you can edit freely.
Business – A professional letterhead layout. Pre-filled with site title, address placeholders, and a structured body area. Best suited for quote requests, application summaries, or any document that should look like official correspondence.
Invoice – A table-based layout pre-structured with billing information, payment details, and an order items section. Pre-populated with payment-specific tags including {{payment_billing_name}}, {{payment_billing_email}}, {{payment_billing_country}}, {{payment_transaction_id}}, {{payment_date}}, {{payment_method}}, {{payment_status}}, {{payment_currency}}, {{payment_items_table}}, and {{payment_amount}}. Designed for payment, donation, and subscription forms.
Certificate – A decorative border layout pre-built for achievement or completion recognition. Pre-populated with {{user_display_name}}, {{user_id}}, {{user_email}}, {{user_username}}, {{admin_email}}, {{admin_name}}, and {{site_url}}. Best used alongside the Quiz feature.
Custom – A blank canvas. The content editor is completely empty. Use this when you need full control over layout, structure, and design.
The Content editor is where you design the PDF body. Use the visual editor to format text, add media, insert tables, and structure your layout. You can also switch to Code view for direct HTML editing.
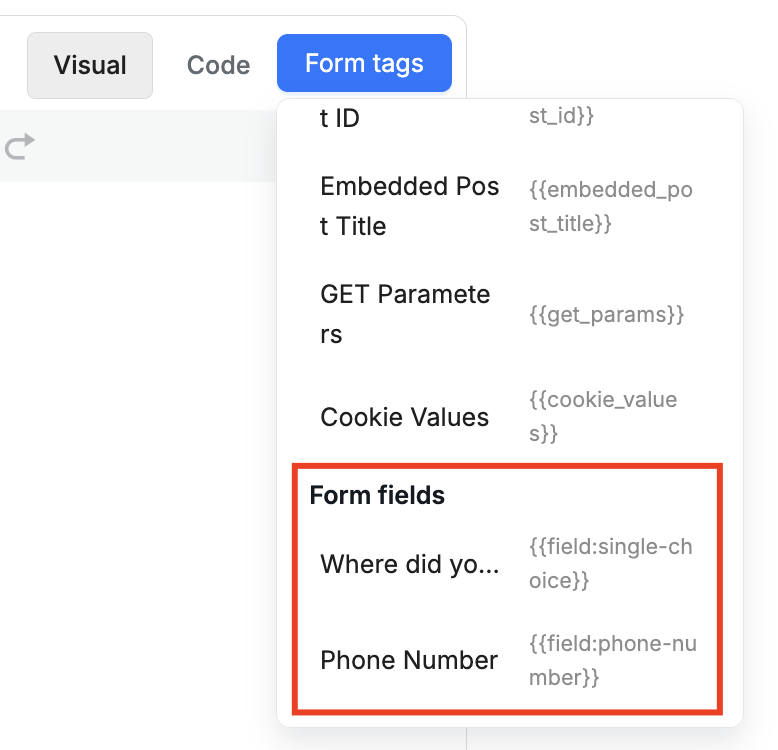
Click Form tags to open the tag picker and insert dynamic values from the form submission. Without form tags, every PDF generated will be identical – plain static text with no submission data. Form tags are what make each PDF unique to the person who submitted the form.
Generic Tags – available in all templates regardless of form content:
Tag
What it inserts
{{site_title}}
Your WordPress site name
{{site_url}}
Your site’s URL
{{form_title}}
The name of the form
{{submission_date}}
The date and time of submission
{{user_id}}
WordPress user ID of the submitter
{{user_email}}
Email address of the logged-in user
{{user_display_name}}
Display name of the logged-in user
{{user_username}}
Username of the logged-in user
{{admin_email}}
The site’s admin email address
{{admin_name}}
The site admin’s display name
Form Field Tags – pulled directly from the fields inside your specific form. These appear under the Form fields section in the tag picker and are unique to each form. For example, a form with a Phone Number field will show {{field:phone-number}}. Every field in your form is available as a dynamic tag.
Use form field tags to personalise every PDF with the actual answers the user submitted – names, choices, uploaded values, and more.
Click Add template to save. The template will now appear in the PDF Generation table for that form, showing its Name, Type, Paper Size, Orientation, and action buttons to edit (pencil icon) or delete (bin icon).
You can create multiple templates per form and manage them all from this table.
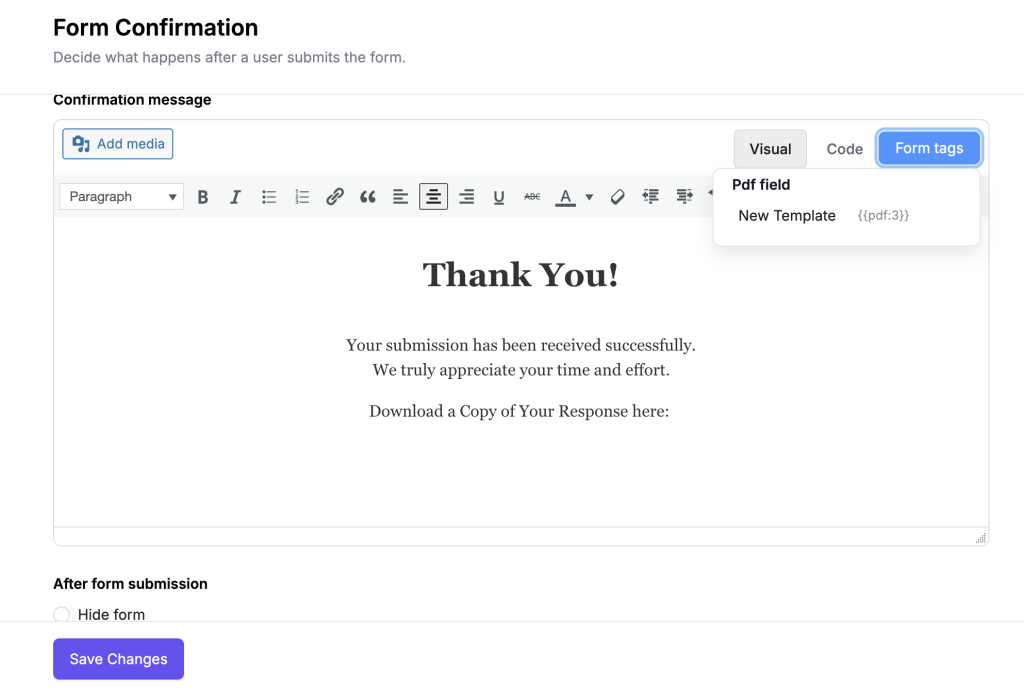
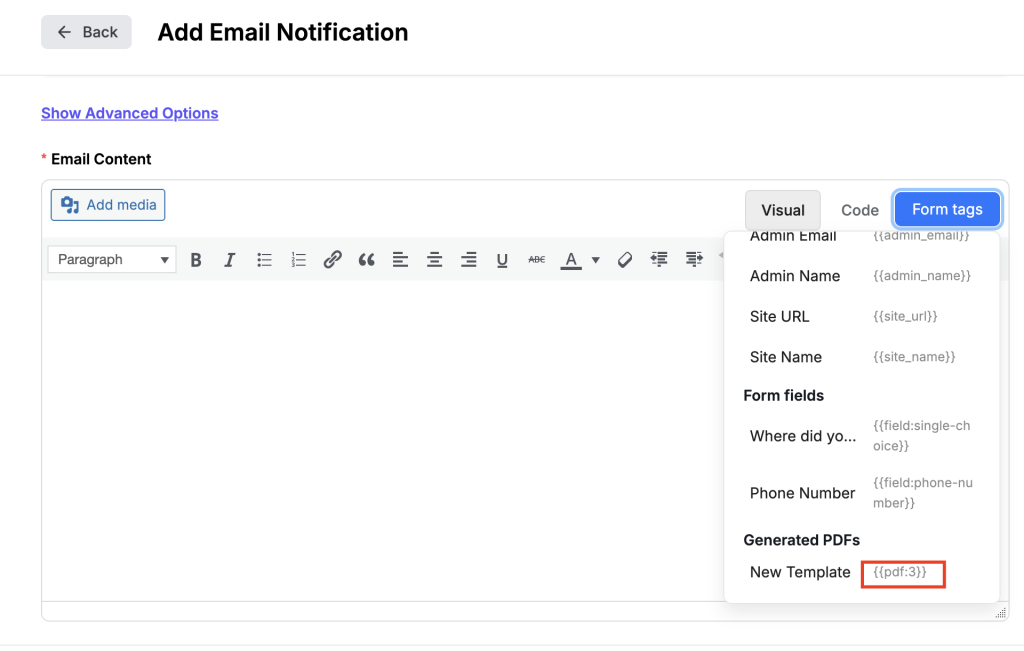
Once a template is created, it becomes available as a tag in two places: Form Confirmation and Email Notifications. In both, click Form tags and look for the Generated PDFs section – your template will appear there by name with its unique tag (e.g., {{pdf:3}}).
Inserting this tag anywhere in the confirmation message or email body will render as a live download link when the PDF is delivered to the recipient.
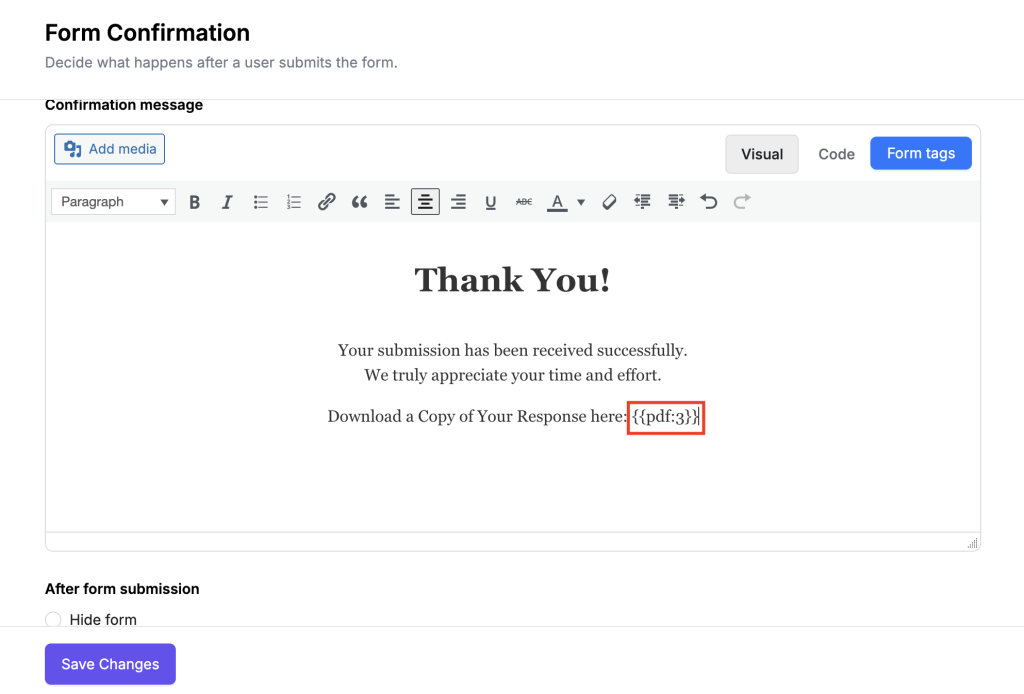
Go to Form Settings → Form Confirmation. In the Confirmation message editor, click Form tags → Pdf field and select your template. The tag (e.g., {{pdf:3}}) will be inserted at the cursor position. Write a label around it so the user understands what they’re downloading – for example: “Download a copy of your response here: {{pdf:3}}“
This is best used when you want the respondent to have immediate access to their PDF on the thank-you screen right after submitting.
Go to Form Settings → Email Notifications and open or create a notification. In the Email Content editor, click Form tags and find the Generated PDFs section to insert your template tag.
Which template goes to which recipient depends on the type of document:
Certificate – Goes to the user. They completed something and should receive their recognition directly.
Invoice – Can go to both the user (as their receipt) and the admin (as a transaction record). Create two notification rules if needed.
Business quote – Goes to the admin or site owner. They need to review the quote and respond – receiving a formatted PDF means they don’t need to log into WordPress to read the submission, which is especially practical for non-technical site owners.
Custom – Goes to whoever the document is designed for, based on your specific workflow.