
Connect your FormGent forms to Zoho CRM so every submission can create or update records automatically in your Zoho account.
What is Zoho CRM integration? #
It’s a secure connection between FormGent and your Zoho CRM. Once connected, FormGent can send form data to Zoho in real time. Typical actions include:
- Create a Lead or Contact
- Update an existing record by email
- Attach notes or custom field values
Authorize this connection once and FormGent keeps it active using Zoho’s standard OAuth method.
Step-by-step Guide to Zoho CRM Integration #
Step 1: Open the integration panel #
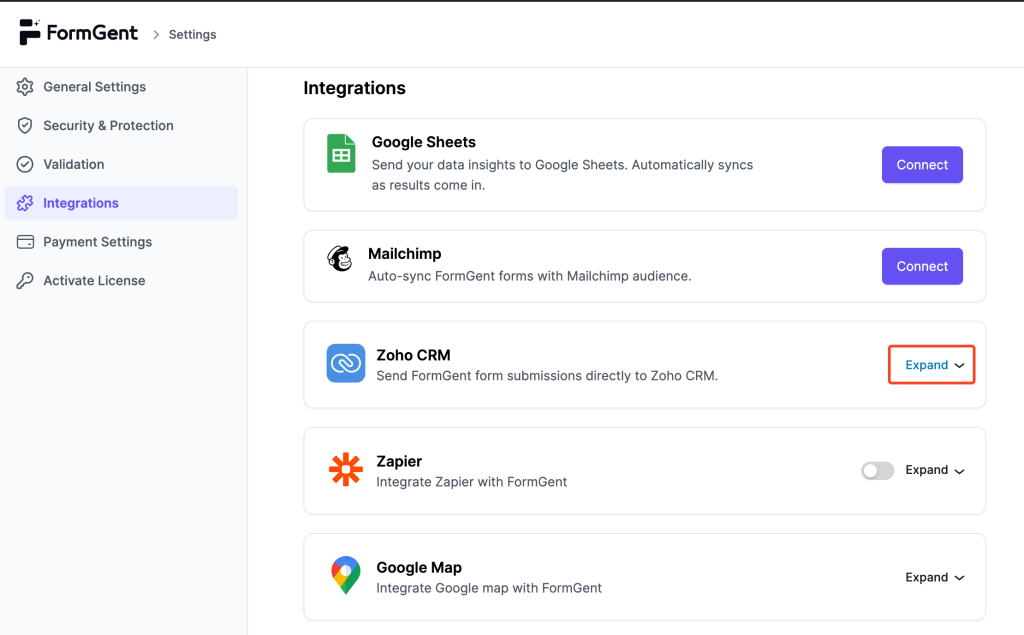
- Navigate to FormGent → Settings → Integrations from your WordPress dashboard.
- Discover Zoho CRM. Click Expand to see the setup.
Step 2: Create your Zoho OAuth client (one-time) #
Under expansion, you will find 2 steps – Step 1 and Step 2. In Step 1, you will register FormGent at Zoho API console.
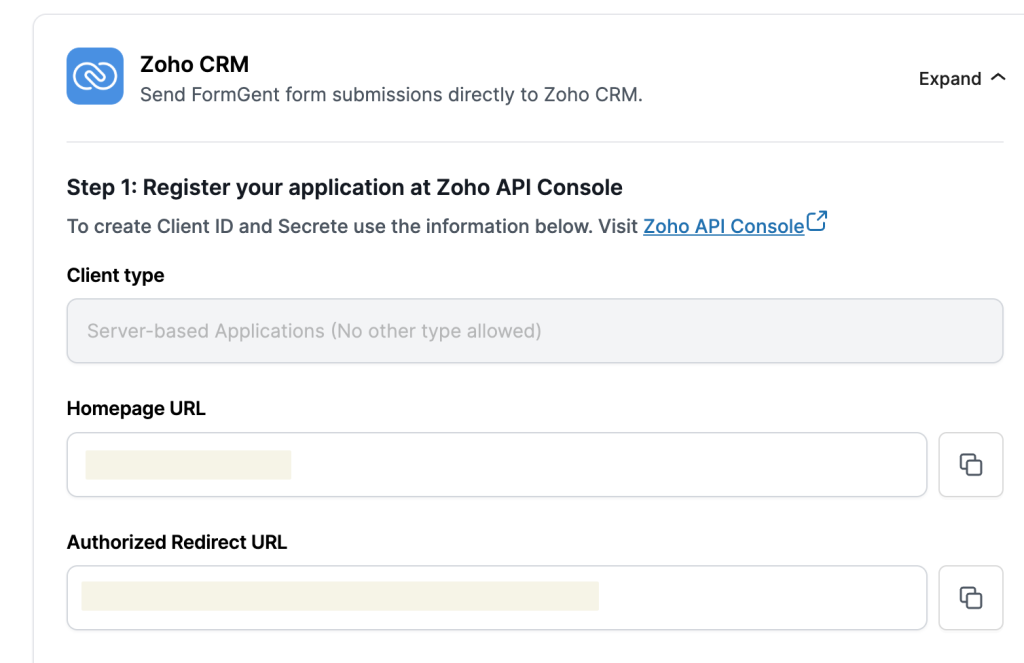
- In the Client Type, Server-based Applications is selected by default.
- You will find values like Homepage URL and authorized redirect URL. Copy values from FormGent and paste them into Zoho API console:
- Homepage URL – use exactly what you see (e.g., http://yoursite.com).
- Authorized Redirect URL – copy exactly, including everything after ? (e.g., …/wp-admin/?fg_zohocrm_confirm=1).
Tip: Use copy options in the right side of the fields to avoid mismatch or typo issues.
To complete registering FormGent, visit Zoho API Console linked in the setting
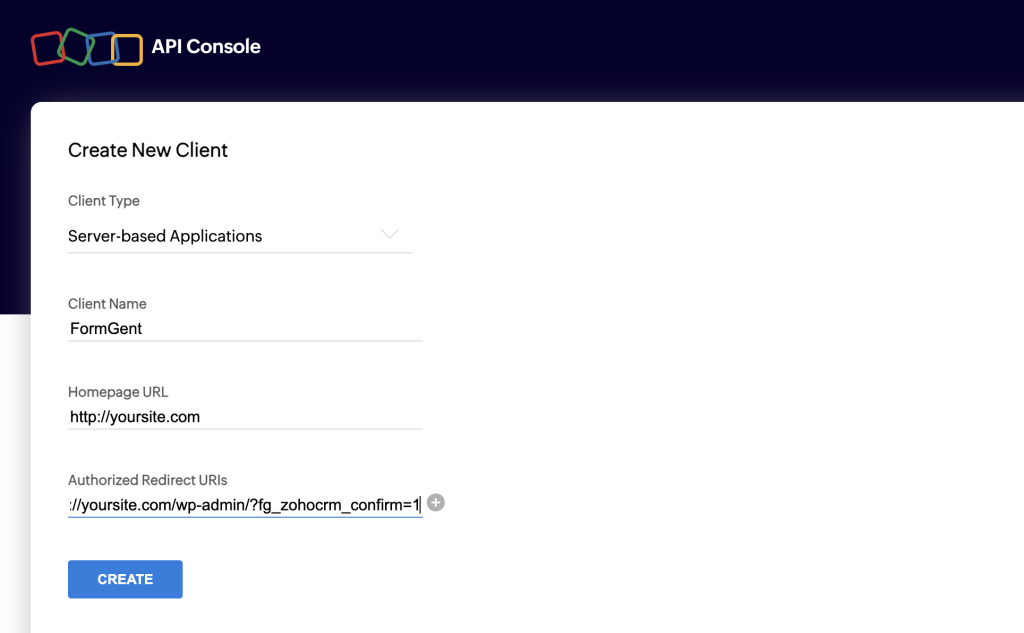
- Create a New Client as per given screenshot.
- Put Client Name, Homepage URL and authorized redirect URL copied from.
- Click create to finish registration. Zoho will show your Client ID and Client Secret.
Step 3: Connect FormGent to Zoho #
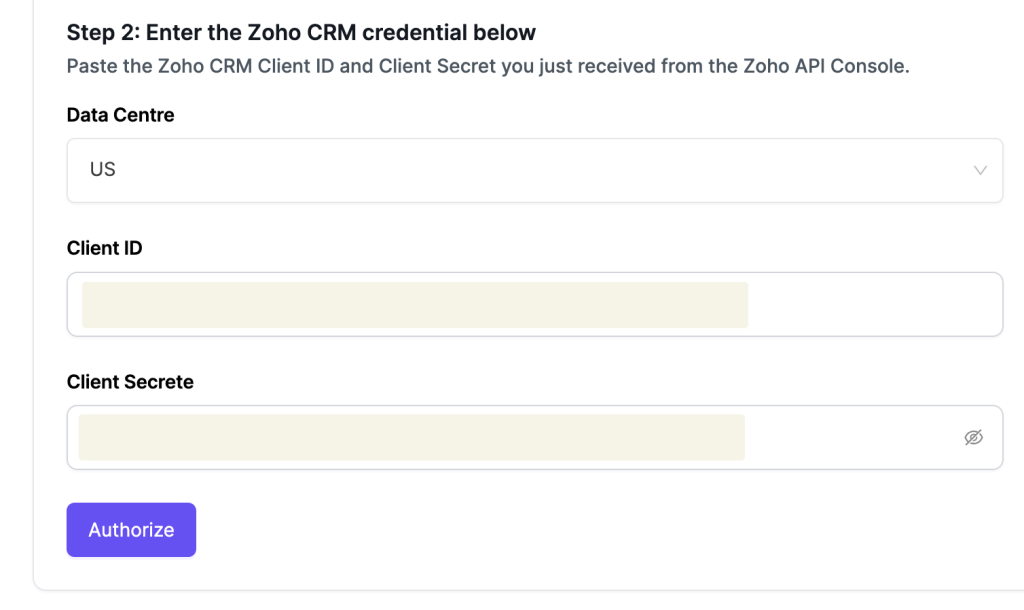
In Step 2, connect FormGent to Zoho. Fill up the fields as below:
- Data Centre: choose the region from the dropdown where your Zoho account lives (e.g., US).
- Client ID: Paste from Zoho.
- Client Secret: Paste from Zoho.
- Click Authorize.
- Log in to Zoho (if asked) and click Accept.
You’ll return to WordPress with the connection stored. FormGent will refresh tokens automatically.
Step 4: Send a form to Zoho (mapping) #
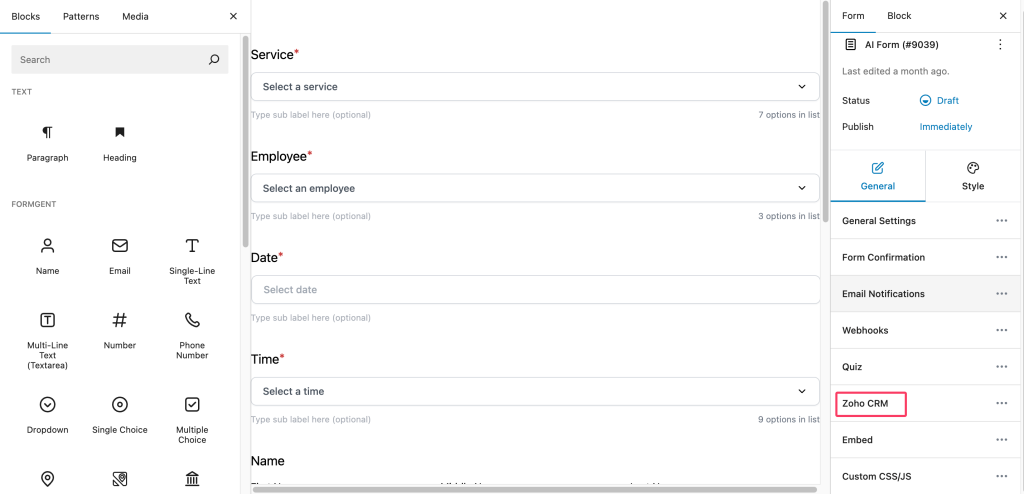
- Open your form in FormGent.
- Go to the form’s Setting area and click Zoho CRM.
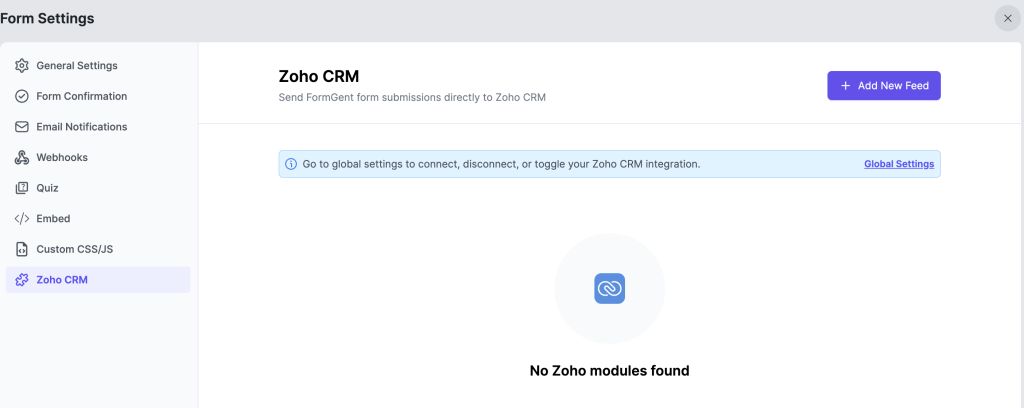
- You will see your existing feeds and option to create a new feed.
- Click on Add New Feed to create your feed.
- Select the Module from dropdown ex: Lead, contact etc.
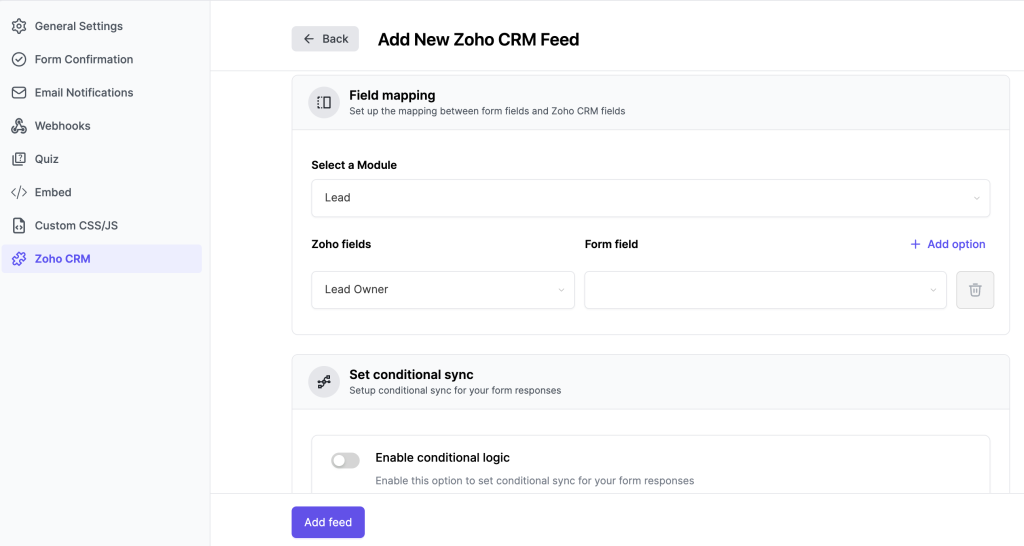
- Map each form field to the matching Zoho field (e.g., Name → Last Name, Email → Email, Phone → Phone, plus any custom fields).
- Set conditional sync if any; toggle Enable conditional logic button to see options.
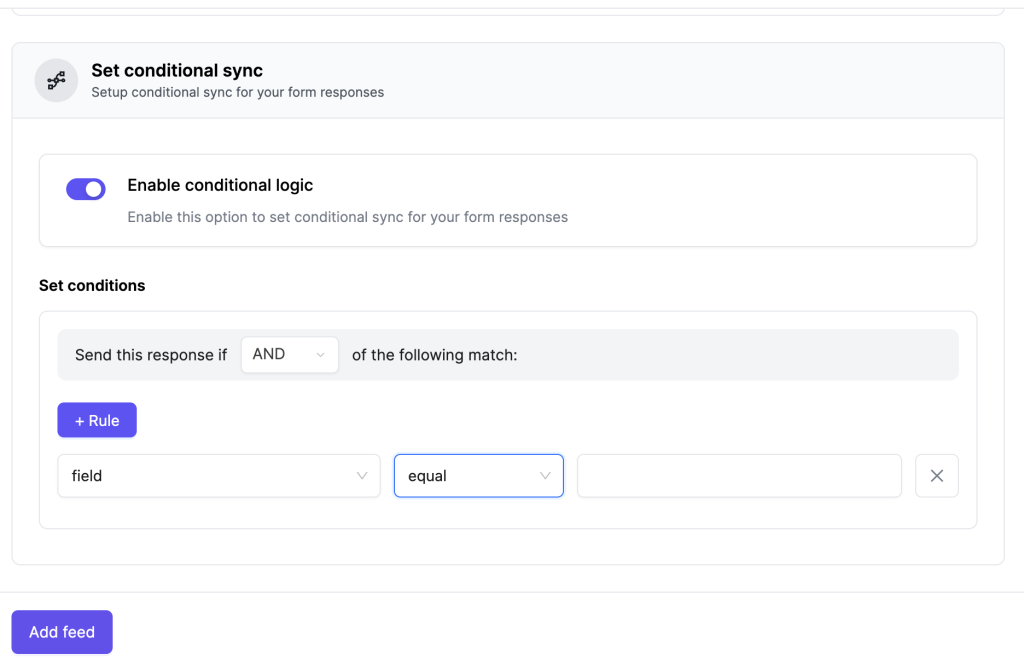
- Set your conditional rules accordingly.
- Click Add feed to finish adding your feed.
Step 5: Test your integration with dummy responses #
Once your feed is created, you will find active feeds on the page.
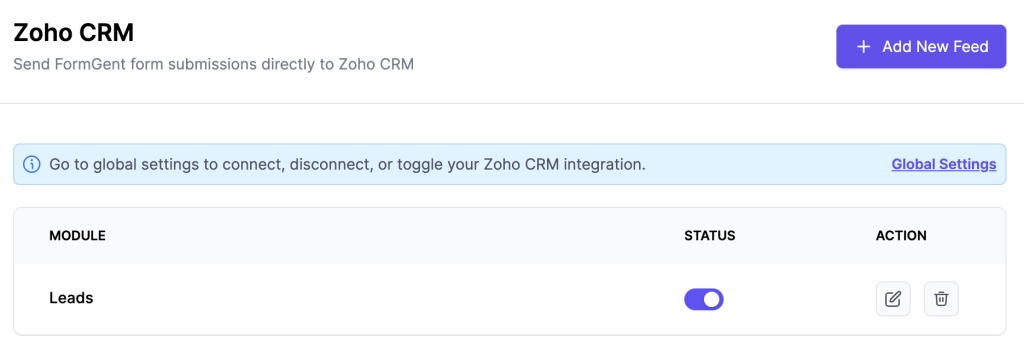
- To test your integration and to check if the mapping is active, send test responses on your form.
- Access your CRM to see if the responses are collected or not.
- If working fine, remove test responses from both FormGent and Zoho databases.
- If not, see configuration of the feed, mapping and conditional logic.
Step 6: Manage or disconnect #
- Enable/Disable: To enable or disable, use the toggle button on integrations beside Zoho CRM.

- To rotate keys: generate a new Client Secret in Zoho, update the FormGent panel, and re-authorize.
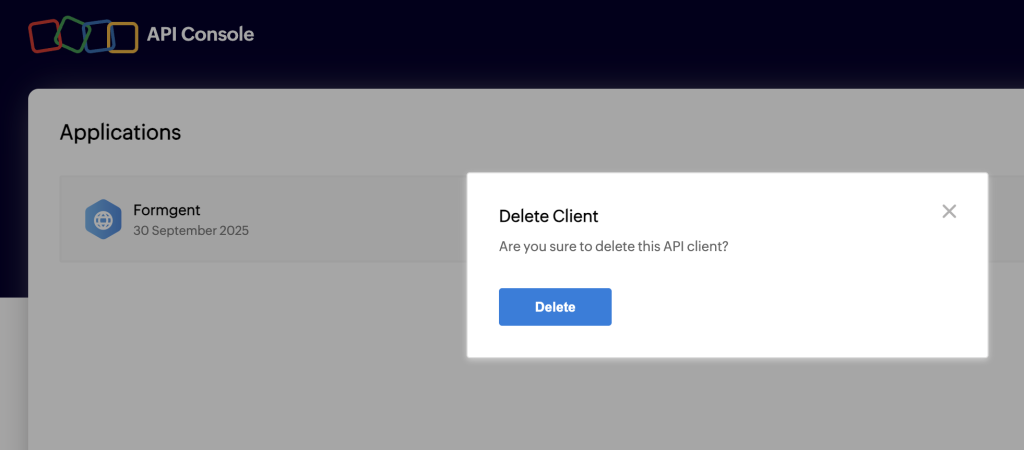
- To disconnect: clear the credentials in FormGent and save. You can delete/revoke the OAuth client from Zoho if needed.
Use cases #
- Contact/Lead forms: Create Leads/Contacts in Zoho with tags and notes.
- Quote/Inquiry forms: Create a Lead and notify the sales team instantly.
- Support/Request forms: Create a Contact and attach a note with the message for quick follow-up.
- Job applications: Store applicants as Leads/Contacts and segment by source.


