
FormGent offers intuitive settings to get you started effortlessly. Follow this guide to navigate and configure the key settings and customize your forms for optimal performance.
Step 1: Accessing FormGent Settings #
- Log in to your WordPress Admin Dashboard.
- Navigate to FormGent → Settings in the admin menu.
- You’ll see four main tabs: General Settings, Security & Protection, Validation, Integrations, Payment Settings and Activate License.
Step 2: Configuring General Settings #
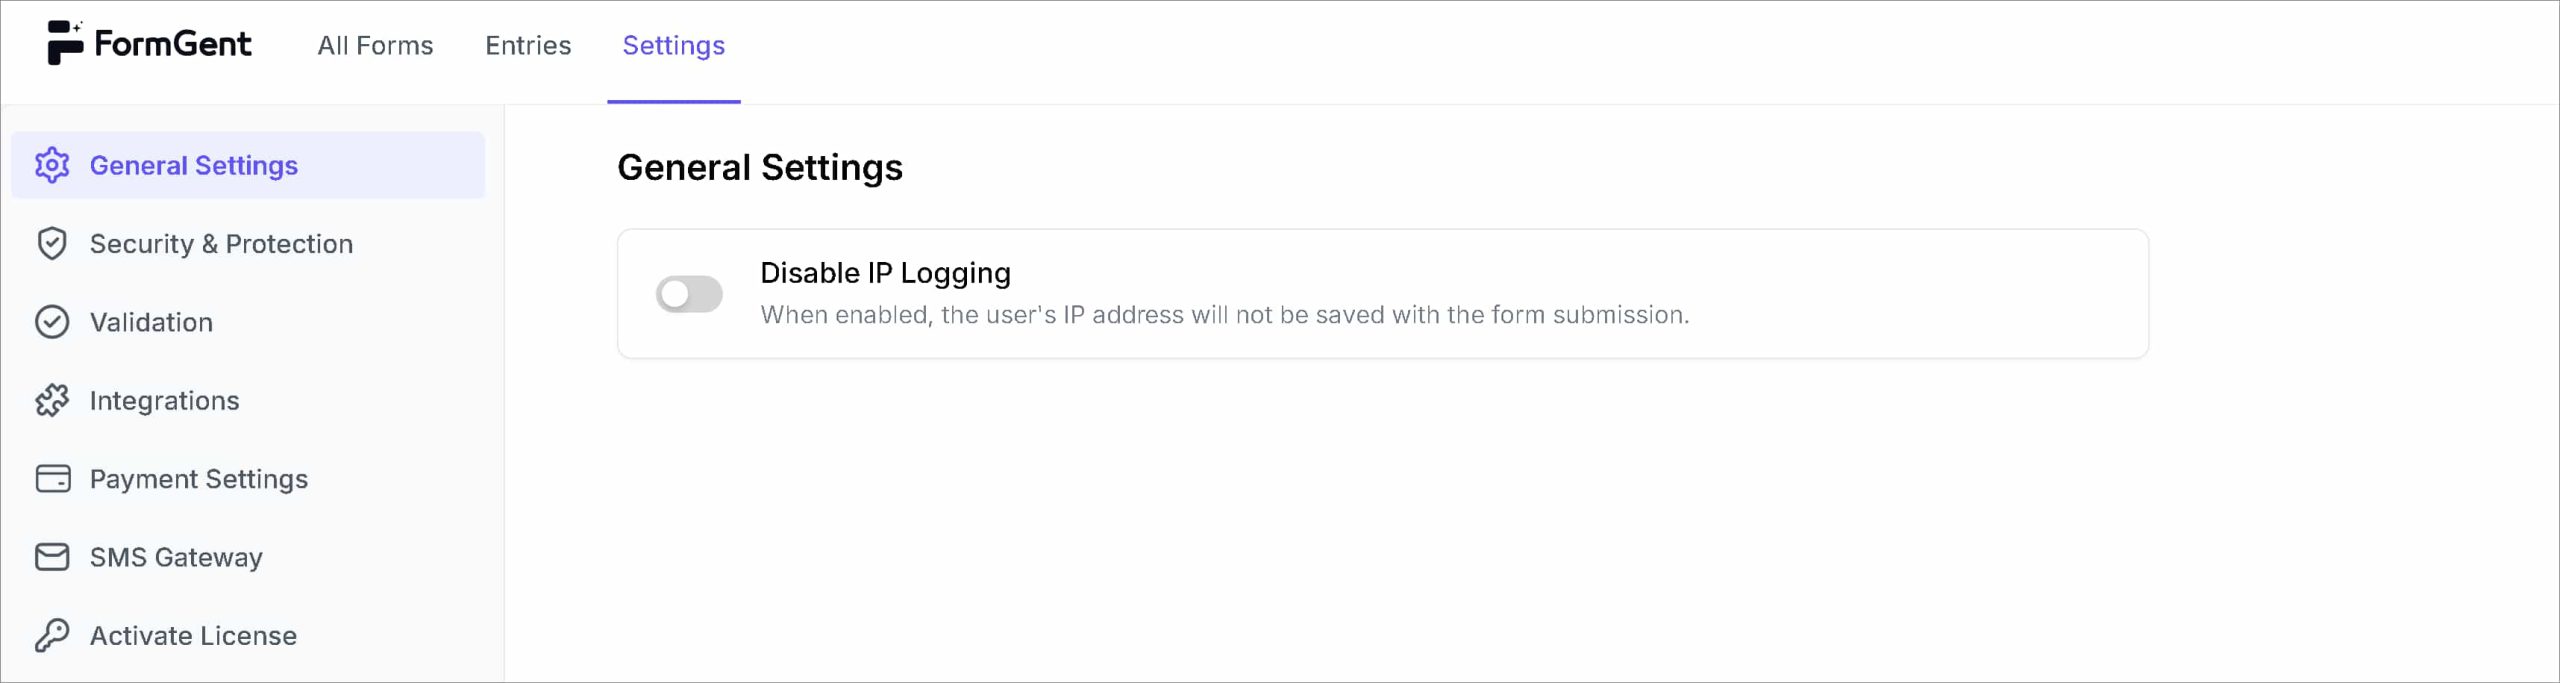
- Click on the General Settings tab.
- Available Options:
- Disable IP Logging: Toggle this setting to prevent saving users’ IP addresses with form submissions.
- Why it’s valuable: Enhances privacy and ensures compliance with GDPR and other privacy regulations.
- After making changes, click Save Changes.
Step 3: Setting Up Security & Protection #
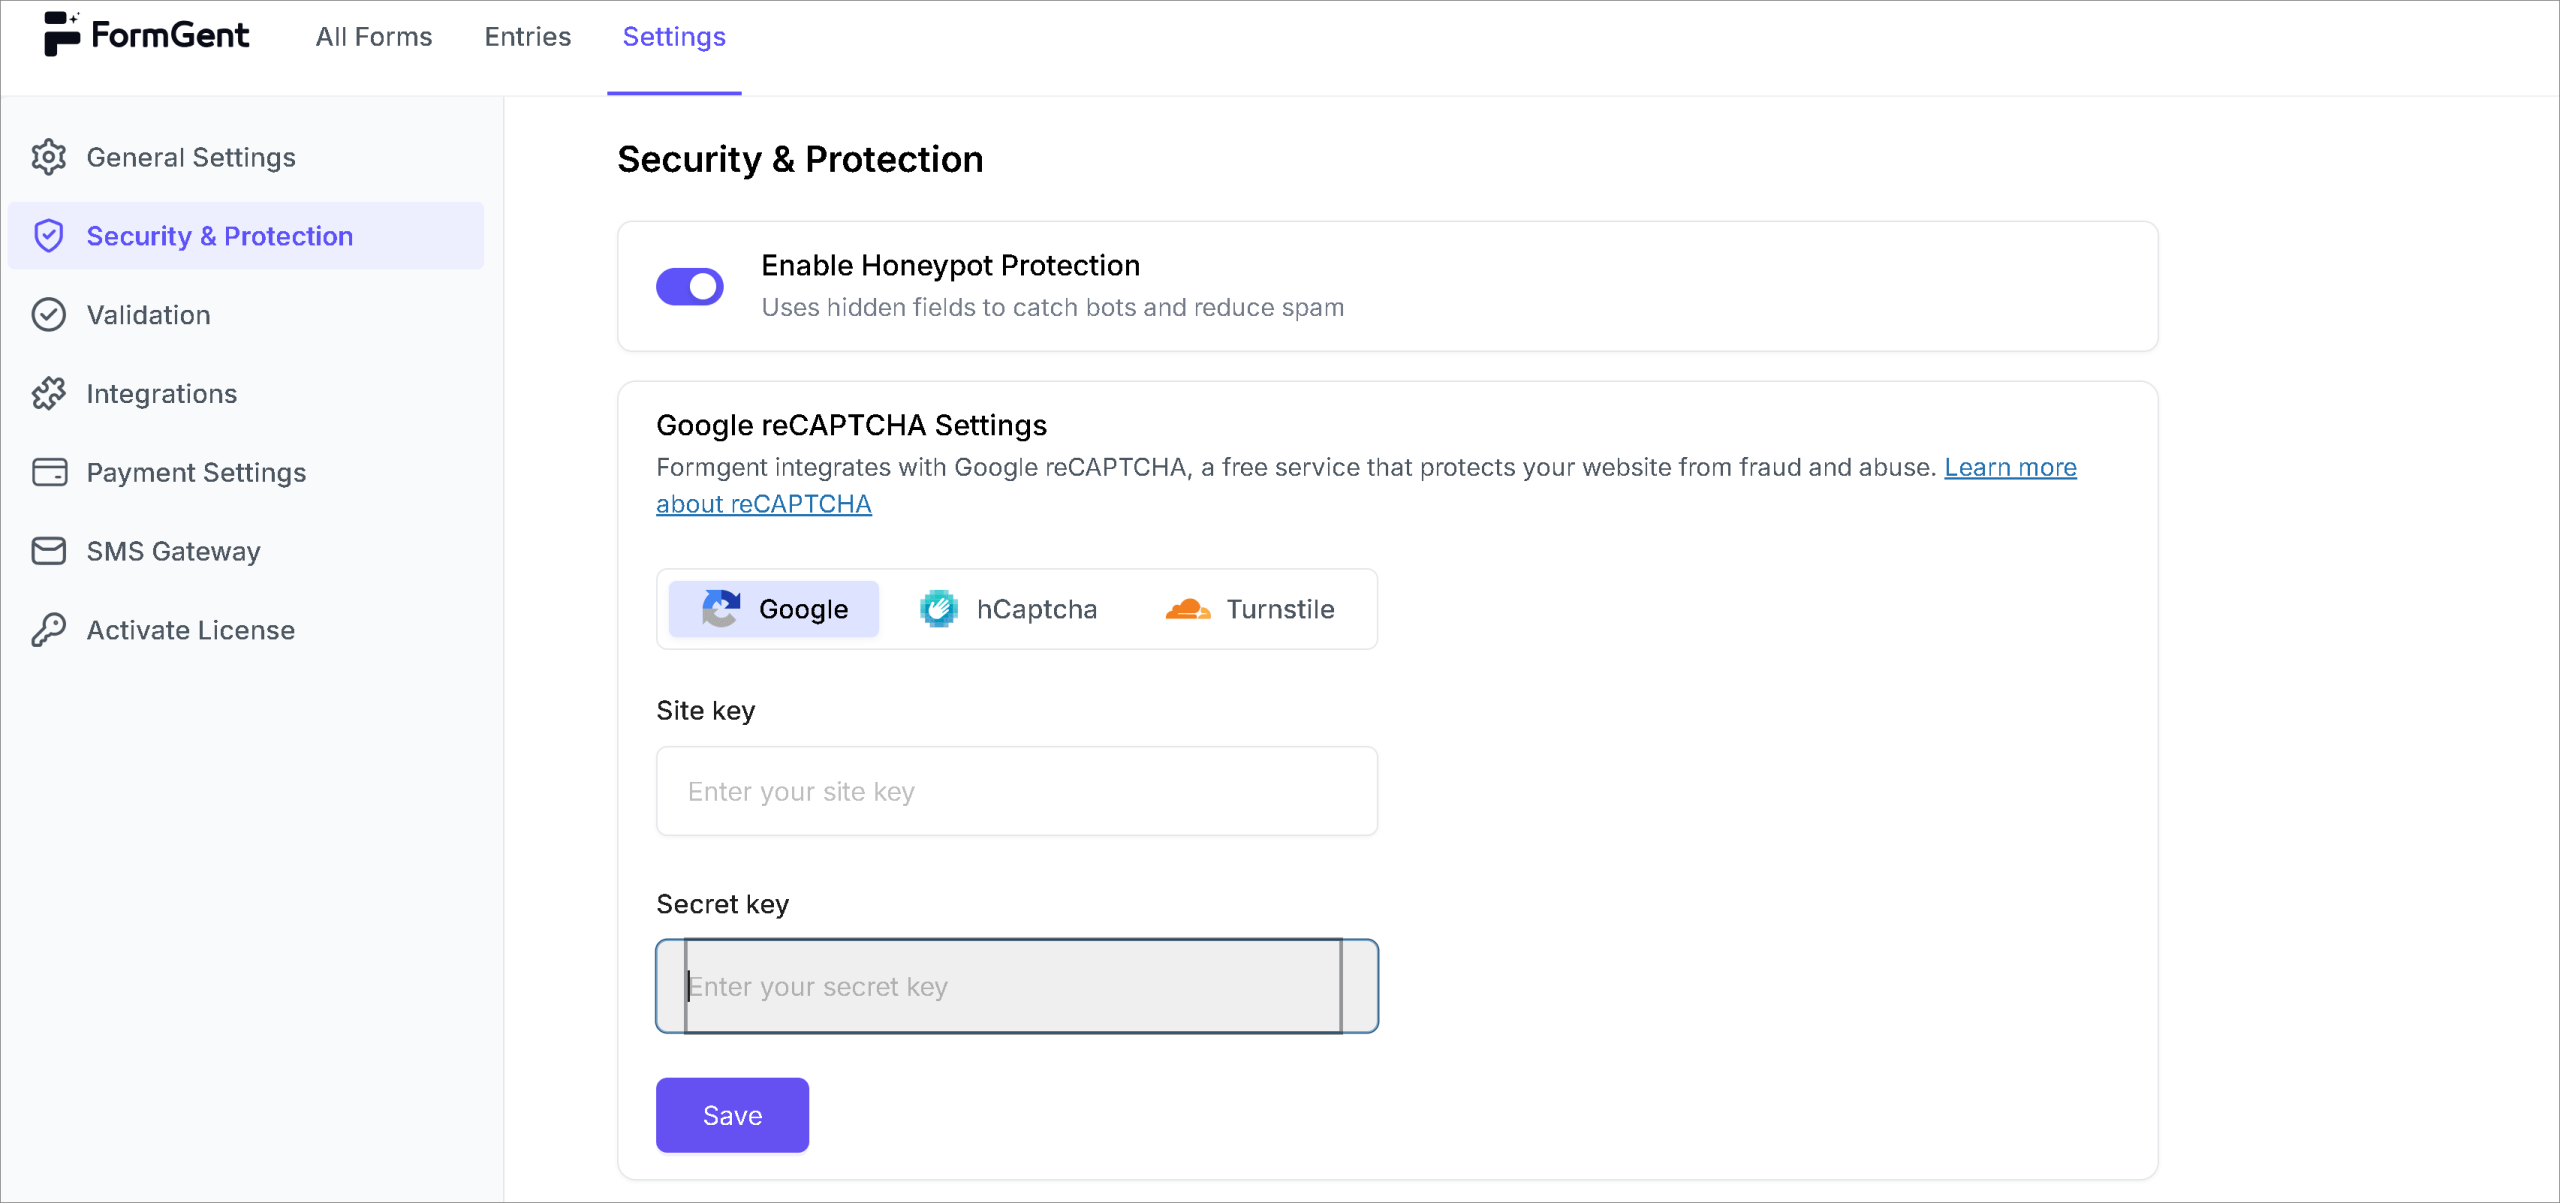
- Select the Security & Protection tab.
- Available Options:
- Enable Honeypot Protection: Toggle this setting to enable hidden fields that trap bots and reduce spam.
- Why it’s valuable: Keeps your submissions clean and secure without interrupting real users.
- Google reCAPTCHA / hCaptcha / Cloudflare Turnstile: Setup your Site Key and Secret Key acquired from respective Captcha document to setup CAPTCHA in your forms.
- Why it’s valuable: Keeps your forms protected from bot attacks and spam submissions.
- Once configured, click Save Changes.
Step 4: Customizing Validation Messages #
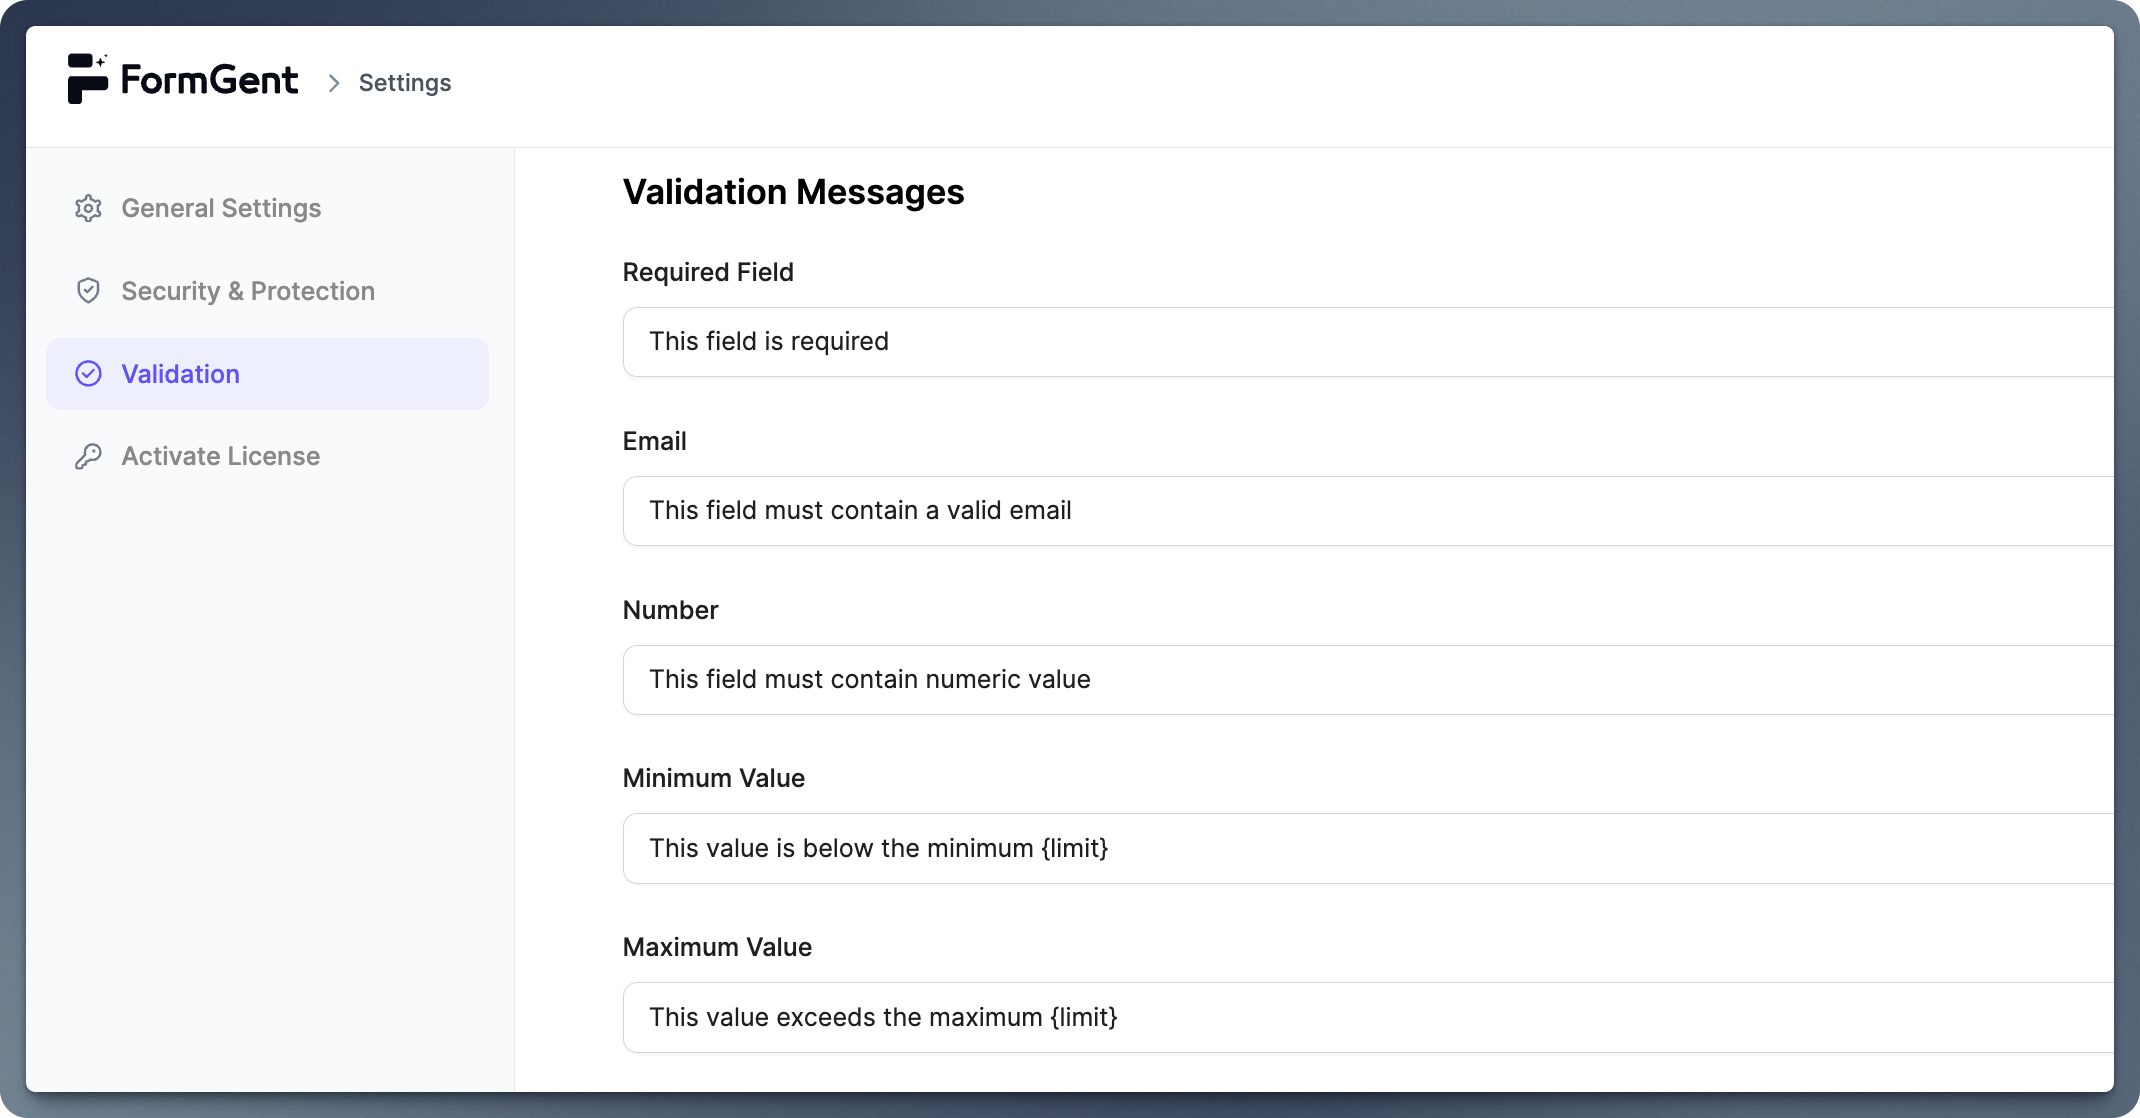
- Click on the Validation tab.
- Available Validation Messages and their Defaults:
- Required Field:
- Default: “This field is required.”
- Ensures users cannot leave important fields empty.
- Email:
- Default: “This field must contain a valid email.”
- Validates that users enter a properly formatted email address.
- Number:
- Default: “This field must contain numeric value.”
- Ensures users provide numeric input where needed.
- Minimum Value:
- Default: “This value is below the minimum {limit}.”
- Applies when a number field’s value is too low.
- Maximum Value:
- Default: “This value exceeds the maximum {limit}.”
- Triggers when a number field exceeds the maximum allowed value.
- Confirm Value:
- Default: “Field values do not match.”
- For fields that require matching values, like password confirmation.
- URL Format Validation:
- Default: “Please enter a valid URL.”
- Validates proper web address formatting.
- Input Mask Error:
- Default: “Please fill out the field in the required format.”
- Ensures inputs adhere to predefined patterns, like phone numbers.
- GDPR Compliance (Checkbox):
- Default: “You must agree to proceed.”
- Prompts users to consent to terms for legal compliance.
- Character Limit:
- Default: “Limit is {limit} characters.”
- Restricts text fields to a specified number of characters.
- Required Field:
- Edit the default messages to match your style or preferences.
- Click Save Changes to apply your updates.
Step 5: Setting Up Your Integrations #
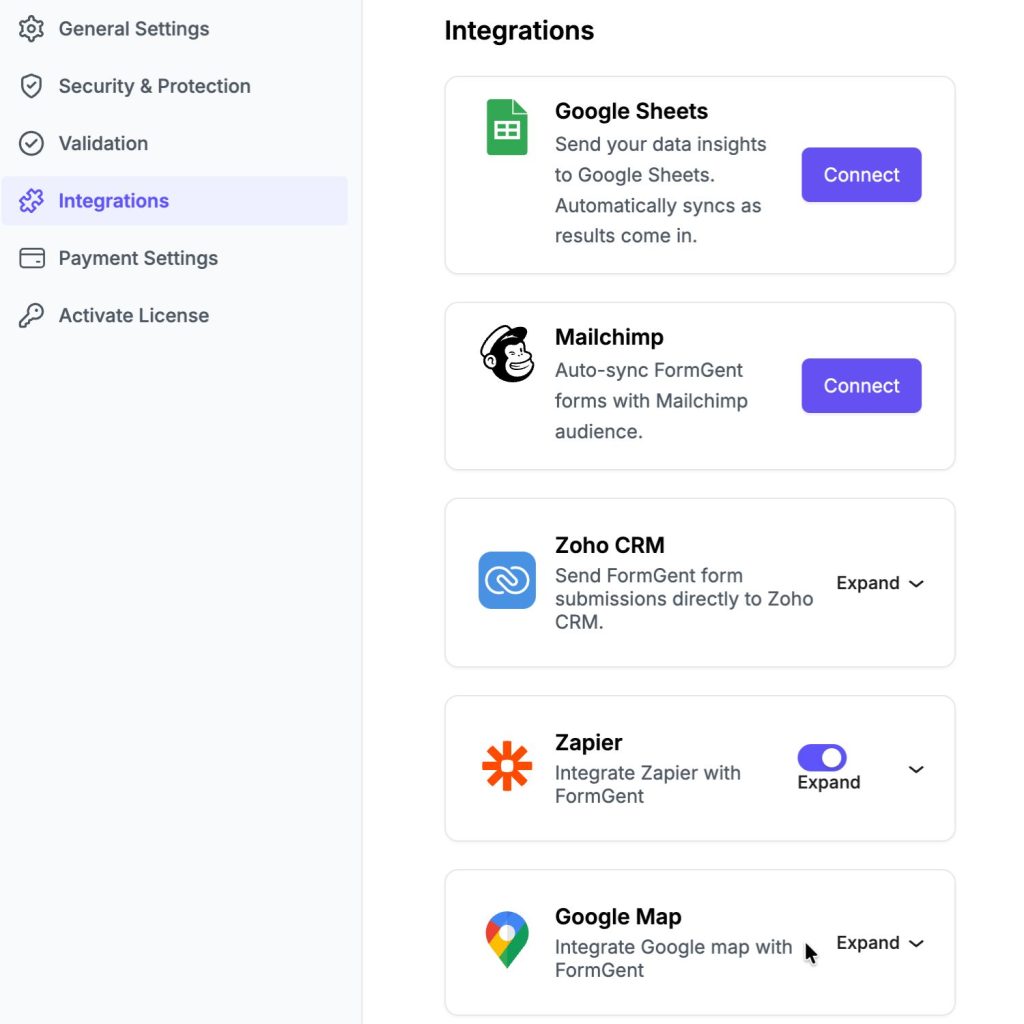
This option contains enabling all available direct integrations with FormGent. You can activate and setup integrations from here.
Available options are:
- Google Sheets
- Mailchimp
- Zoho CRM
- Zapier
- Google Map
For setting up integrations, navigate to FormGent Integrations documentations. You’ll find step by step guide and work flow of each tool here.
Step 6: Configuring Payment Settings #
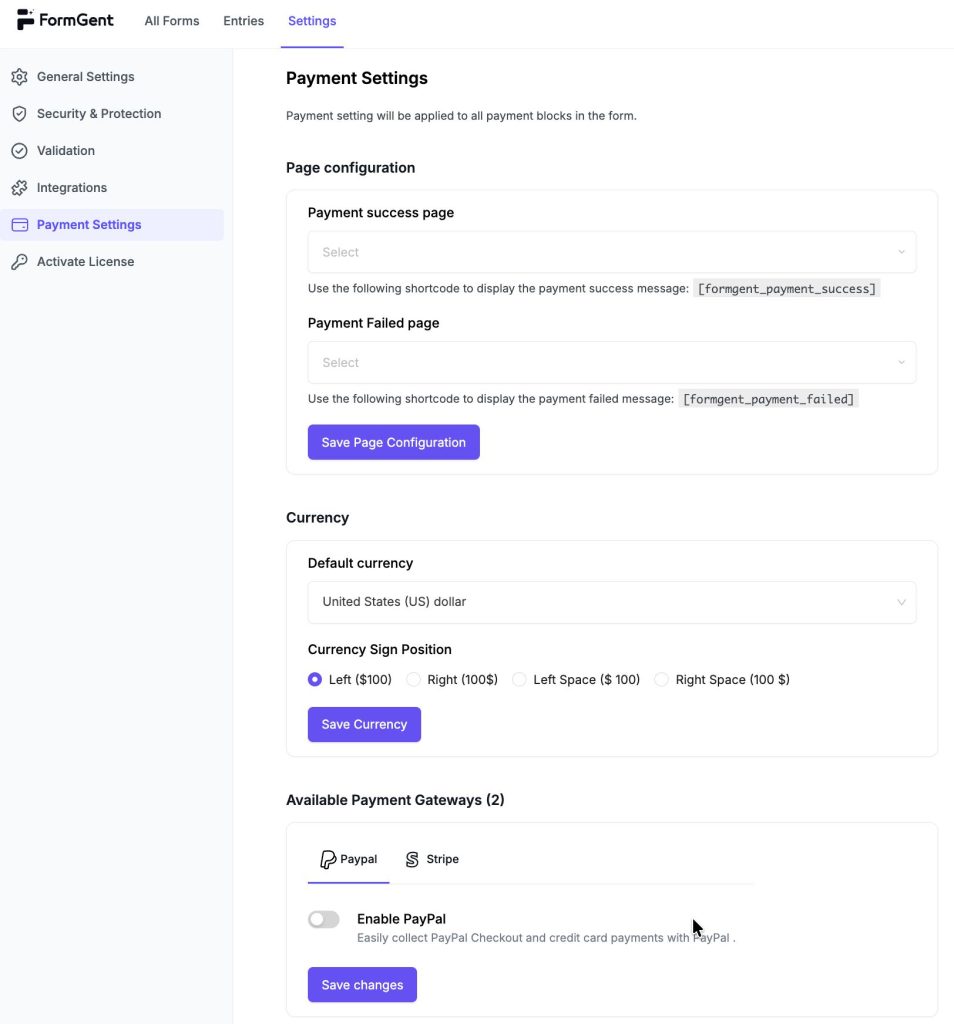
Payment Settings contain configuration option with PayPal and Stripe. You can setup your gateway, adjust payment settings such as currency, post-payment or failed payment navigation from here.
For step by step guide to FormGent Payment Settings, access Payment Integrations documentation.
Step 6: SMS Gateway Settings #
SMS Gateway Settings
If you’re using the OTP Verification feature with the Phone (SMS) option, you’ll need to configure an SMS gateway so FormGent knows how to deliver the one-time password to your users’ phone numbers. This is where that setup happens.
FormGent supports three SMS providers from the dropdown menu. Here’s what each one requires:
Twilio
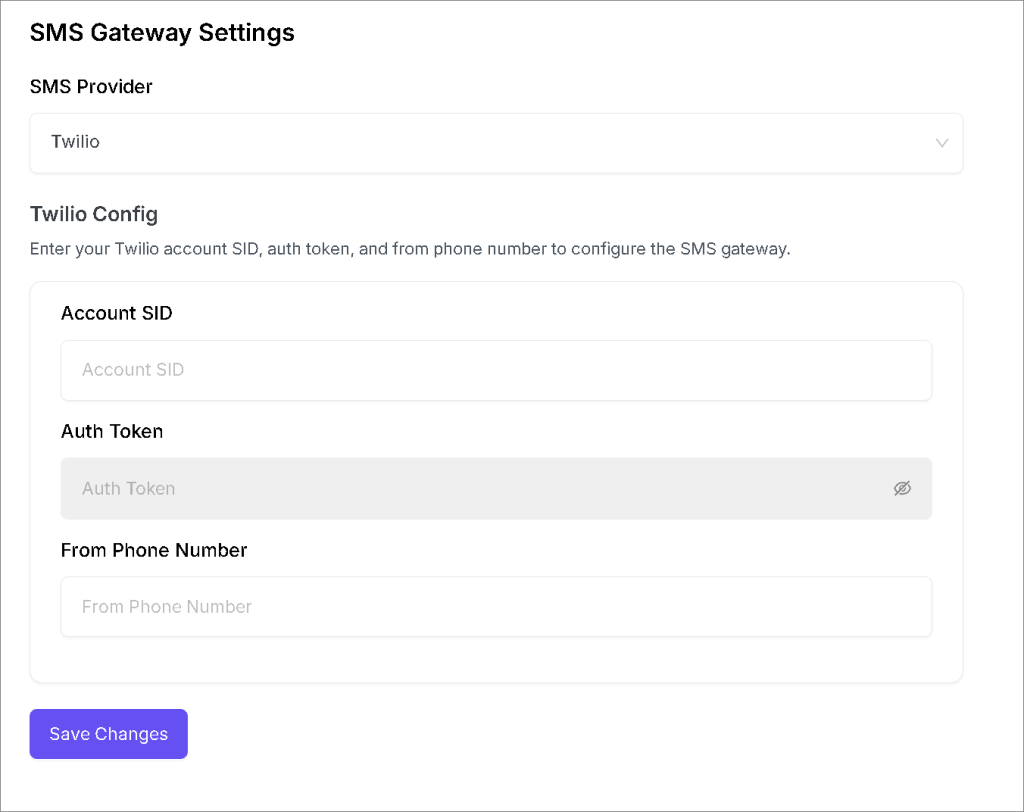
Twilio is the most widely used SMS platform — reliable, well-documented, and easy to connect. Select Twilio from the provider dropdown and fill in three credentials from your Twilio dashboard:
- Account SID — your unique Twilio account identifier
- Auth Token — your private authentication token
- From Phone Number — the Twilio number that appears as the sender when users receive the OTP
All three values are available directly inside your Twilio account dashboard.
Firebase (Google)
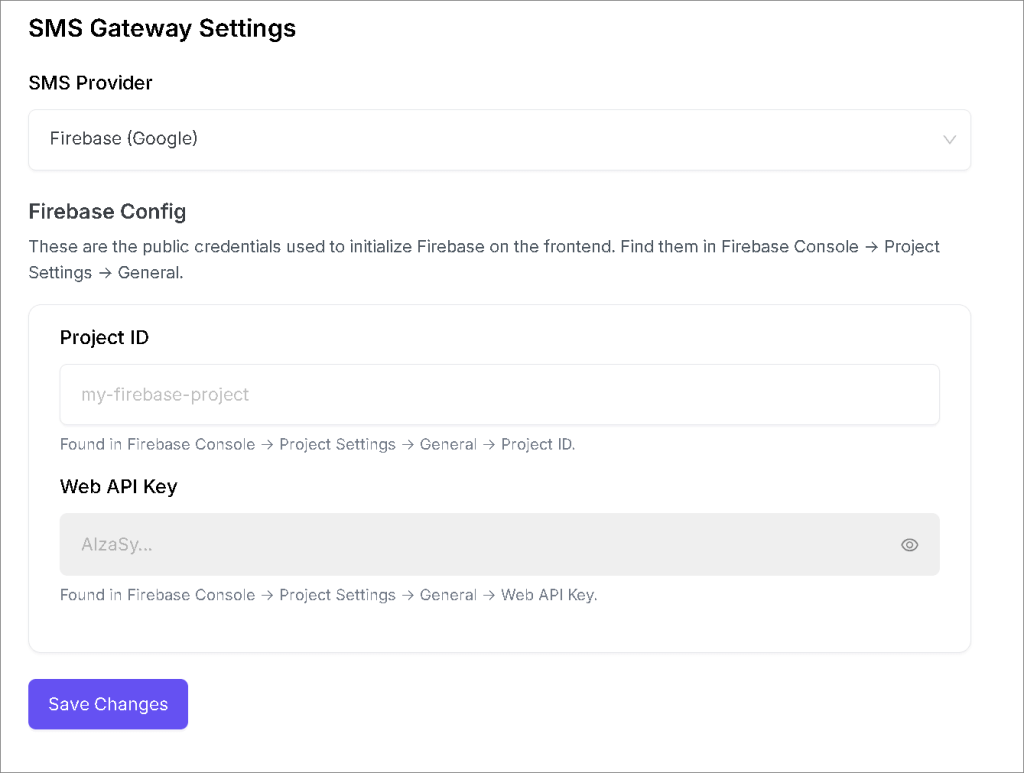
If you’re already working within the Google ecosystem, Firebase is a solid choice. Select Firebase (Google) from the provider dropdown and enter two credentials from your Firebase Console:
- Project ID — found under Firebase Console → Project Settings → General → Project ID
- Web API Key — found under Firebase Console → Project Settings → General → Web API Key
These are public credentials used to initialize Firebase on the frontend. Copy them in exactly as they appear in your Firebase Console and you’re good to go.
Custom Gateway
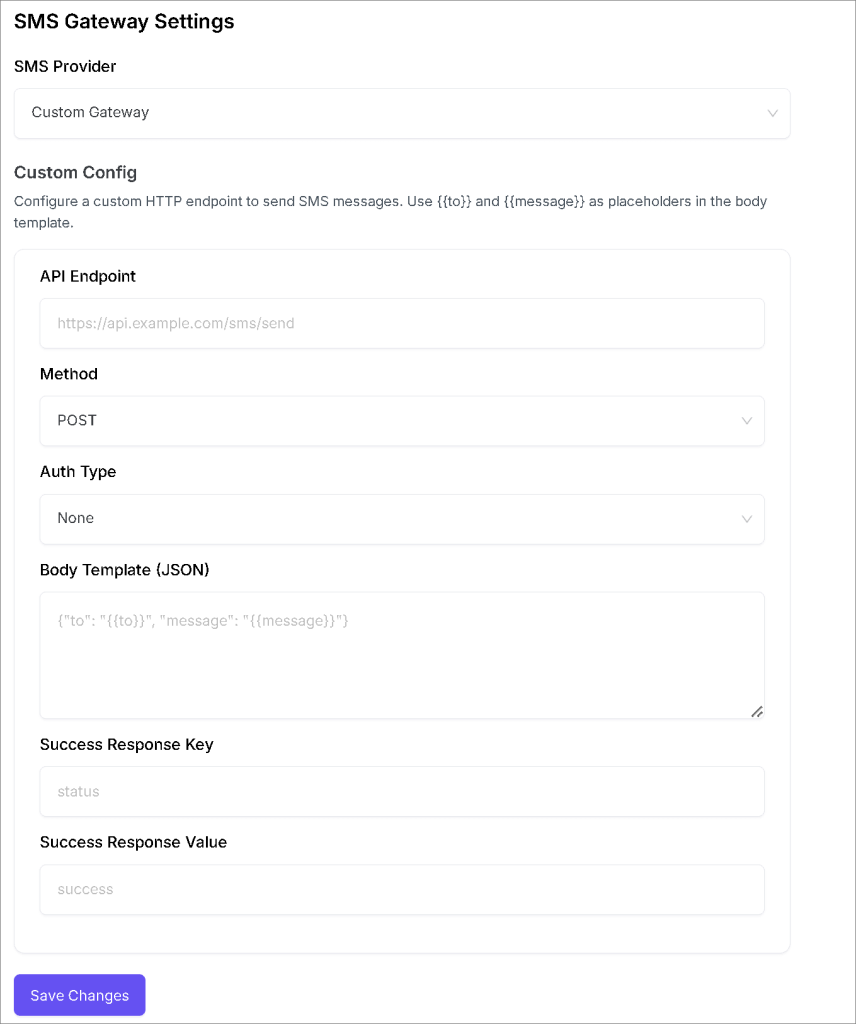
For teams that have their own SMS infrastructure or prefer a third-party provider not listed above, the Custom Gateway option lets you connect any SMS service through a custom HTTP endpoint. It’s a more technical setup, but it gives you full flexibility over how OTP messages get delivered.
Here’s what you’ll configure:
- API Endpoint — the full URL of your SMS service’s sending endpoint (e.g.,
https://api.example.com/sms/send) - Method — the HTTP request method, set to POST by default
- Auth Type — choose the authentication method your gateway requires (e.g., None, Bearer Token, Basic Auth)
- Body Template (JSON) — define the request body structure using
{{to}}and{{message}}as dynamic placeholders. For example:{"to": "{{to}}", "message": "{{message}}"} - Success Response Key — the key in your gateway’s response that confirms delivery (e.g.,
status) - Success Response Value — the expected value that confirms the SMS was sent successfully (e.g.,
success)
Once FormGent sends the OTP request, it checks the response against your defined key-value pair to confirm delivery. If it matches, the verification process moves forward.
Hit Save Changes after configuring your preferred provider. This is a one-time setup — once it’s saved, every SMS OTP triggered by your WordPress form goes out automatically through the gateway you’ve connected.
Step 7: Activating Your FormGent License #
If you’ve upgraded to FormGent Pro, activating your license unlocks pro features, premium support and automatic updates. Here’s how to activate your license:
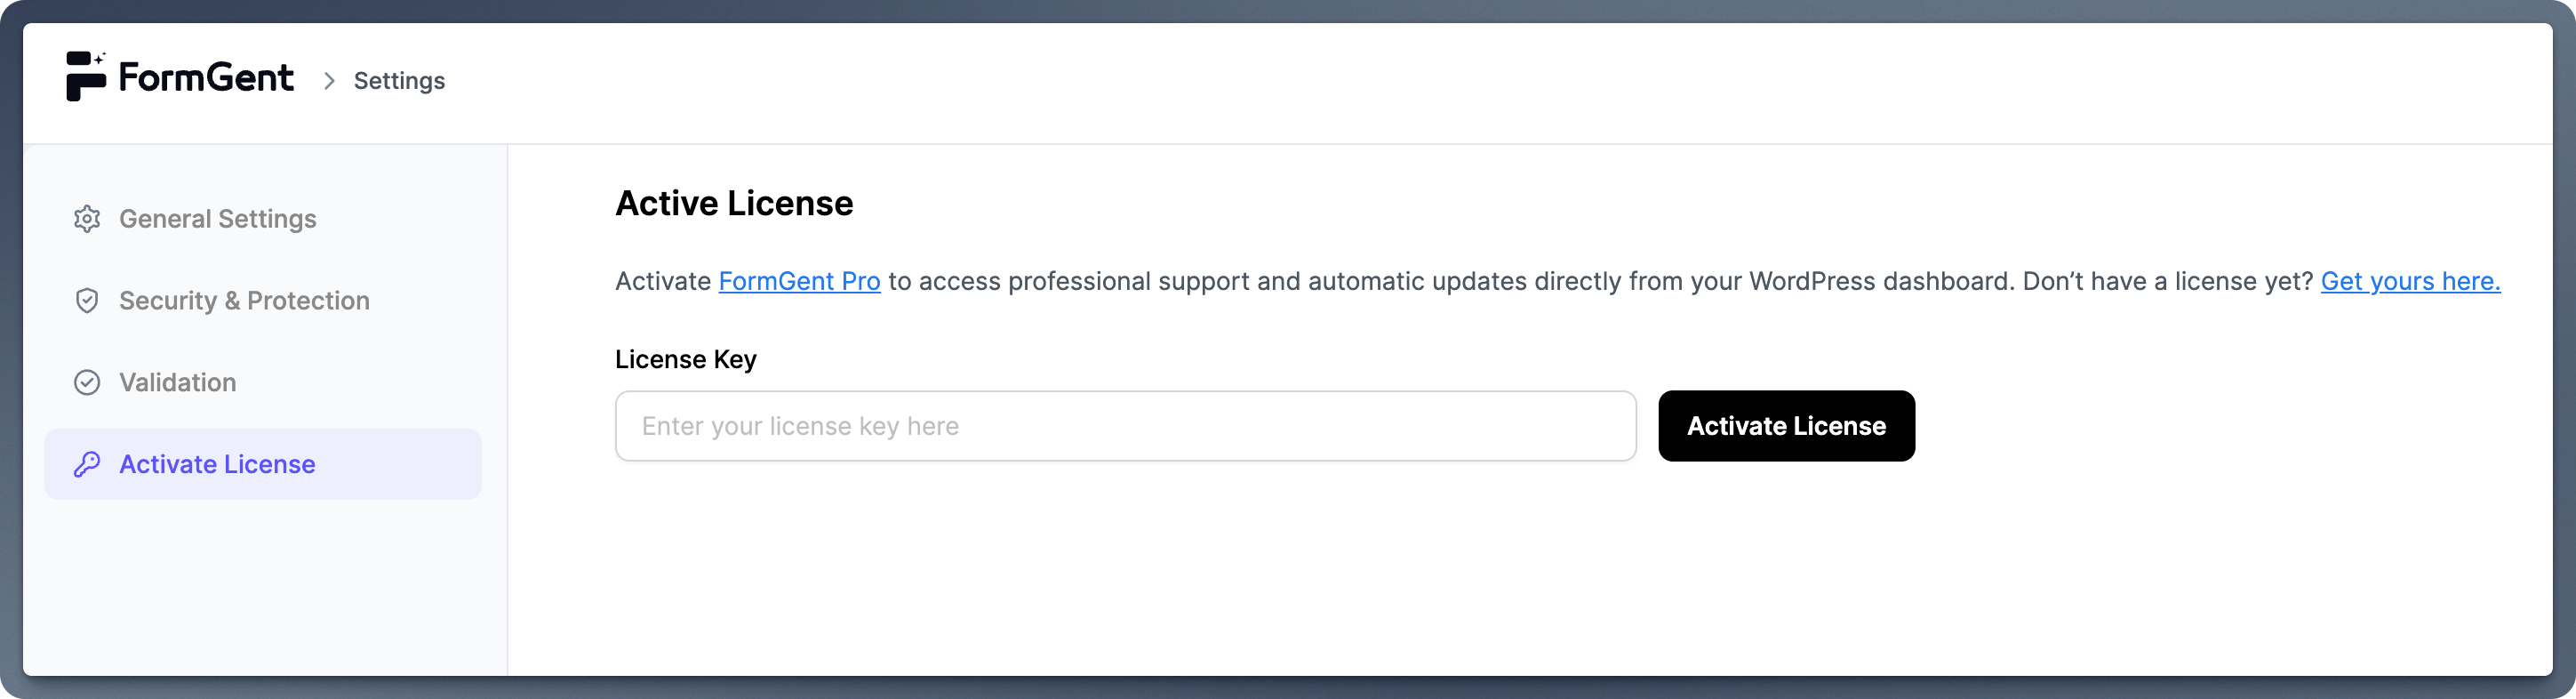
How to Activate Your License #
- Navigate to FormGent → Settings in your WordPress dashboard.
- Click on the Activate License tab in the left-hand menu.
- Enter your License Key into the provided field.
- Don’t have a license? Click on Get yours here to purchase one.
- Click the Activate License button.
You can also check this step by step guide to activating FormGent Pro documentation.
What’s Next? #
Now that you’ve configured the settings:
- Create Your First Form to start collecting responses.
- Explore Advanced Features like AI-driven suggestions and conditional logic.


