
FormGent’s Conditional Confirmation feature allows you to show personalized confirmation messages or trigger different post-submission actions based on what a user submitted – automatically, without any manual review.
Every form has a default Form Confirmation that every respondent sees. Conditional Confirmation sits on top of that. You define rules, and when a submission matches those rules, the conditional confirmation fires instead of the default. If no condition matches, the default confirmation fires as a fallback.
This is a Pro Feature and require a FormGent Pro subscription to avail this feature.
Use Cases #
- Quiz forms with score-based feedback – Show a congratulations message to respondents who scored 100%, a motivational message to those who scored above 50%, and a try-again message to those who didn’t pass – each with the actual score displayed dynamically.
- Lead generation forms – Route pre-sales enquiries to a booking or demo page while showing a standard thank-you message to general enquiries, without creating separate forms.
- Event registration forms – Display different next-step instructions depending on which session, tier, or workshop a registrant selected.
- Application or intake forms – Acknowledge different applicant types with tailored messaging based on their answers, rather than a generic confirmation that fits no one perfectly.
How to Access Conditional Confirmation #
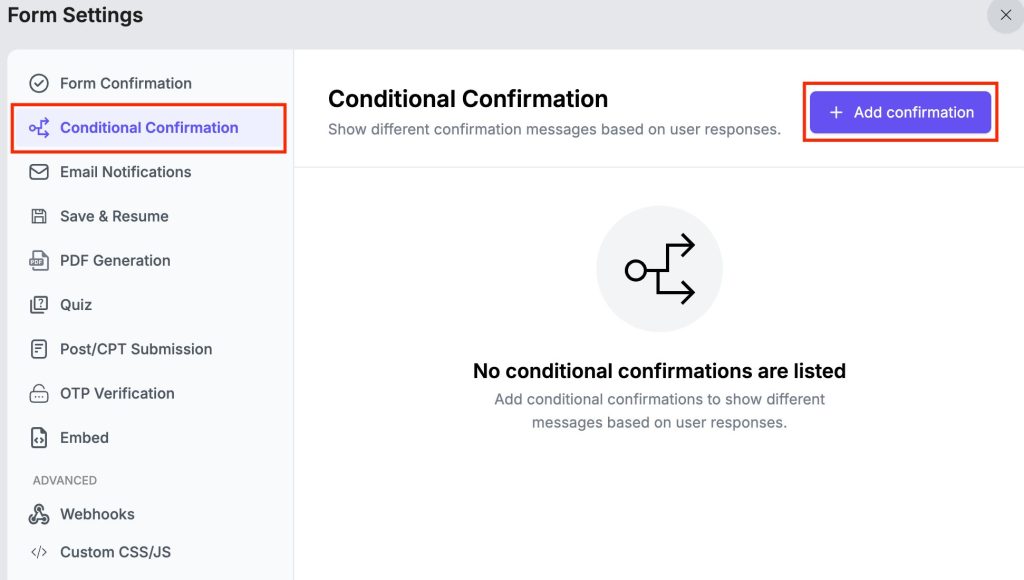
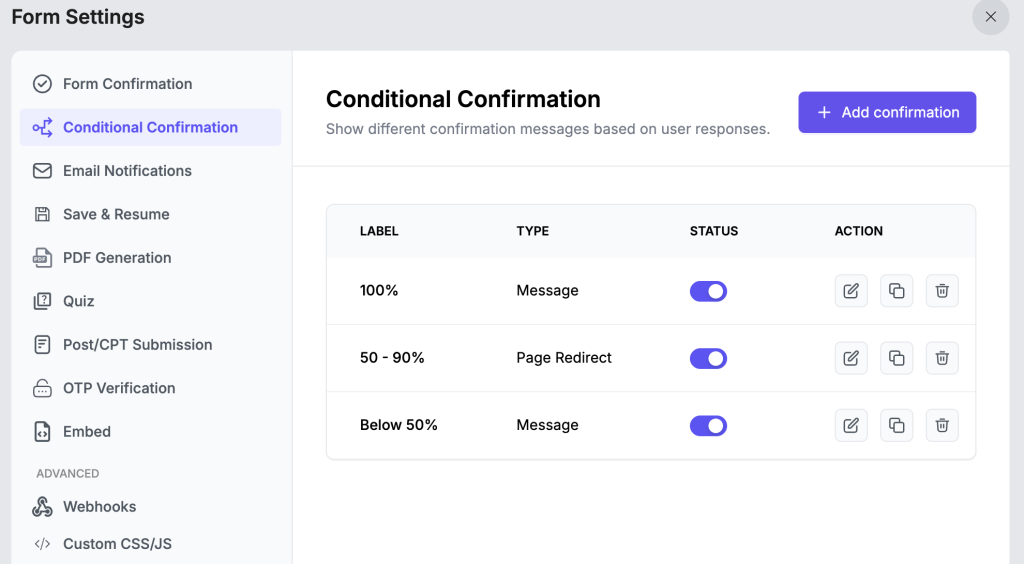
Go to Form Settings → Conditional Confirmation for the form you want to configure. The dashboard shows a table of all existing conditional confirmations for that form with columns for Label, Type, Status, and Action.
Click + Add confirmation to create a new one.
Adding a Conditional Confirmation #
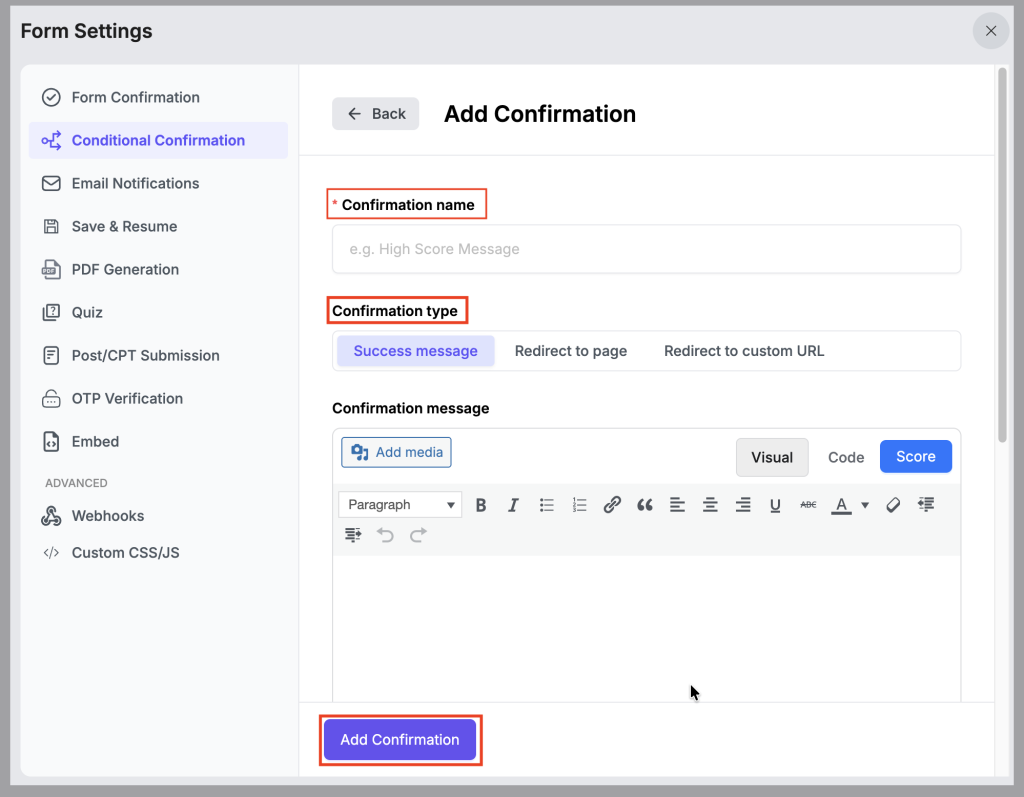
Confirmation Name #
Enter a name to identify this rule in the dashboard list (e.g., 100%, High Score Message, Pre-Sales Redirect). This is internal only and not shown to users.
Confirmation Type #
Choose what happens when this confirmation fires – the same three options as Form Confirmation:
- Success message – Display a custom message to the user on the page.
- Redirect to page – Send the user to a selected WordPress page.
- Redirect to custom URL – Send the user to any URL.
Confirmation Message #
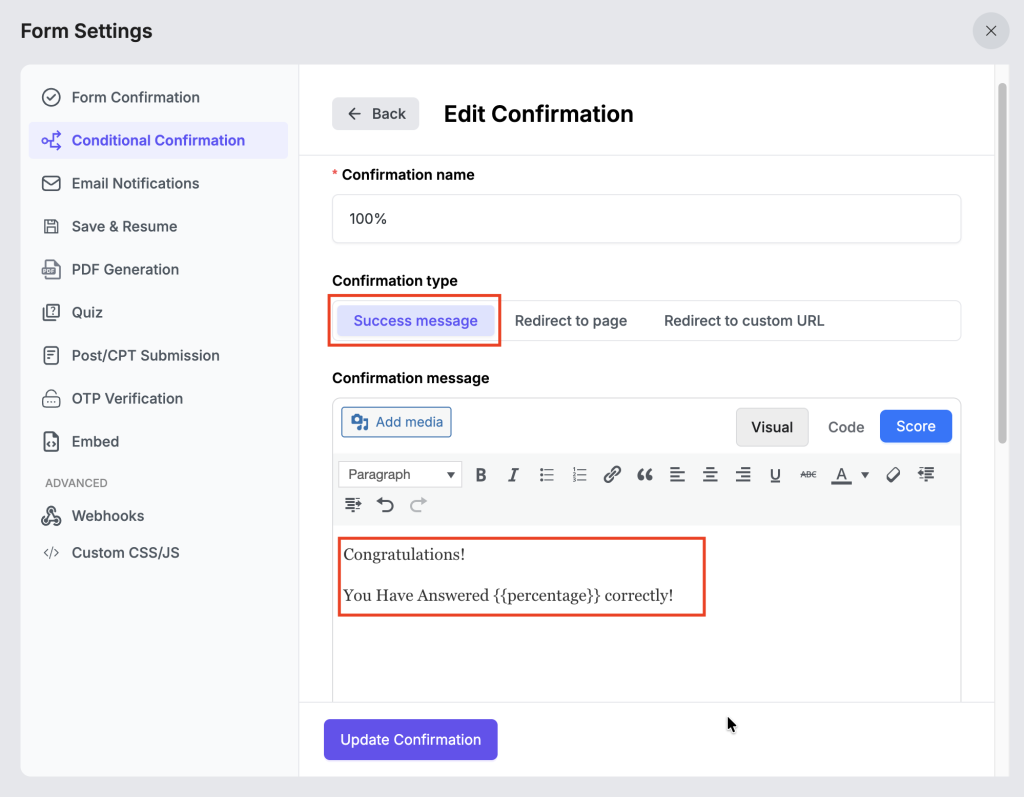
If Success message is selected, compose the message in the visual editor. You can format text, add media, or switch to Code view for HTML.
Click the Score button to insert quiz-related dynamic tags into the message. Available score tags include:
{{total_points}}– The user’s total points scored.{{percentage}}– The user’s score as a percentage.
These tags make each confirmation message unique to the respondent. For example: “Congratulations! Your Score is: {{total_points}}“ or “You Have Answered {{percentage}} correctly!”
After Form Submission #
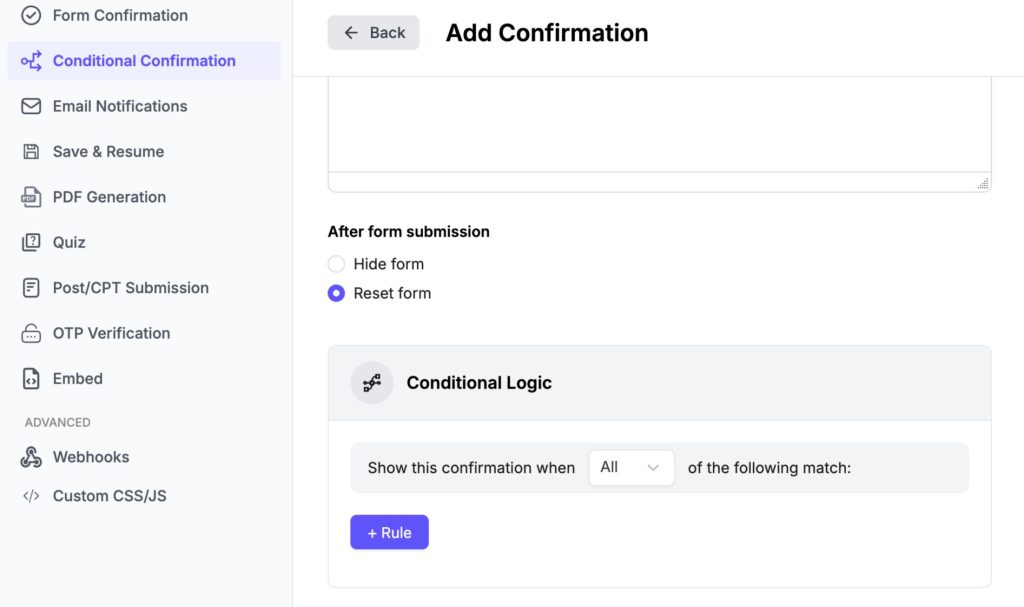
Choose what happens to the form after this conditional confirmation fires:
- Hide form – The form disappears after submission.
- Reset form – The form clears and stays visible, ready for another entry.
Setting the Conditional Logic #
The Conditional Logic panel at the bottom of the Add/Edit Confirmation screen defines when this confirmation fires.
Show this confirmation when – Set whether All rules must match or Any single rule is enough to trigger this confirmation.
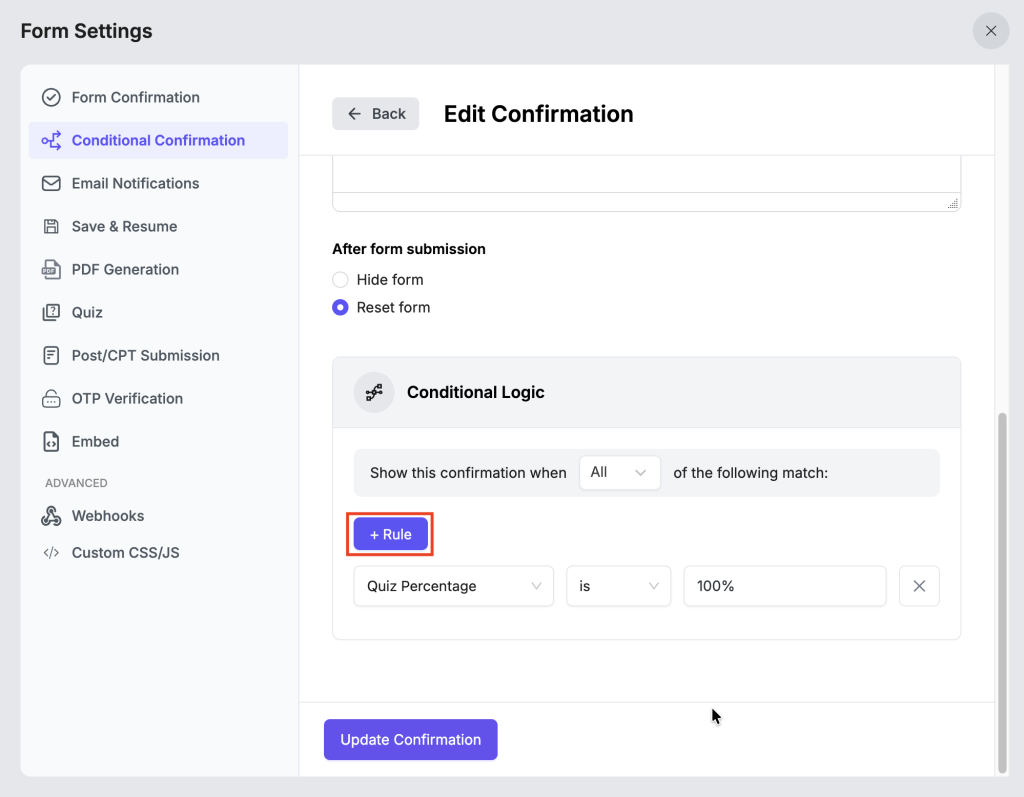
Click + Rule to add one or more conditions. Each rule has three parts:
Attribute – What to evaluate. The following attributes are available:
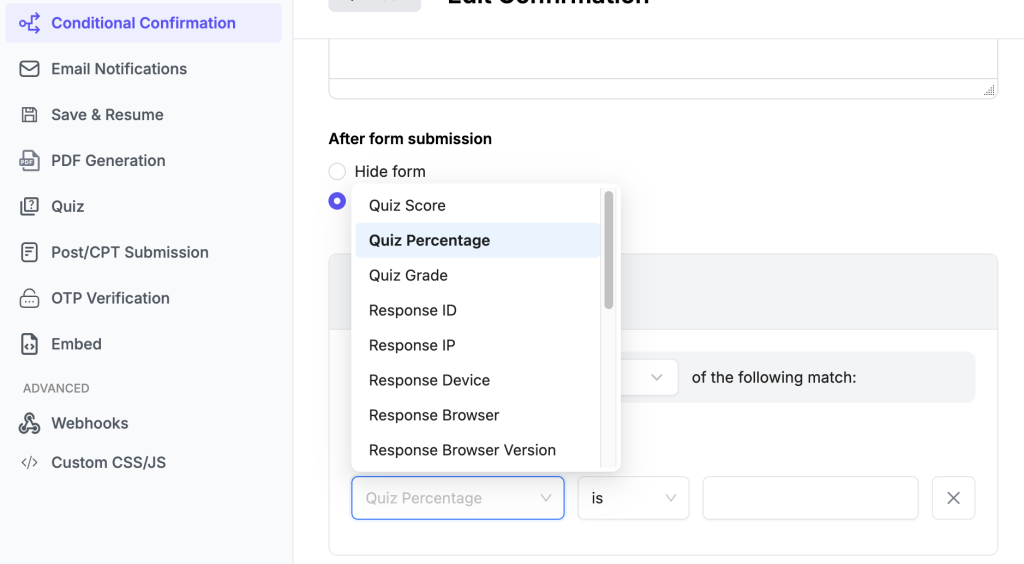
- Quiz Score – The raw points score from a quiz submission.
- Quiz Percentage – The score expressed as a percentage.
- Quiz Grade – The grade assigned based on the quiz grading system.
- Response ID – The unique ID of the submission.
- Response IP – The IP address of the submitter.
- Response Device – The device type used to submit (e.g., mobile, desktop).
- Response Browser – The browser used to submit.
- Response Browser Version – The specific version of the browser.
- Form fields – Any field from the form itself (e.g., a dropdown answer, a text input, a choice selection).
- Note: Conditional logic rules work with most form fields, but the following field types are not available as condition attributes due to incompatibility or lack of applicable use cases: HTML, Google Map, Repeater, Captcha, and Payment. If your form contains these fields, they will not appear in the attribute dropdown when building a rule.
Operator – How to compare the attribute (e.g., is, is not, contains, greater than, less than, REGEX).
Value – The specific value to match against (e.g., 100%, pre-sales, mobile).
Click the × on the right of any rule to remove it. Add as many rules as needed to build precise conditions.
Managing Confirmations #
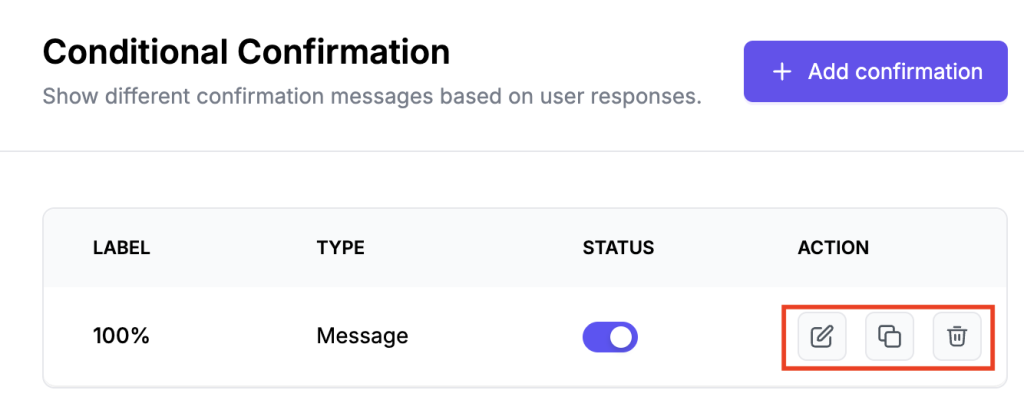
The Conditional Confirmation dashboard table gives you full control over all your rules:
- Label – The confirmation name you assigned.
- Type – Whether it fires a message, page redirect, or URL redirect.
- Status – Toggle to enable or disable a rule without deleting it.
- Action – Three icons per row:
- Edit (pencil) – Modify the confirmation.
- Duplicate (copy) – Clone the rule as a starting point for a similar one.
- Delete (bin) – Permanently remove the confirmation.
FormGent evaluates all active conditional confirmations in order and fires the first one whose conditions are met. If none match, the default Form Confirmation is shown.


