
Connect FormGent to an SMS provider so every form submission can trigger an automated text message such as confirmations, alerts, OTPs, or notifications sent directly to your users or your team.
FormGent supports three SMS providers: Firebase (Google), Twilio, and a Custom Gateway for any third-party SMS service with an HTTP endpoint.
How to Configure SMS Gateway #
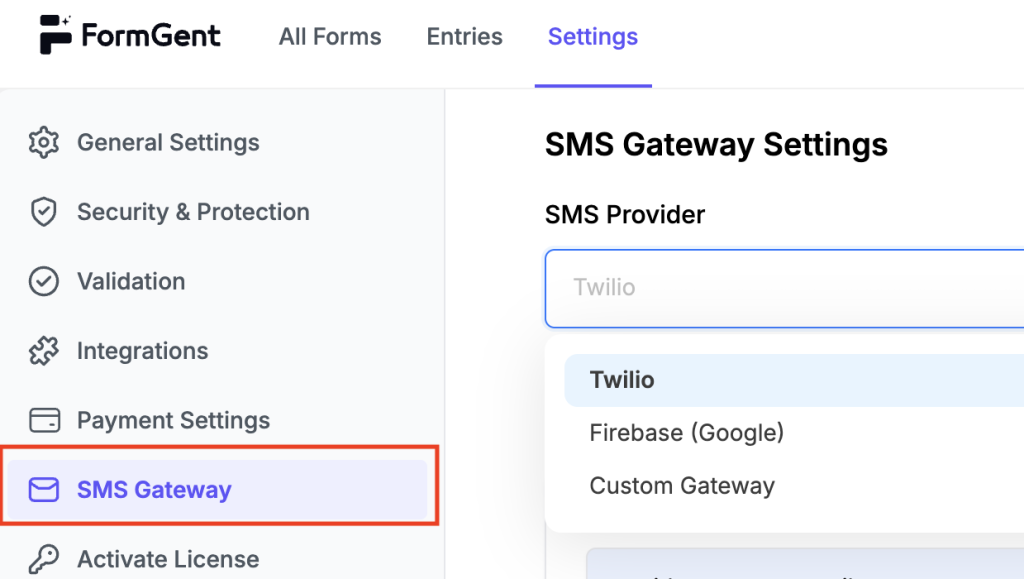
Navigate to FormGent → Settings → SMS Gateway from your WordPress dashboard. You will land on the SMS Gateway Settings page.
Step 1: Select Your SMS Provider #
Use the SMS Provider dropdown to choose one of the three available options:
- Twilio
- Firebase (Google)
- Custom Gateway
The configuration fields below will update automatically based on the provider you select.
Twilio Configuration #
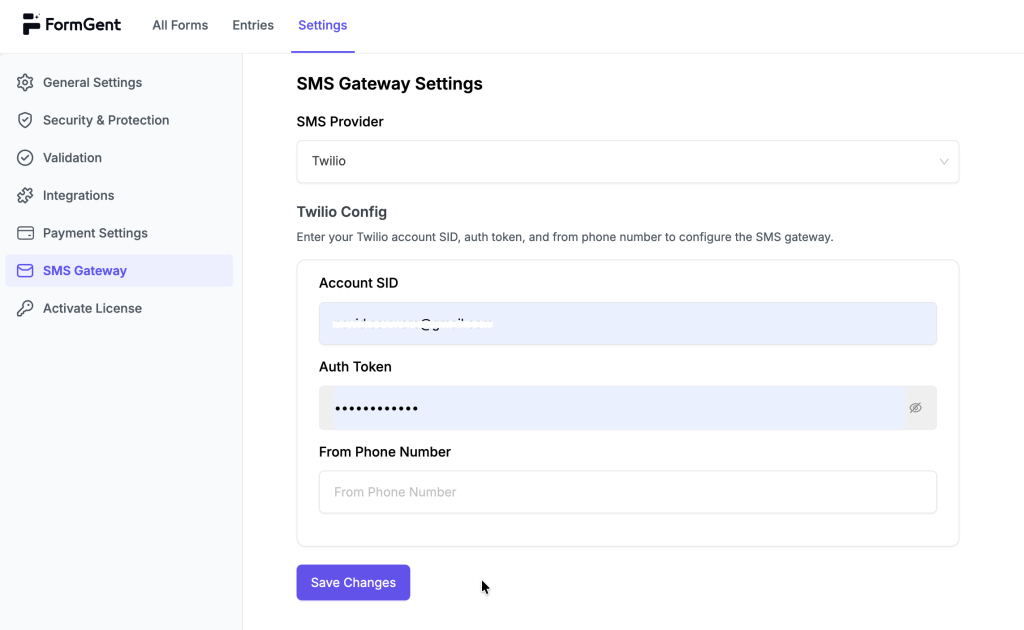
Select Twilio from the SMS Provider dropdown. The Twilio Config section will appear below.
Enter your Twilio account credentials to configure the SMS gateway. You can find all three values in your Twilio Console dashboard.
- Account SID – Your unique Twilio account identifier. Found in your Twilio Console dashboard under Account Info.
- Auth Token – Your Twilio authentication token. The field is masked by default; click the eye icon on the right to reveal your input.
- From Phone Number – The Twilio phone number that will appear as the sender of all outgoing SMS messages (e.g., +12015551234). This must be a verified number in your Twilio account.
Click Save Changes to apply.
Firebase (Google) Configuration #
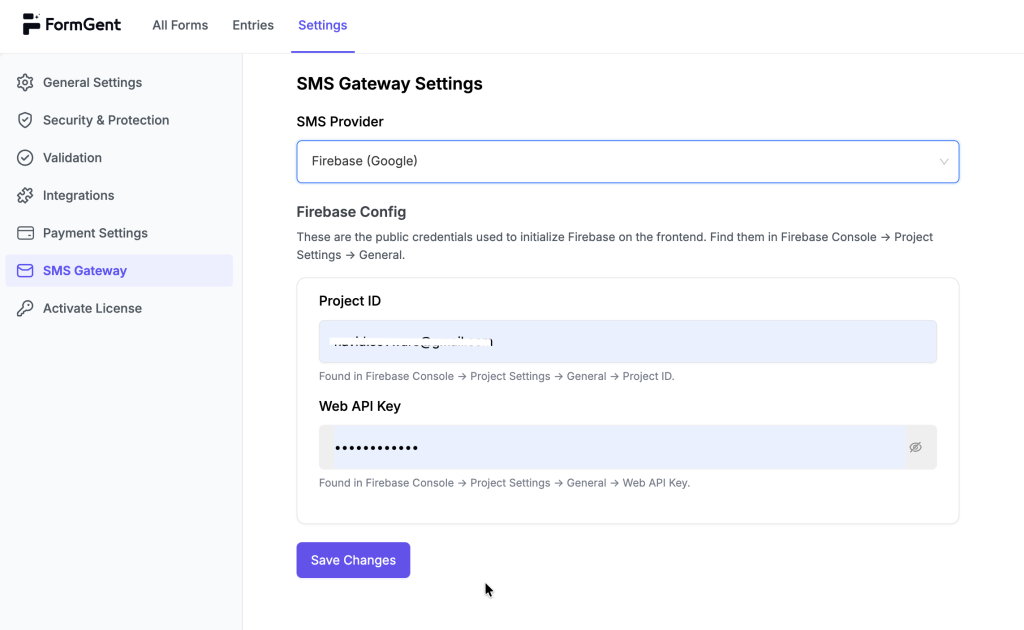
Select Firebase (Google) from the SMS Provider dropdown. The Firebase Config section will appear below.
Step 1: Create a Firebase Project #
Go to firebase.google.com and sign in. Click “Create a project” and enter a name for your project.
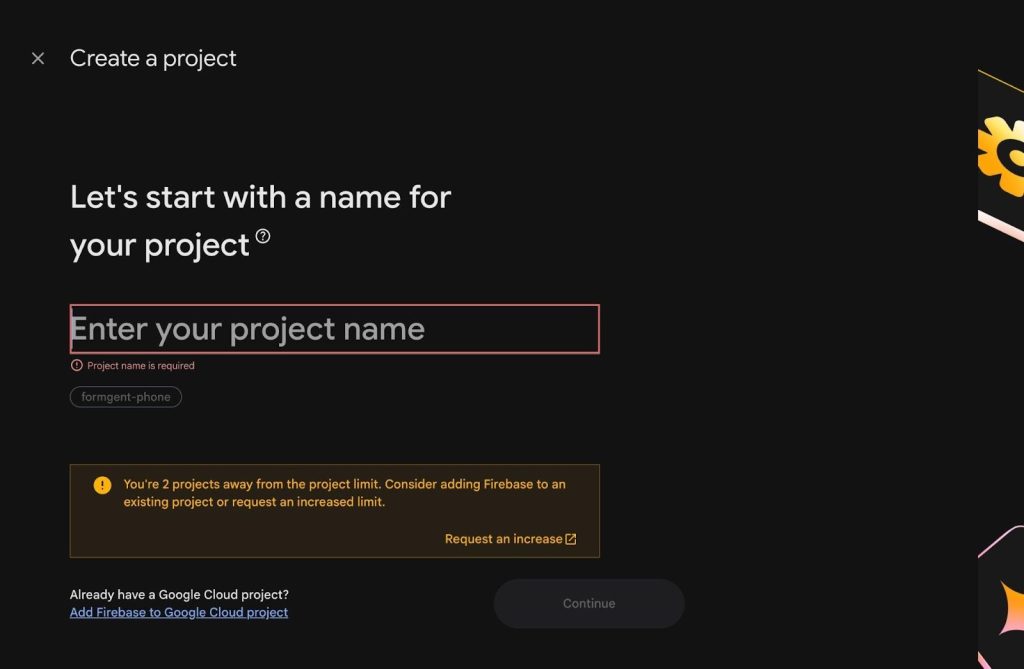
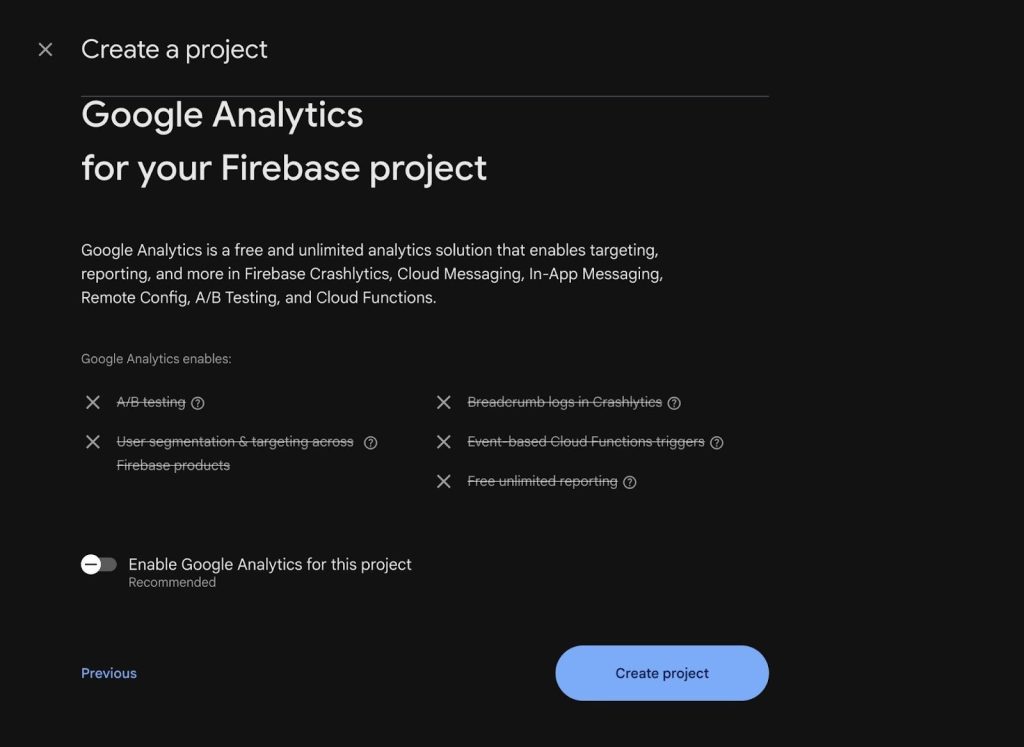
On the next screen, you will be asked about Google Analytics. This is optional. You can leave it disabled and click “Create project”.
Step 2: Open Project Settings #
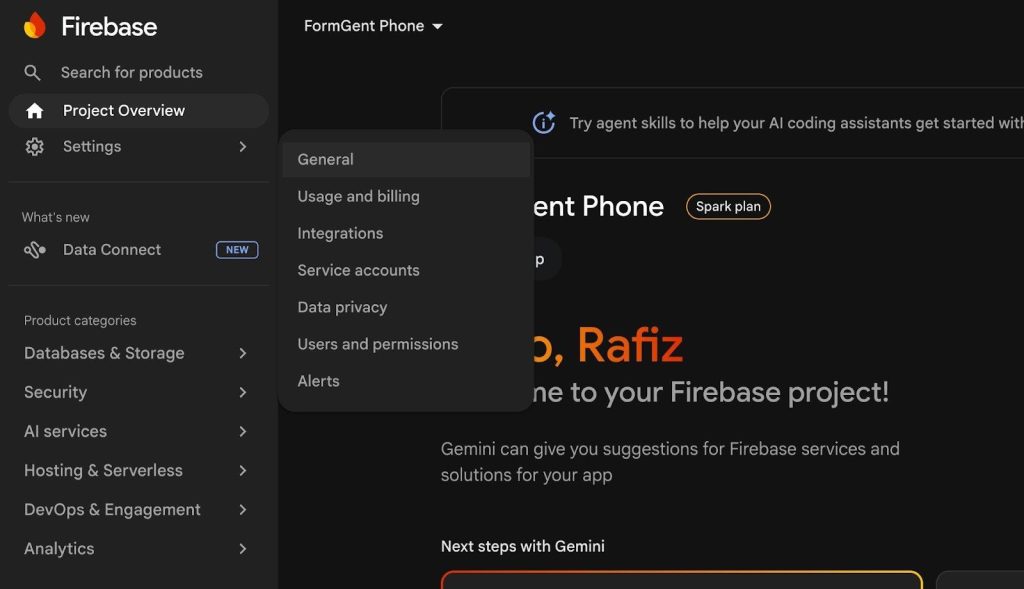
Once the project is ready, click “Continue”. You will land on the Project Overview page. Click the gear icon next to “Settings” in the left sidebar and select “General”.
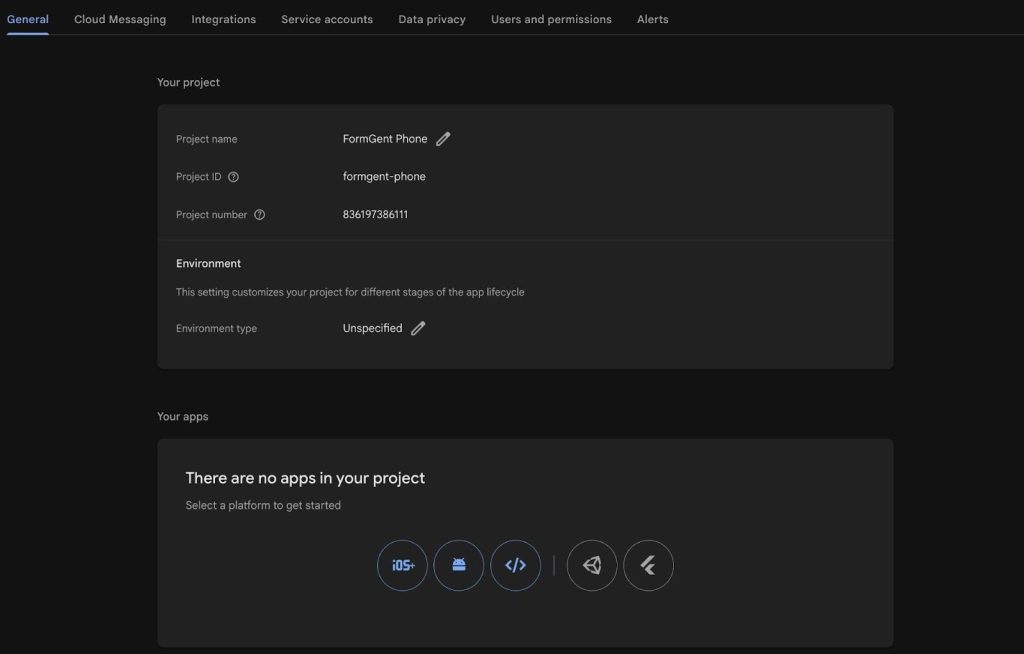
On the General settings page, you will see your Project ID and Project number. Scroll down to the “Your apps” section.
Step 3: Register a Web App #
In the “Your apps” section, click the web icon (</>). Enter a nickname for your app (for example, “FormGent-SMS”) and click “Register app”. You do not need to set up Firebase Hosting.
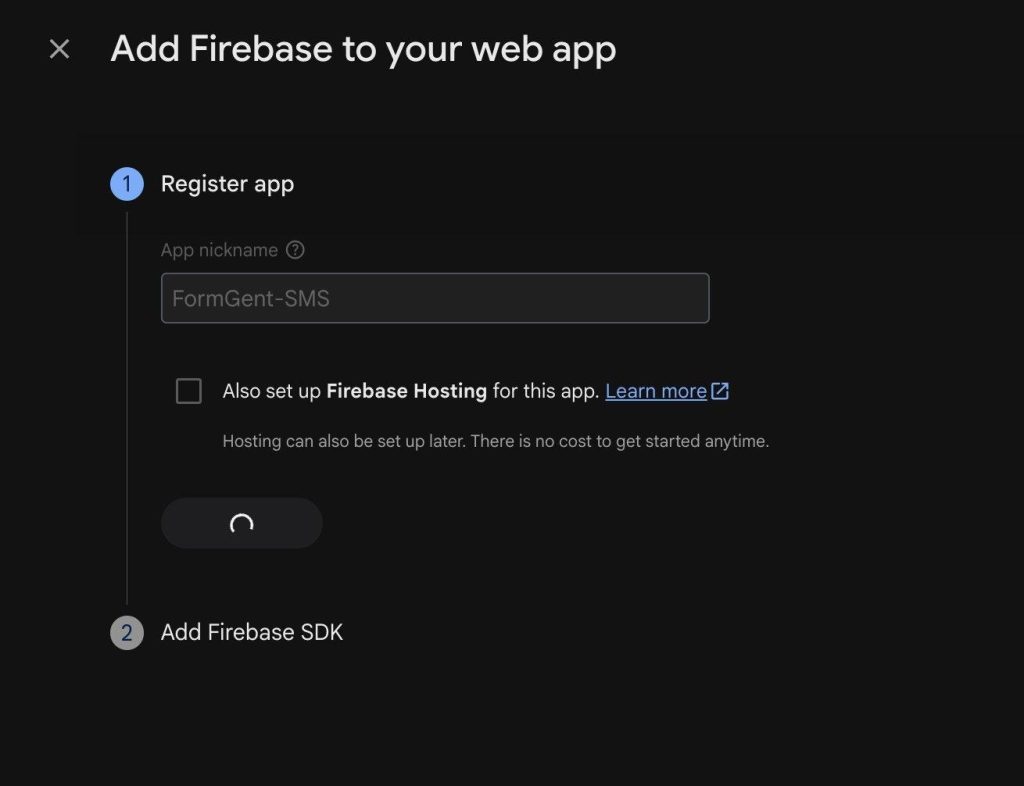
Note: After the app registers, click “Continue to console” to go back to the project overview.
Step 4: Enable Phone Authentication #
In the left sidebar, click “Security” and then select “Authentication”.
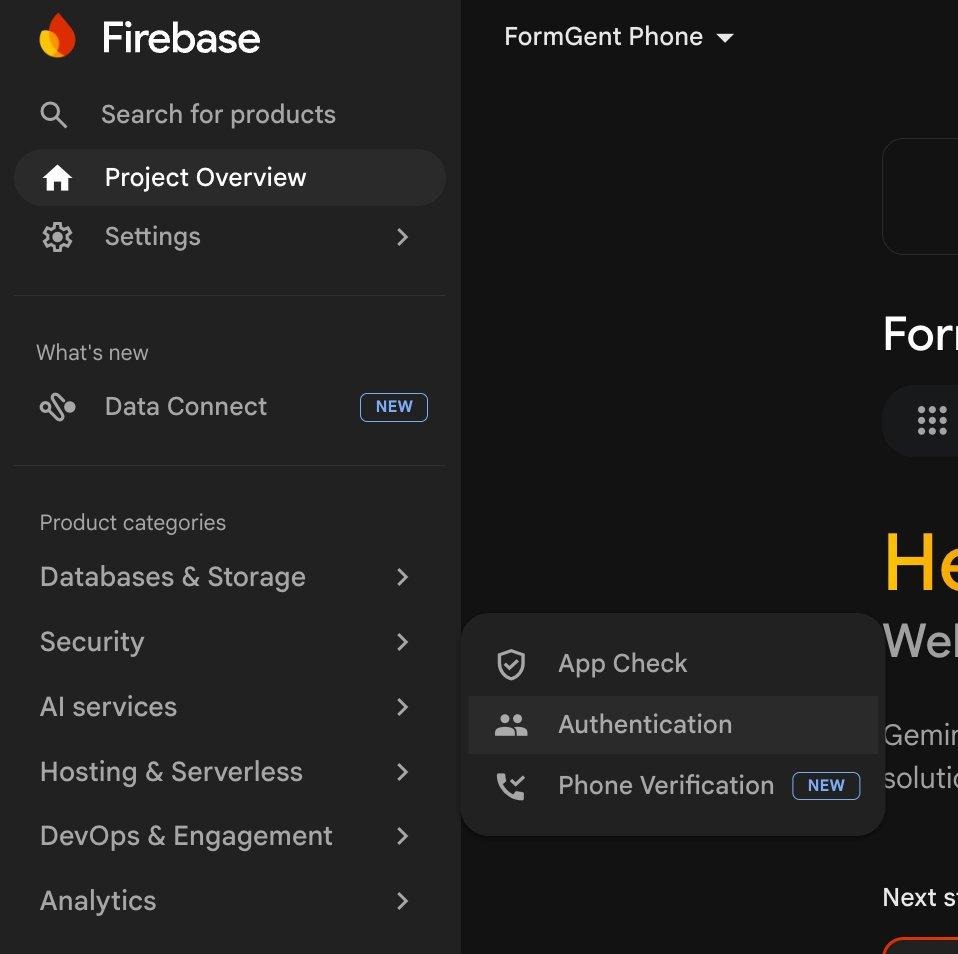
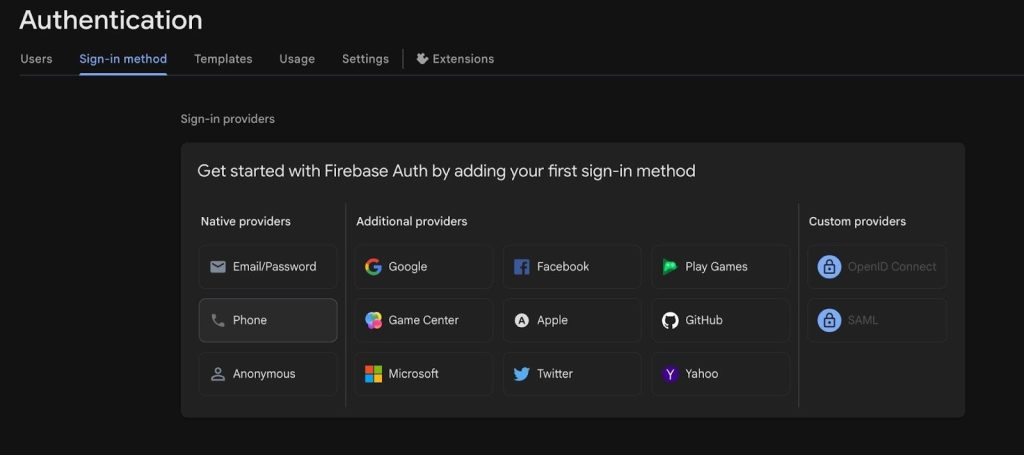
Click “Get started”. Go to the “Sign-in method” tab and click “Phone” from the list of sign-in providers. Enable it and save.
Step 5: Add Your Domain #
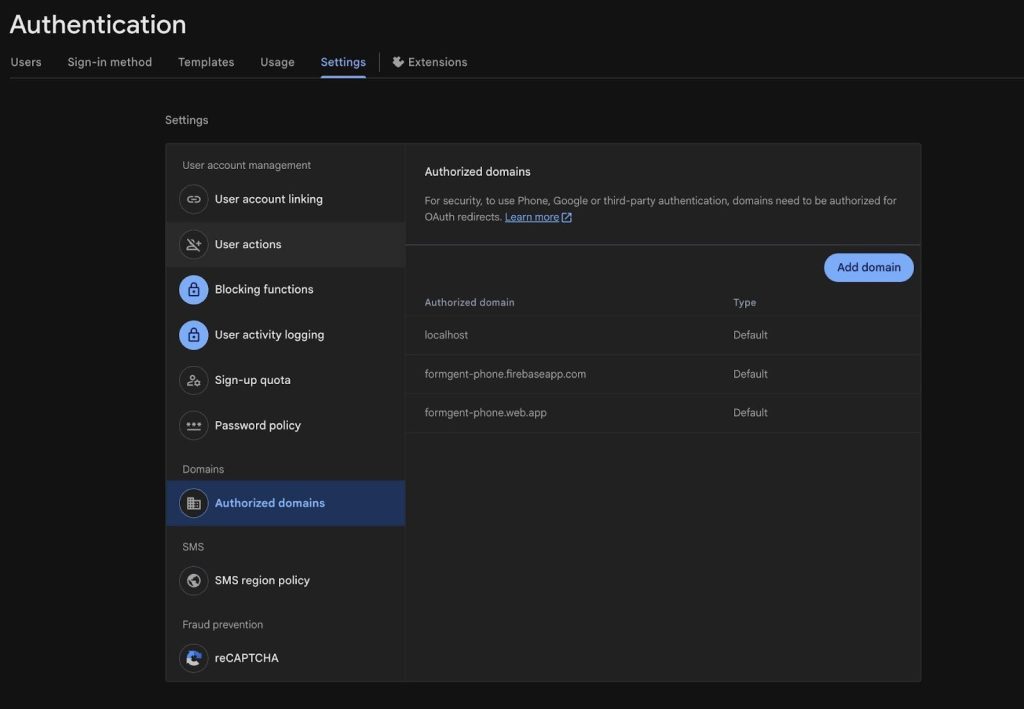
Go to the “Settings” tab inside Authentication. Under “Authorized domains”, click “Add domain” and enter your website domain. This is required for phone authentication to work on your site.
Step 6: Upgrade to Blaze Plan #
Firebase requires a paid plan (Blaze) to send SMS messages. Find the “Upgrade” button at the bottom of the left sidebar, select the Blaze plan, and complete the billing setup.
Note: You only pay for what you use. There is no upfront charge.
Step 7: Copy Credentials to FormGent #
Go to Project Settings > General. Copy the Project ID and Web API Key. Paste these into the SMS gateway settings inside the FormGent plugin.
You are all set. Firebase is now connected to FormGent and phone OTP will work on your forms.
Note: Local addresses like localhost:10033will not work as an authorized domain. Firebase only accepts plain hostnames without a port number. For local testing, use localhoston its own.
Click Save Changes to apply.
Custom Gateway Configuration #
Select Custom Gateway from the SMS Provider dropdown if you want to connect any third-party SMS service that supports HTTP requests. The Custom Config section will appear below.
Configure a custom HTTP endpoint to send SMS messages. Use {{to}} and {{message}} as dynamic placeholders in the body template – FormGent will replace these automatically with the recipient’s phone number and the message content on each submission.
- API Endpoint – The full URL of the SMS provider’s API endpoint (e.g.,
https://api.example.com/sms/send). - Method – The HTTP method used to call the endpoint. Defaults to POST.
- Auth Type – The authentication method required by your SMS provider. Defaults to None. Select the appropriate type based on your provider’s API documentation.
- Body Template (JSON) – The JSON payload to send with each request. Use
{{to}}for the recipient number and{{message}}for the SMS content. Example:{"to": "{{to}}", "message": "{{message}}"}. - Success Response Key – The key in the provider’s API response that indicates success (e.g.,
status). - Success Response Value – The expected value of the success key that confirms the SMS was sent (e.g.,
success).
Click Save Changes to apply.
Use Cases #
- Form submission confirmations – Automatically notify users with a text message after they submit a form.
- OTP or phone verification – Use Firebase to trigger one-time password flows during form submission.
- Internal team alerts – Notify your team via SMS whenever a high-priority form is submitted.
- Booking and appointment reminders – Send instant SMS confirmations for reservation or scheduling forms.
- Lead capture notifications – Alert your sales team in real time when a new lead comes in through a form.
To learn how to enable SMS in your form, navigate to Single Form Settings and learn how to add OTP verification.


