
The Entries section in FormGent allows you to view, track, and manage all form submissions collected from your website. Every time a visitor fills out a form created with FormGent, the submission is stored here as an Entry.
The Entries Dashboard helps you quickly see new submissions, review completed entries, and edit single entries by clicking each of them without opening each form individually.
In Your WordPress sidebar menu, a notification badge appears beside Entries.
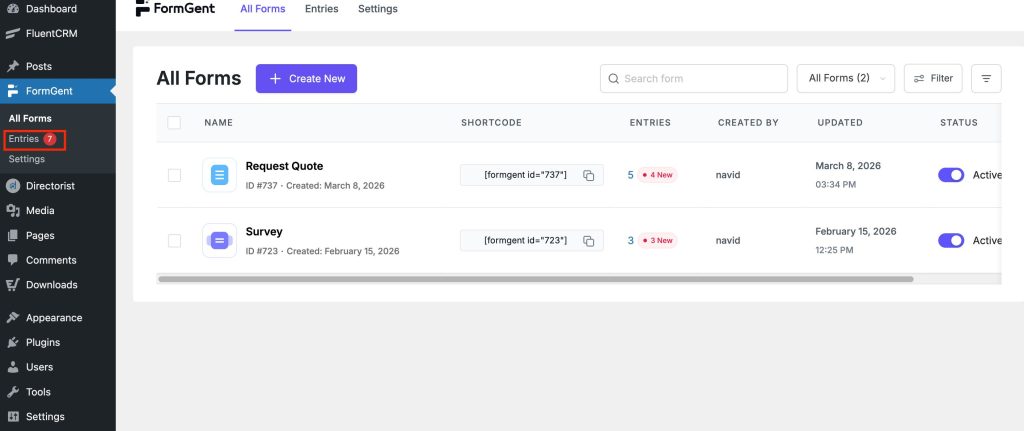
This number shows how many new submissions have been received since you last checked.
Example:
If the badge shows 7, it means 7 new form submissions are waiting to be reviewed.
Accessing the Entries Page #
To open the entries dashboard:
- Go to your WordPress Admin Dashboard
- Navigate to FormGent → Entries
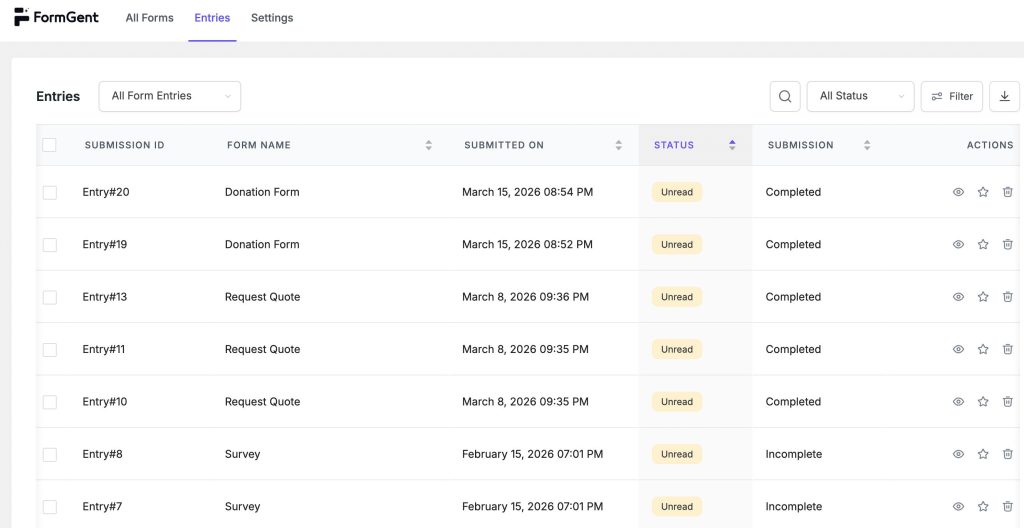
You will see a table containing all form submissions received from your forms.
Entries Page Overview #
The entries page displays a table with the following information:
| Column | Description |
|---|---|
| Checkbox | Select one or multiple entries for bulk actions |
| Submission ID | Unique ID assigned to each form submission |
| Form Name | The form where the entry was submitted |
| Submitted On | Date and time the form was submitted |
| Status | Shows whether the entry has been read |
| Completed | Shows if the form submission was successfully completed |
| Actions | Tools to view, mark, or delete the entry |
This layout helps you quickly review submissions without opening each one individually.
Understanding Each Column #
Submission ID #
Each form submission receives a unique entry ID.
This makes it easy to reference specific submissions when reviewing entries or exporting data. Clicking on the Submission ID also opens single submission details that you can view and edit.
Form Name #
Displays the name of the form the visitor submitted.
This helps identify which form generated the entry, especially when you have multiple forms on your site.
Submitted On #
Shows the exact date and time when the form was submitted.
This helps you track when leads or messages arrived.
Status #
The Status column indicates whether the entry has been reviewed.
Possible statuses include:
| Status | Meaning |
|---|---|
| Unread | The entry has not been viewed yet |
| Read | The entry has already been opened and checked |
Unread entries are usually highlighted with a colored label so you can quickly identify new submissions.
Completed #
This column shows whether the form submission process finished successfully.
If a submission is marked Completed, it means the user finished filling the form and the data was saved completely. If you keep your Save Incomplete Data (Pro Feature) turned on from settings, incomplete entries will also appear here with showing status as Incomplete.
Form Selection (Global Filter) #

At the top of the Entries page, you will see a dropdown labeled All Form Entries. This works as a global filter for the entire entries dashboard.
If you keep it as All Form Entries, the dashboard will show submissions from all forms. When you select a specific form, the page instantly updates to show only the entries related to that form. This means you are no longer looking at all submissions, but only the ones that belong to your selected form.
Searching Entries #
At the top of the page, you will see a Search Entries field. You can use this search box to quickly find specific submissions. This is useful when your website receives many submissions.
Export Entries #
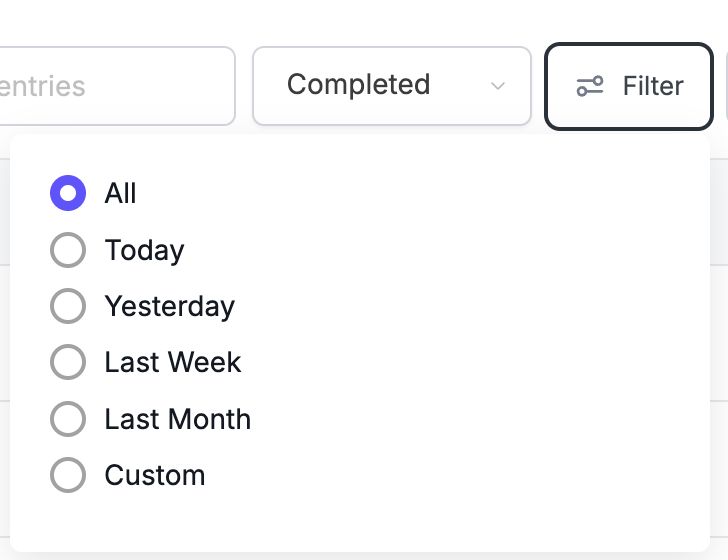
FormGent allows you to filter entries based on submission date range.
Options are:
| Filter | Description |
|---|---|
| All | Displays all form submissions |
| Today | Shows entries submitted today |
| Yesterday | Displays entries submitted yesterday |
| Last Week | Shows submissions received within the last 7 days |
| Last Month | Displays entries from the previous month |
| Custom | Allows you to define a custom date range |
The filter feature helps you manage entries more efficiently, especially when your forms receive many submissions.
Export Entries #
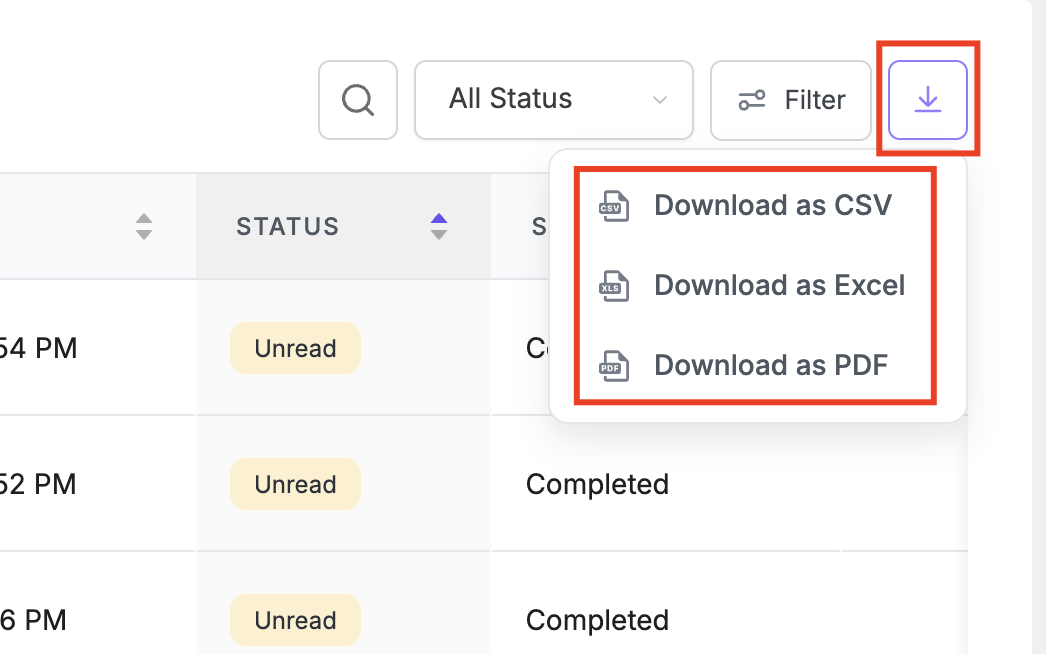
FormGent allows you to export entries directly in various usable formats for reporting, sharing, or record keeping. This makes it easier to take your form data outside WordPress and use it where you need it.
Available Export Formats:
FormGent provides three export options:
| CSV | Best for quick data handling or importing into other tools |
| Excel (XLS) | Useful for structured reports and data analysis |
| Ideal for sharing or keeping a clean, readable record |
Here’s how exporting entries work:
The export behavior depends on your selection:
- If you select a specific form, only that form’s entries will be exported in your chosen format (CSV, Excel, or PDF).
- If you do not select any specific form (keep it as All Form Entries), FormGent will export entries from all forms.
- In this case, if you have multiple forms with submissions, the exported files will be grouped and downloaded as a ZIP file.
Entry Actions #
Each row contains action icons that allow you to manage the entry.
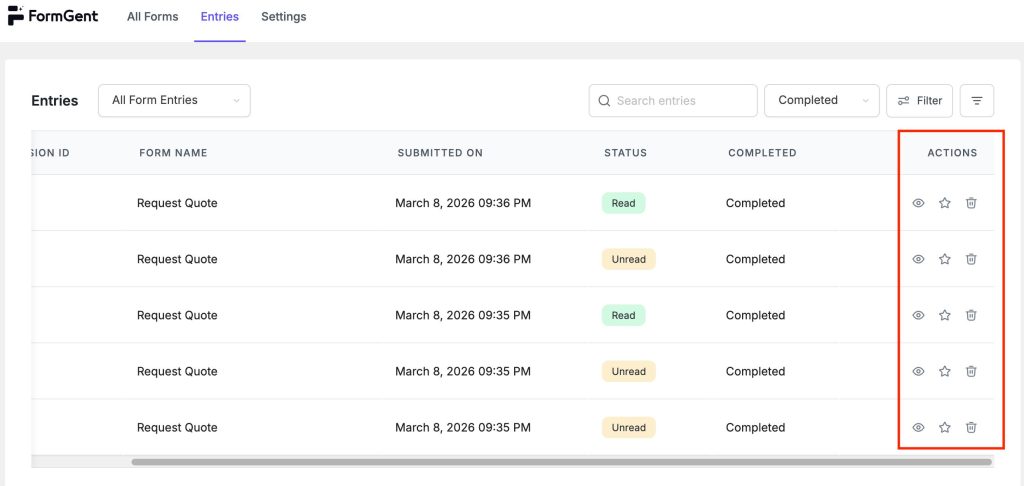
Typical actions include:
View Entry #
Open the full submission details to see all submitted form fields. You can also click on Submission ID for the same action.
Use this when you want to review the message, edit single entry details, Add note or download the single submission data in various formats.
Star Entry #
The star icon allows you to highlight an important entry.
This is helpful for:
- High priority leads
- Important customer messages
- Follow-up
Clicking on the Starred icon will remove Star mark from an entry in the same way.
Delete Entry #
Remove the entry permanently from your database. Once you click the Trash icon, a confirmation window will appear. If you hit Delete, the entry will be deleted permanently. Hit Cancel if you don’t want to delete permanently.
Be careful, as deleted entries cannot be recovered.
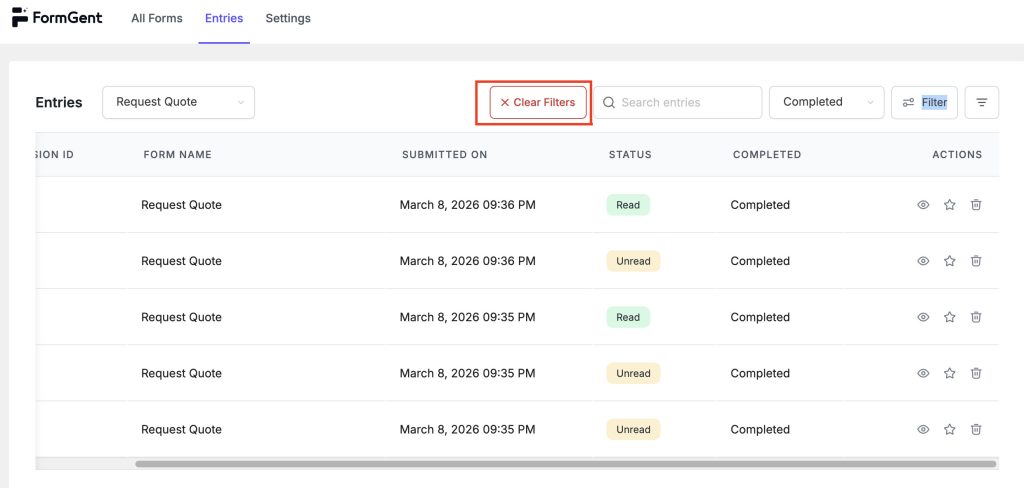
Clear Filters (Quick Action) #
The Clear Filters button appears when you apply a search or filter on the Entries page.
This button allows you to quickly remove all active filters and return to the full list of form submissions. When all filters are cleared, the button will be automatically hidden.
Navigate to Viewing a Single Entry for Next Actions.


