Each form in Formgent comes with its own set of settings that you can customize individually. These are called Single Form Settings, and they allow you to control form behavior, appearance, confirmation, and more, specific to that form only.
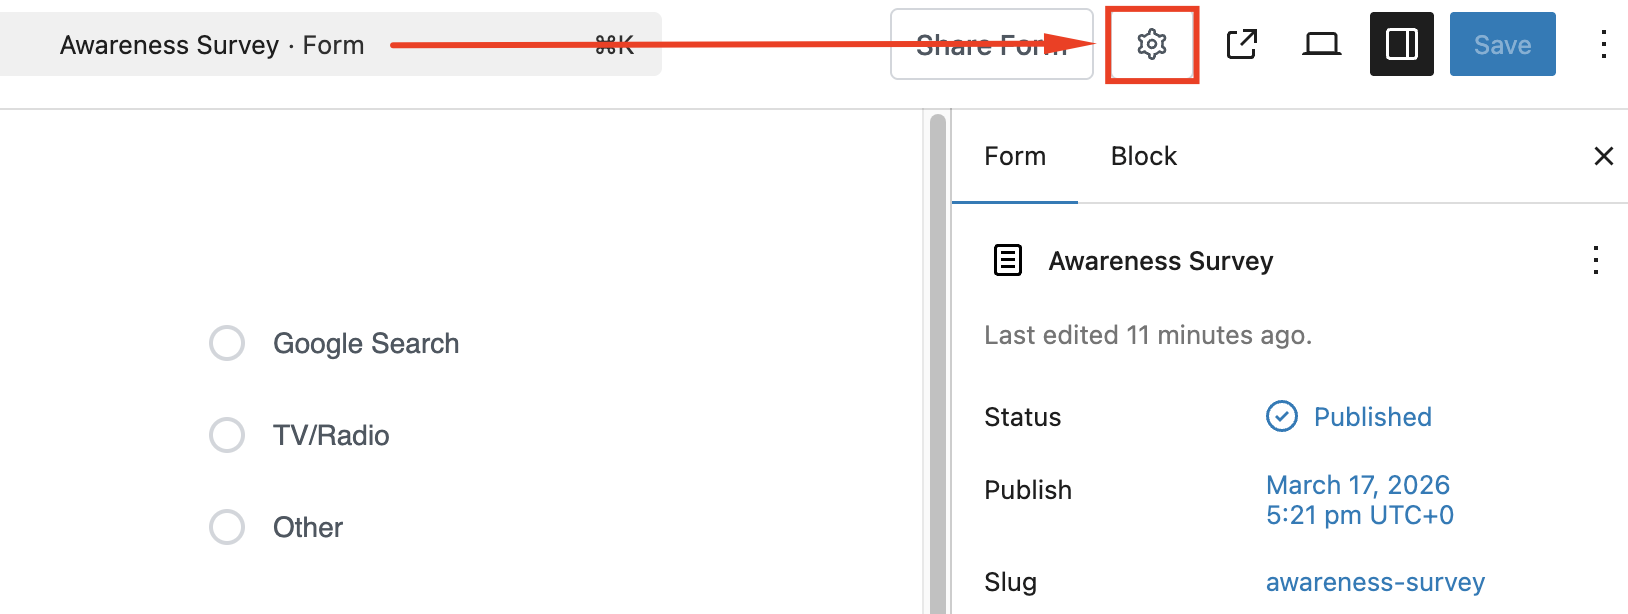
You’ll find these settings icon on the top of your form beside the title when building any form in Gutenberg builder.
Form Confirmation #
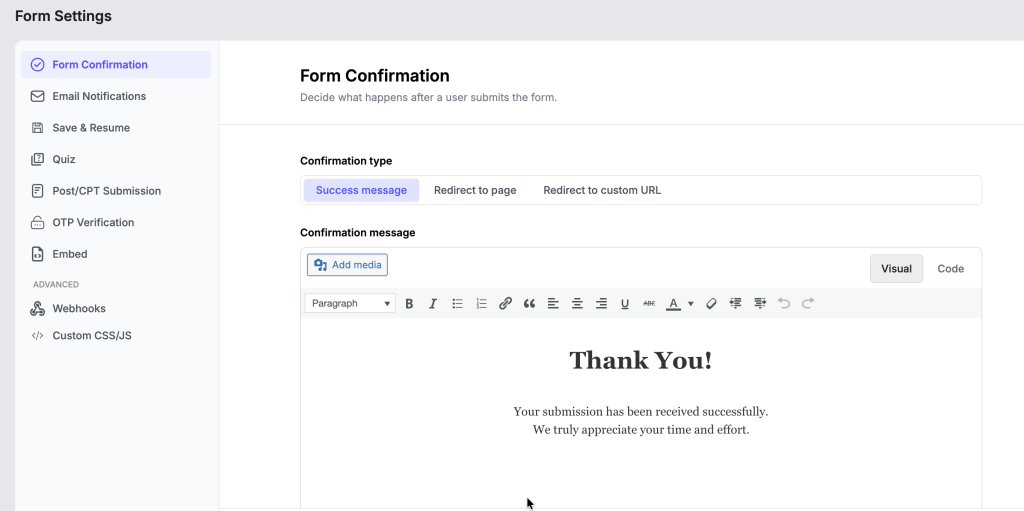
FormGent gives you full control over what happens after a user submits a form. You can show a thank you message, redirect them to a different page, or send them to a custom URL.
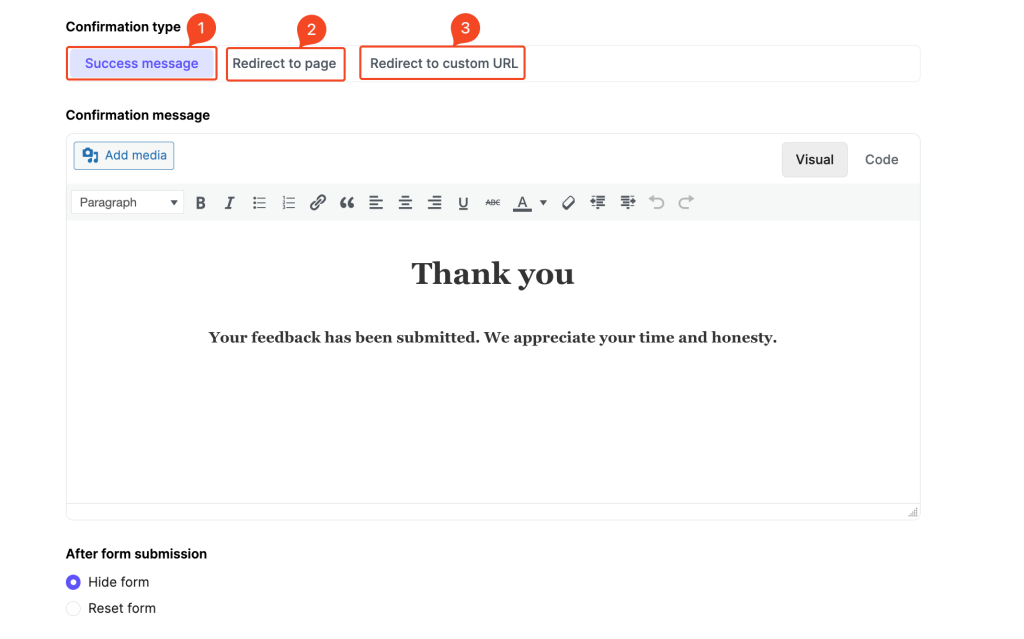
- Confirmation Types You can choose one of three actions after submission:
- Success Message(Default) Display a custom message directly on the same page after submission.
- You can use the built-in editor to add text, images, or styling.
- Common use: A thank you message like: “Thanks for reaching out! We’ll get back to you shortly.”
- Redirect to Page Redirects the user to another page on your own site.
- You’ll see a dropdown list of your existing pages.
- Just choose the page you want the user to land on.
- Useful for:
- Thank You Pages
- Confirmation Pages
- Download Pages
- Redirect to Custom URL Send users to any external or internal URL.
- Enter the full URL (e.g.,
https://example.com/thank-you) - Great for:
- Tracking conversions with landing pages
- Sending to a third-party service or subdomain
- Enter the full URL (e.g.,
- Success Message(Default) Display a custom message directly on the same page after submission.
Conditional Confirmation #
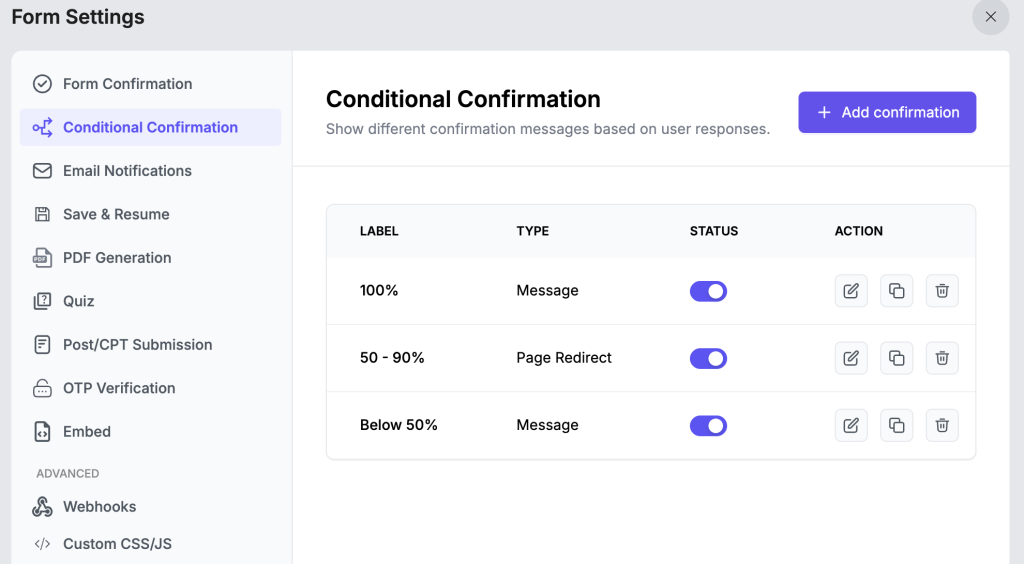
Conditional Confirmation is another Pro feature that lets you override default form confirmation allowing you to show different messages or triggering different actions based on what the user actually submitted. If no condition matches a submission, the default Form Confirmation fires as a fallback.
When you need this: #
- A quiz form that congratulates perfect scorers differently from average ones
- A lead generation form that redirects pre-sales enquiries to a booking page while sending general enquiries a thank-you message
- A registration form that shows different next steps based on which plan or option the user selected
- Any form where one-size-fits-all confirmation creates a poor or irrelevant experience for a segment of your respondents
You can create unlimited conditional confirmations per form, each with its own rules, message or redirect, and independent enable/disable toggle.
For full setup instructions, condition attributes, and score tags, see the complete Conditional Confirmation guide.
Email Notifications #
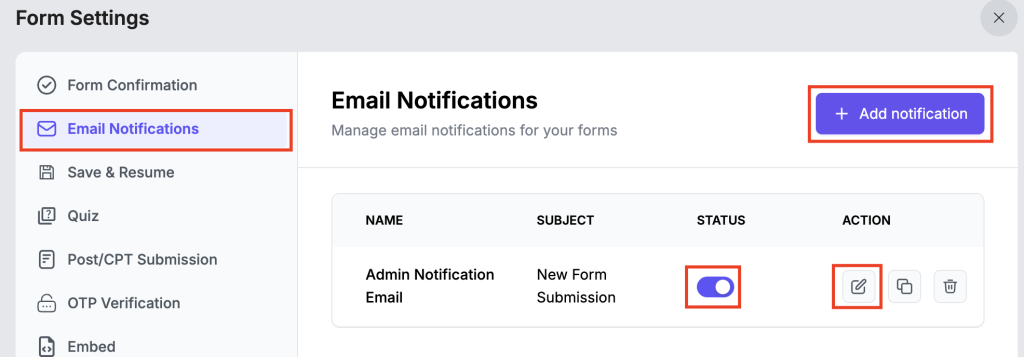
Email notifications help you stay informed whenever someone submits a form on your website. You can fully customize who receives emails, what the message says, and even create multiple notification templates for each form.
By default, a notification is already set up to send submission details to the site admin’s email address.
Add a New Notification #
You can send different emails to different people. For example, one to yourself, and another confirmation email to your team member.
To add a new notification:
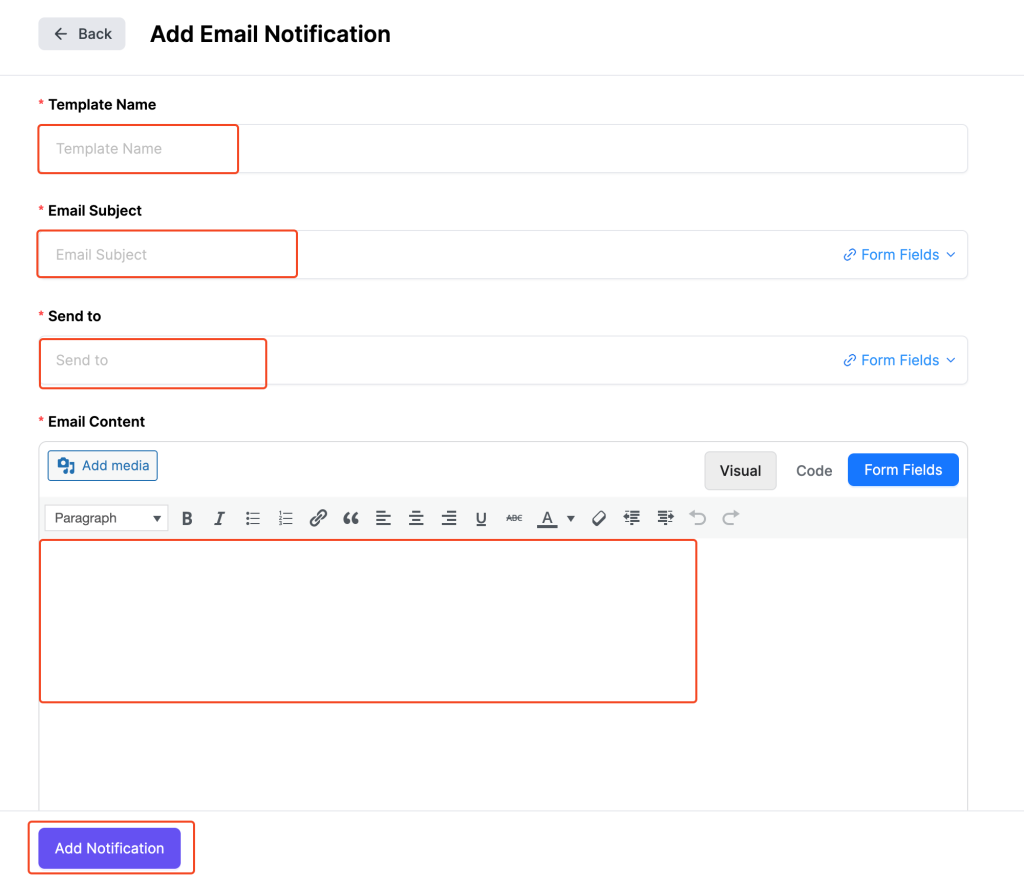
- Click the “Add Notification” button.
- Fill in the required fields:
- Template Name – Internal label for managing notifications.
- Email Subject – What the recipient will see as the subject.
- Send To – Enter a specific email address, or use smart tags.
- Email Content – Write your email message using the visual editor.
- Click Add Notification to save.
4. Advanced Options (v1.3 or later) #
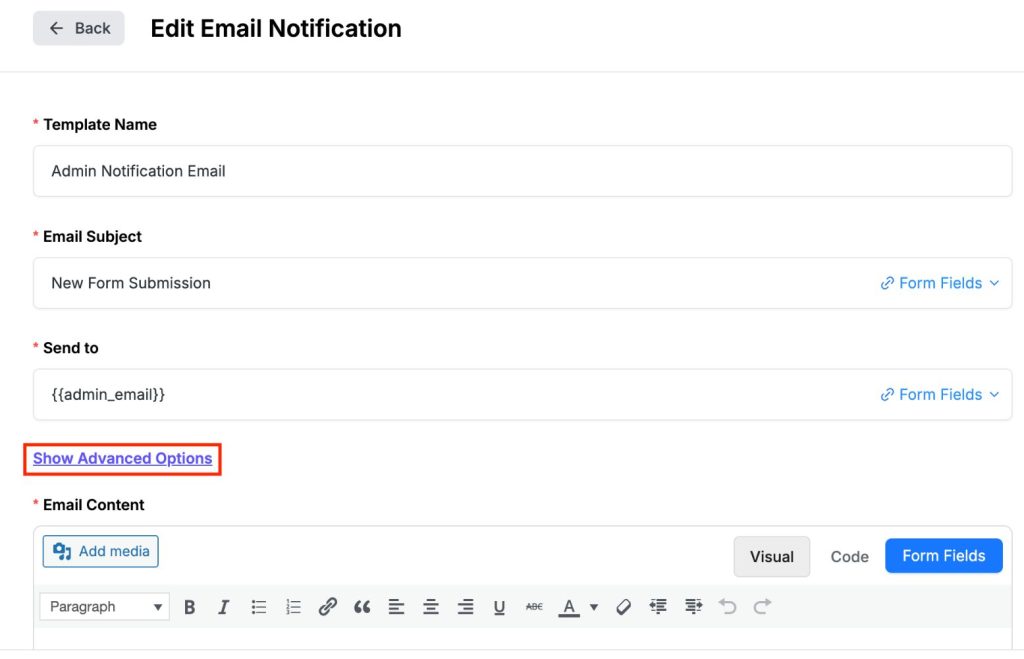
Below are the key fields available in the Advanced Options:
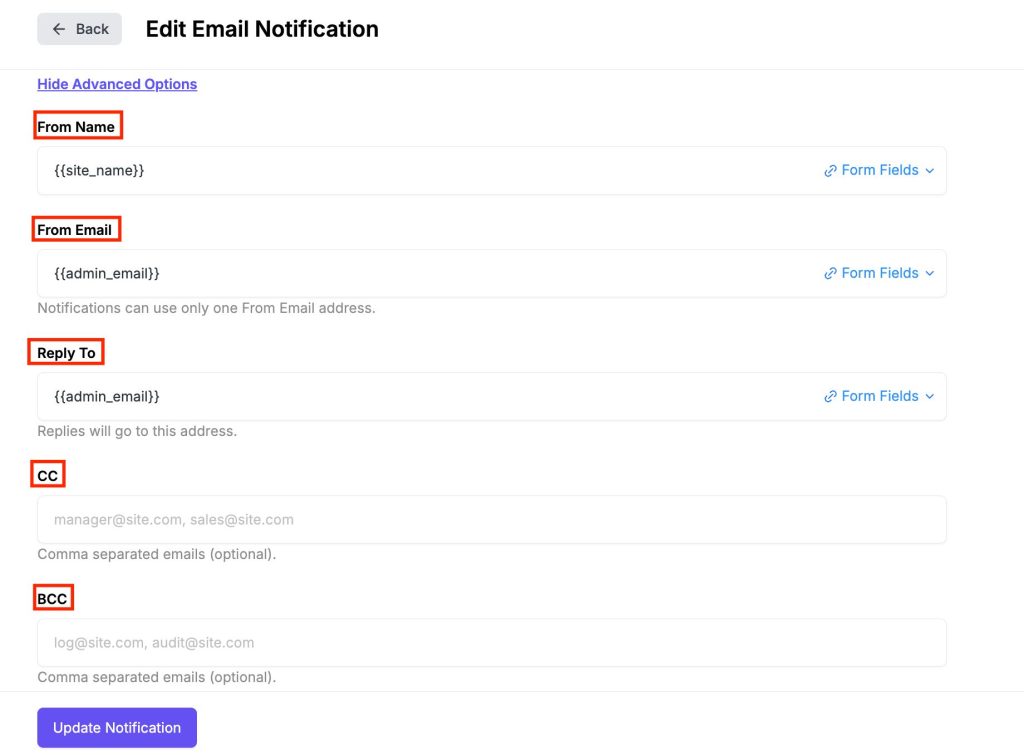
4.1 – From Name
- Purpose: Specifies the name that will appear as the sender of the email.
- Options:
- Static text (e.g.,
Contact Form) - Dynamic placeholder (e.g.,
{{site_name}}) to automatically use your site’s name.
- Static text (e.g.,
- Example: If you set
From Nameas{{site_name}}, the email will show as coming from your website name.
4.2 – From Email
- Purpose: Defines the email address that will appear as the sender.
- Options:
- Static email address (e.g.,
[email protected]) - Dynamic placeholder (e.g.,
{{admin_email}}) to use the site administrator’s email. - Can also reference a form field to dynamically set the sender email from user input.
- Static email address (e.g.,
- Important: Notifications can only use one From Email address.
4.3 – Reply To
- Purpose: Sets the email address where replies from recipients will be sent.
- Options:
- Static email (e.g.,
[email protected]) - Dynamic placeholder (e.g.,
{{admin_email}}) - Form fields (e.g., user-provided email in the submission)
- Static email (e.g.,
- Note: This allows recipients to respond directly to the desired email instead of the
From Email.
4.4 – CC (Carbon Copy)
- Purpose: Sends a copy of the notification to additional recipients.
- Format: Comma-separated email addresses (e.g.,
[email protected], [email protected]) - Optional: Leaving this empty will not send CC emails.
4.5 – BCC (Blind Carbon Copy)
- Purpose: Sends a copy of the notification to recipients without revealing their addresses to others.
- Format: Comma-separated email addresses (e.g.,
[email protected], [email protected]) - Optional: Leaving this empty will not send BCC emails.
To hide these options, click on the Hide Advanced Options toggle button.
Conditional Email #
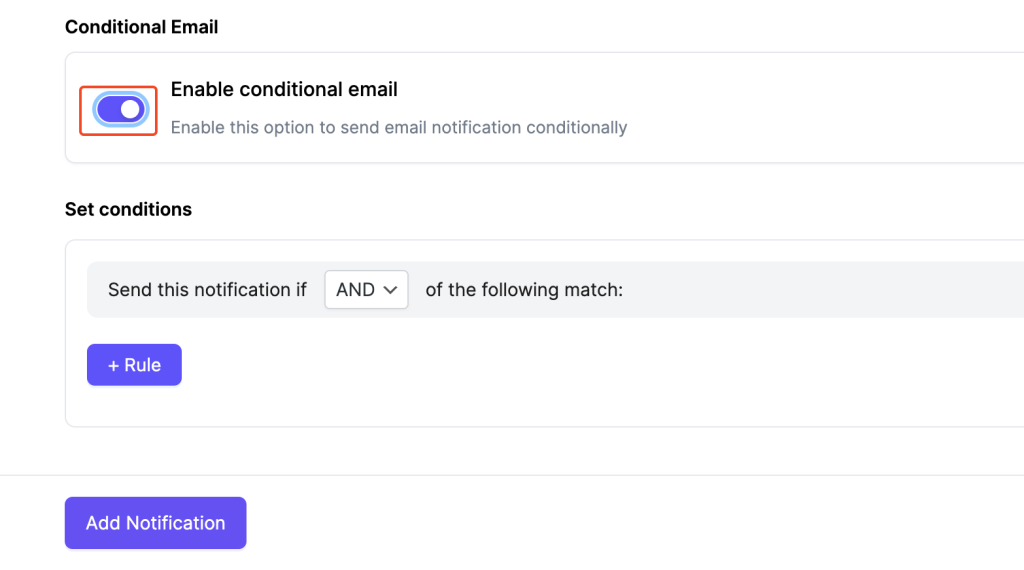
You can send email notifications based on specific user responses by enabling Conditional Email. Enable Conditional toggle to activate conditional email logic.
- Set Conditions: Define the rules that must be met for this email to be sent. You can set multiple conditions using AND/OR logic.
Manage Existing Notifications
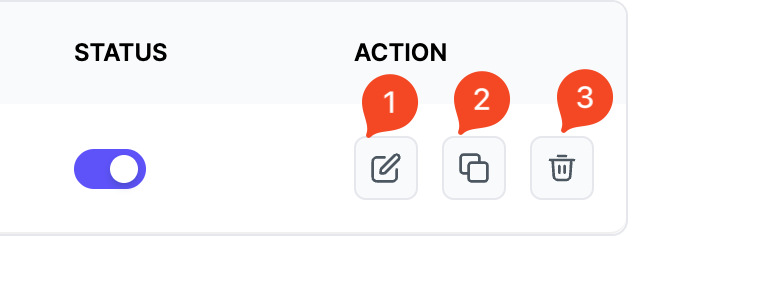
For each existing email connection, you can:
- Edit – Update subject, recipients, or content
- Duplicate – Quickly clone the notification for a similar use case
- Delete – Remove the notification
Save & Resume (Pro) #
FormGent allows users to save their progress mid-way through a form and continue later without losing any data – useful for long or detailed forms where a single sitting isn’t always practical.
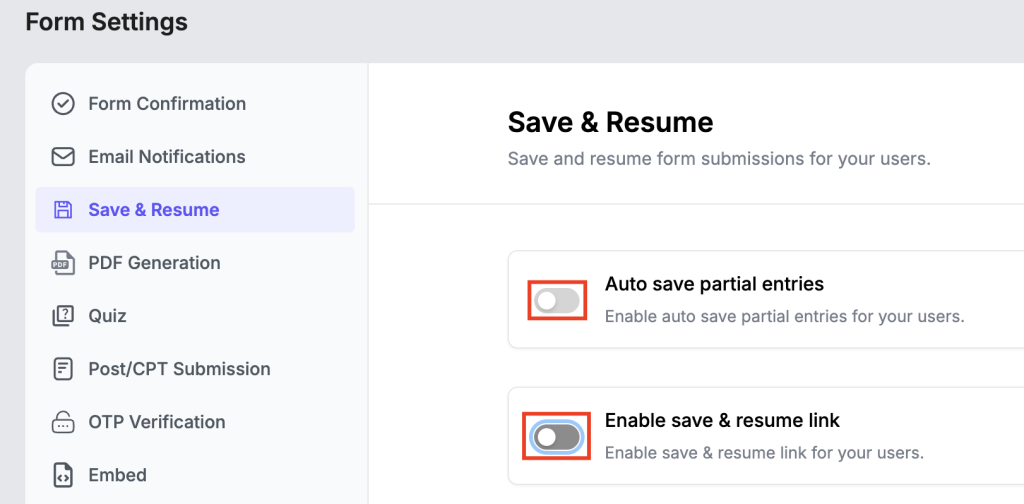
Two options are available:
- Auto Save Partial Entries – FormGent silently saves whatever the user has entered so far. If they close the tab or get interrupted, their progress is stored as an incomplete entry in your Entries Dashboard. You can also enable a disclaimer message on the form to let users know their data is being saved automatically.
- Enable Save & Resume Link – Adds a visible button on the form that lets users intentionally save their progress and receive a personal resume link to continue later. You can customize the button label, the on-screen confirmation message, and the email template that delivers the resume link to their inbox.
For full field-by-field configuration, see the complete Save and Resume Later guide.
PDF Generation (Pro) #
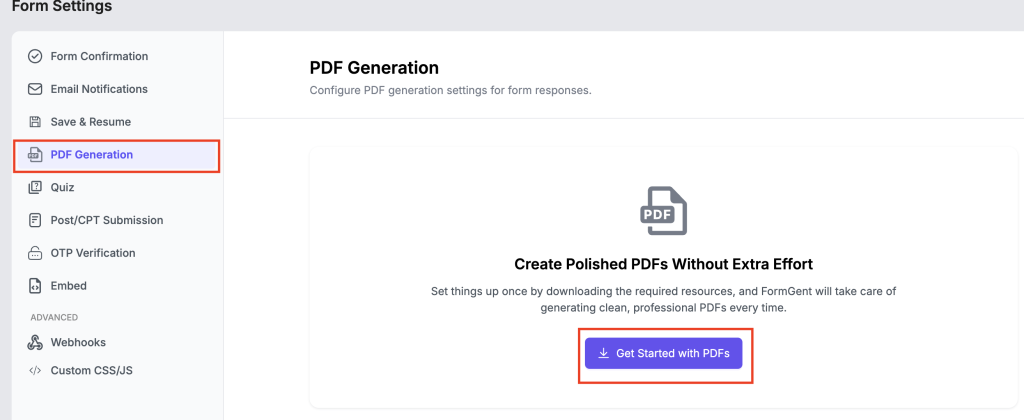
FormGent allows you to generate custom PDF documents directly from form submissions – invoices, certificates, business quotes, or any custom layout – and deliver them automatically via confirmation messages or email notifications.
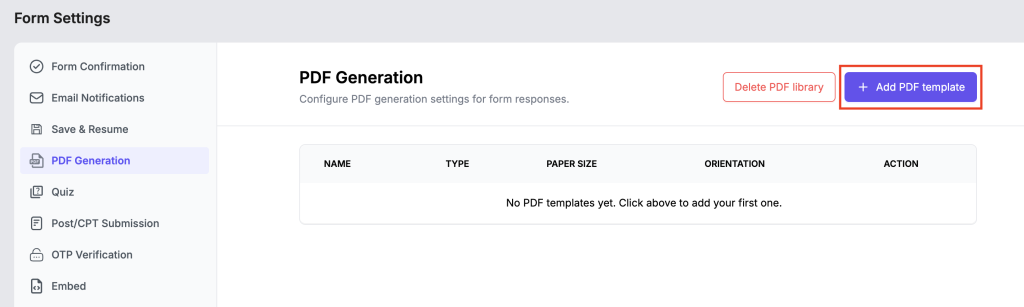
You’ll find PDF Generation under the Form tab when editing any form. On first use, click Get Started with PDFs to download the required library. This is a one-time setup. Once the library is installed, you can start creating PDF templates for the form.
Using the red Delete PDF library button in the top right removes the entire PDF library from the server and affects all forms on your site, not just the current one. Any confirmation messages or email notifications that reference a PDF tag will stop delivering PDFs immediately across every form that uses them.
Use this only if you need to fully uninstall the PDF functionality from your site. If you delete it accidentally, you can re-create the library right away by clicking Get Started with PDFs again from any form’s PDF Generation tab – your templates will remain intact and resume delivery once the library is restored.
For full instructions on creating templates, using form tags, and sharing PDFs with users, see the complete PDF Generation guide.
Quiz #
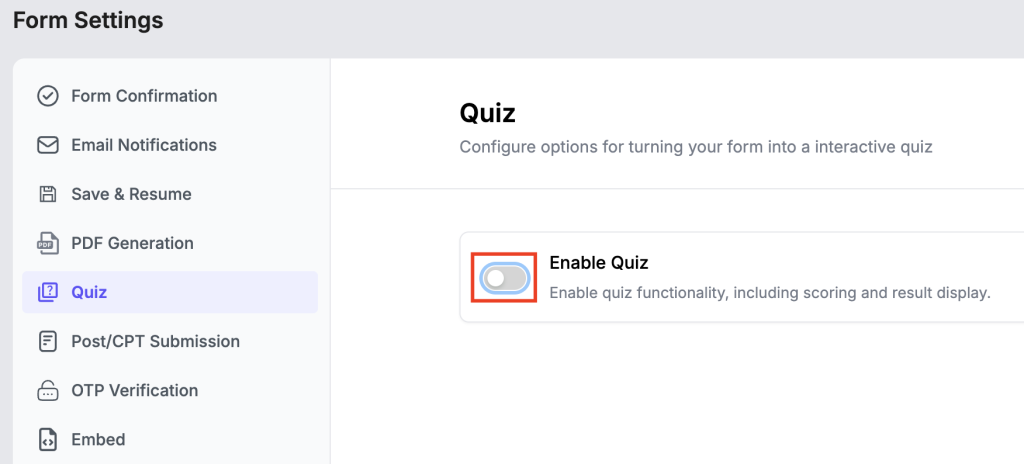
Formgent allows you to turn any form into an interactive quiz with scoring and result display. This is perfect for educational tools, assessments, knowledge checks, or fun interactive content.
To activates the quiz functionality, just toggle on Enable Quiz. See full Quiz setup guide.
Post/CPT Submission (Pro) #
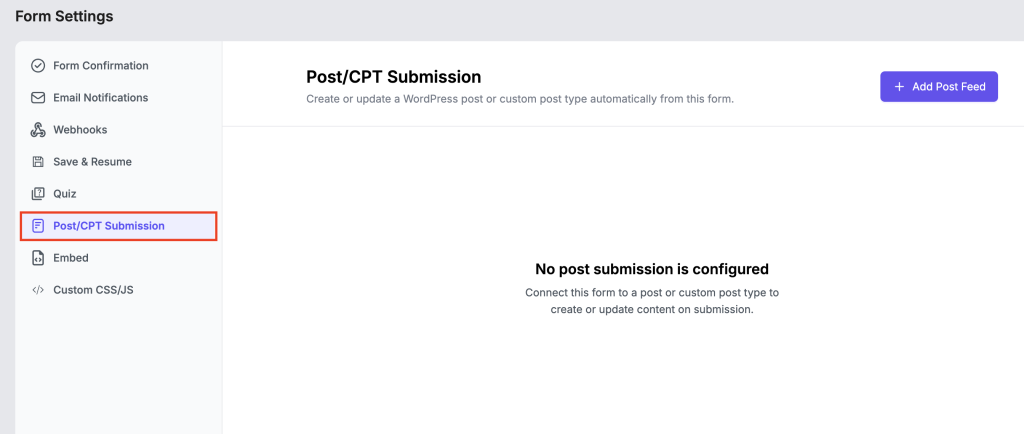
FormGent’s Post/CPT Submission feature lets you turn any form submission into a WordPress post or custom post type entry automatically – without any manual publishing on your end. Click Add Post Feed to connect the form to a post type. From there you can configure:
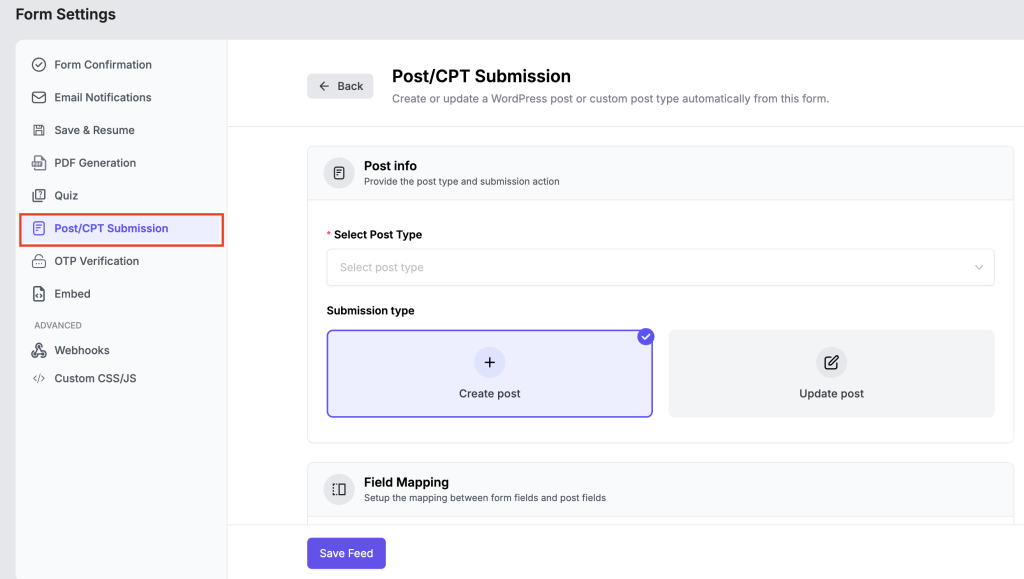
- Post Info – Choose the post type (Post, Page, or any registered CPT) and whether the form should create a new post or update an existing one on each submission.
- Field Mapping – Map your form fields to post fields: Title, Content, Featured Image, and Excerpt.
- Meta Fields Mapping – Map additional form fields to custom post meta keys for storing extra data alongside the post.
- Taxonomy Mapping – Assign form field values to WordPress taxonomies like categories, tags, or custom taxonomies.
- Post Options – Set the default post status (Publish, Pending, Draft, or Private), assign a post author, and optionally enable guest posting to allow non-logged-in users to submit.
- Conditional Logic – Define rules so the post feed only runs when specific form conditions are met.
For a complete setup walkthrough, see the Post/CPT Submission guide.
OTP Verification (Pro) #
FormGent allows you to verify users with a one-time password via email or SMS before they can successfully submit a form. This adds an extra layer of authenticity to your form submissions and helps prevent spam and fake entries.
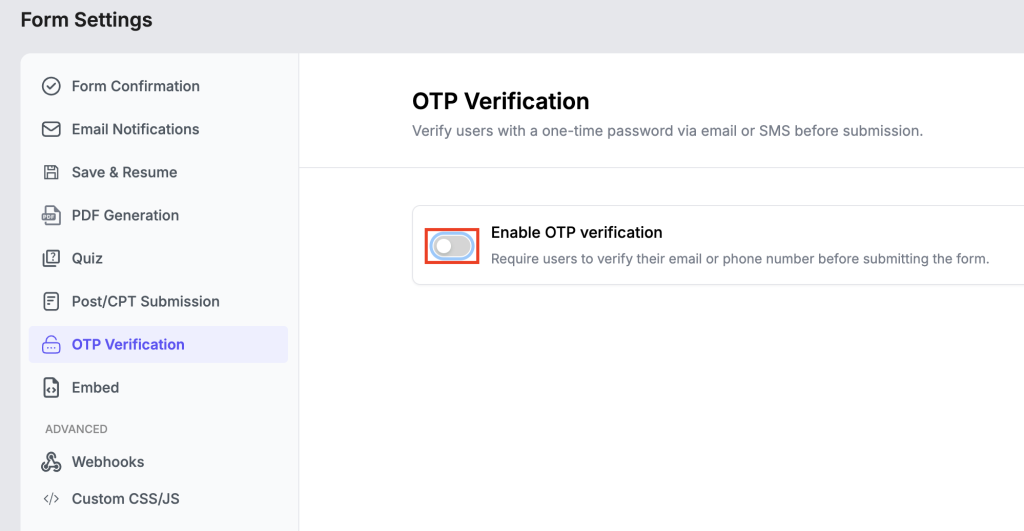
Toggle Enable OTP Verification to activate the feature. Once enabled, users will be required to verify their email address or phone number before the form submission goes through.
Find the details guide to OTP verification in this article.
Webhook (Pro) #
Formgent Webhooks allow you to send form submission data to external applications or services in real-time. You can use this to connect with CRMs, automation platforms, Slack, Discord, Zapier alternatives, or any service that accepts incoming web requests.
You’ll find this under the Form tab > Webhooks. See full Webhook setup guide.
Embed #
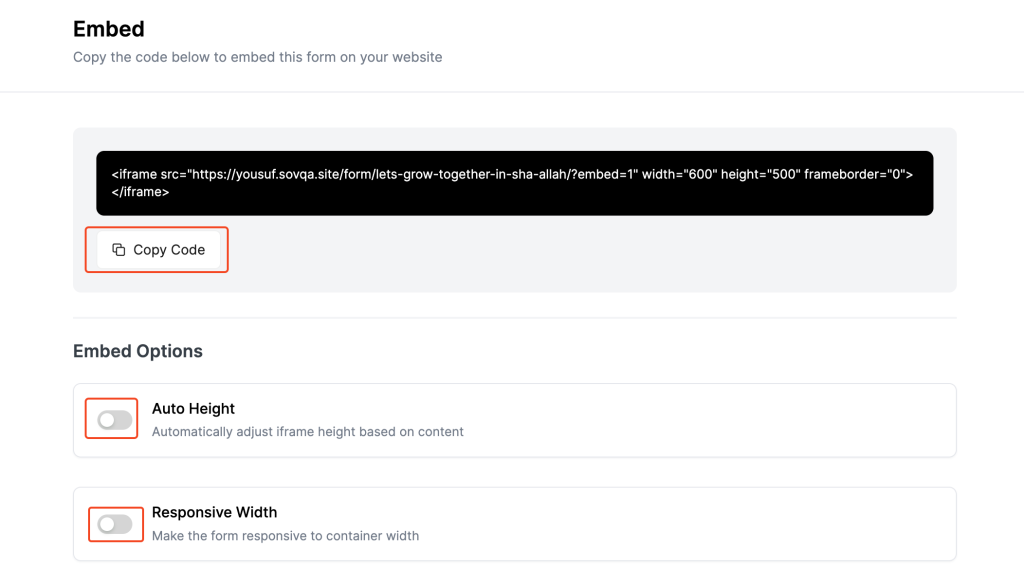
Want to display your form on another page or website? The Embed feature lets you copy a simple <iframe> code and paste it anywhere — whether it’s on another WordPress page, a non-WordPress site, or an external platform.
You’ll find this option under the Form tab > Embed section.
How to Embed Your Form #
Formgent automatically generates a ready-to-use embed code.
- Open the Embed panel.
- Copy the provided iframe code from the Code Block section.
- Paste it into any HTML area on your site or external website.
You can control how your embedded form behaves on different screens:
Auto Height
- Automatically adjusts the iframe height based on the content inside.
- Prevents scrollbars and makes the form feel seamless within the page.
Responsive Width
- Ensures the embedded form adapts to the width of its container.
- Ideal for embedding on mobile-friendly or responsive layouts.
Custom CSS / JS #
Formgent gives you the flexibility to style and customize your form even further using custom CSS and JavaScript. Whether you want to match your brand design or add advanced interactions. This section has you covered.
You’ll find it under the Form tab > Custom CSS/JS.
Custom CSS #
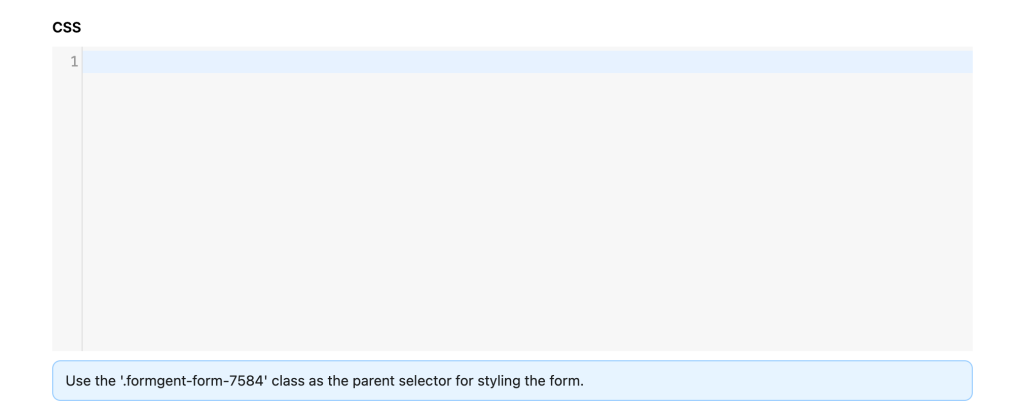
Use the CSS box to apply custom styles directly to the form. Every form has a unique class for targeting. Use the provided class as the parent selector.
Custom JS #
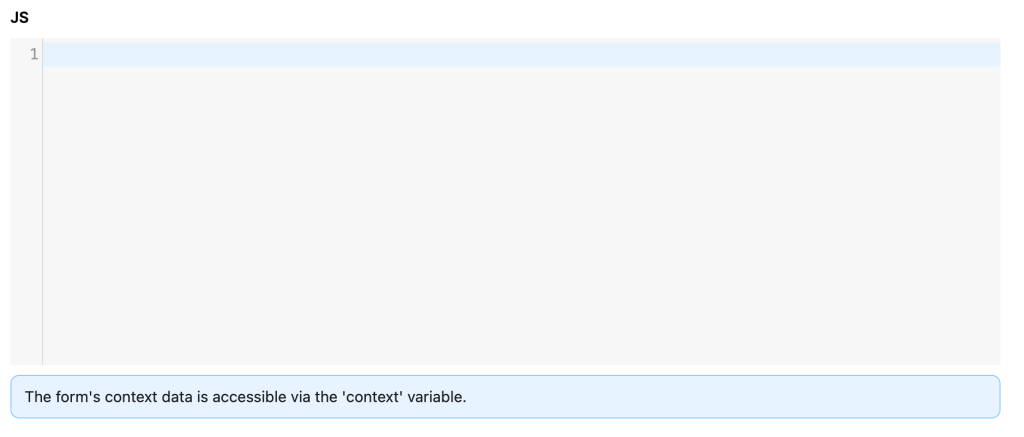
The JS box lets you inject JavaScript that runs within the context of this form. You can access the form’s internal context using the context variable.