
How to Create an Order Form in WordPress
-
- Tips and Tricks Form Builder
- 13 mins read

An order form is easy to picture. It’s a form on your site where visitors pick products or services, set a quantity, watch the total add up, and pay. No shopping cart. No full online store. Just one page that does the job.
You build it using WordPress forms. In this guide, we’ll use FormGent — a plugin with product, quantity, and payment fields already built in, so you’re not piecing things together from scratch. By the end, you’ll have a working order form. You’ll also know where most order forms go wrong, and you’ll have a checklist to run through before you publish.
So who is this guide for? Maybe you sell a handful of products. Maybe you take custom orders. Maybe you collect one-off payments, or recurring ones. In any of those cases, an order form is usually faster to set up than a full ecommerce platform, and easier to maintain once it’s live.
Here’s everything this guide covers:
- What an order form actually is
- Who it’s right for
- The exact steps to build one
- Real examples of what works, and what doesn’t
- Common mistakes to avoid
- How to measure whether it’s performing
- A checklist to run before you publish
Start from an order form template →
What Is an Order Form in WordPress?
A WordPress order form does one job well. A visitor picks one or more products or services. They set a quantity for each. They watch the total update as they go. Then they pay. All of it happens on a single page.
It’s simpler than a full shopping cart. But it still has to get the core job right: turning a selection into an accurate, paid order.
Four building blocks make that happen:
- A product or service list
- A way to set quantity
- A running total
- A connected payment gateway
That’s it. You don’t need inventory tracking, shipping calculators, or a product catalog to make an order form work. Those belong to WooCommerce — a bigger tool for a bigger job. An order form is meant for something smaller and more direct: a quick, focused way to sell without the overhead.
Want a broader sense of what’s possible with WordPress forms beyond order forms? FormGent’s types of forms guide covers the full range.
Order Form vs. Contact Form vs. WooCommerce
Not sure which one fits your situation? Here’s a quick side-by-side:
| Tool | Best for | Not ideal for |
| Contact form | Simple inquiries, no payment involved | Any transaction |
| Order form (FormGent) | A handful of products or services, one-off or subscription payments, low SKU count | Large catalogs, inventory management, shipping-rate logic |
| WooCommerce | Full storefronts, large catalogs, inventory/tax/shipping automation | Quick single-page sales, service businesses, simple bookings |
Here’s the simplest way to decide. Selling three services? Ten products? Don’t need to track inventory? An order form gets you live faster. Running a real storefront with dozens of SKUs? Go with WooCommerce. We’ll come back to that trade-off in more detail later in this guide.
Who Needs a WordPress Order Form?
Order forms show up across a wide range of businesses. The right fields just depend on what you’re selling. Here’s a quick reference:
| Business type | Example use | Recommended fields |
| Service providers/freelancers | Package selection plus a custom quote | Payment Item (choice-based) + Custom Payment Amount |
| Small product sellers | T-shirts, merch, a limited set of SKUs | Payment Item + Quantity + Payment Summary |
| Restaurants/cafes | Pre-orders, catering requests | Payment Item (checkbox multi-select) + Quantity |
| Nonprofits | One-off or recurring donations | Payment block set to one-time or subscription mode |
| Event or booking add-ons | Adding a paid extra to a reservation | Payment Item + Date/Time Picker |
Find your business in that list? Good — the step-by-step build below will map closely to what you need.
Want to see one worked all the way through first? FormGent has a dedicated walkthrough on how to create a T-shirt order form, which covers the “small product seller” row in full. Worth a look alongside this guide.
What You Need Before You Start
A few things to have ready before you open the form editor, so you’re not stopping mid-build to go set something up:
- A form plugin with native payment support. This guide uses FormGent, which has product, quantity, and payment fields built in.
- A payment gateway account. You’ll need an account with at least one of Stripe, PayPal, or Mollie before you can connect it to your form.
- SSL/HTTPS enabled on your site. Every payment gateway requires this for PCI-compliant data handling — if your site doesn’t have it yet, that’s step zero.
- A clear list of what you’re selling and at what price. Decide this before you start building. It’s much faster to fill in a form once you know exactly what products or services you’re offering than to figure it out field by field.
With those in place, you’re ready to build.
How to Create an Order Form in WordPress (Step-by-Step)
Here’s the full build, from an empty form to a live, calculating order form.
Step 1: Install and open FormGent
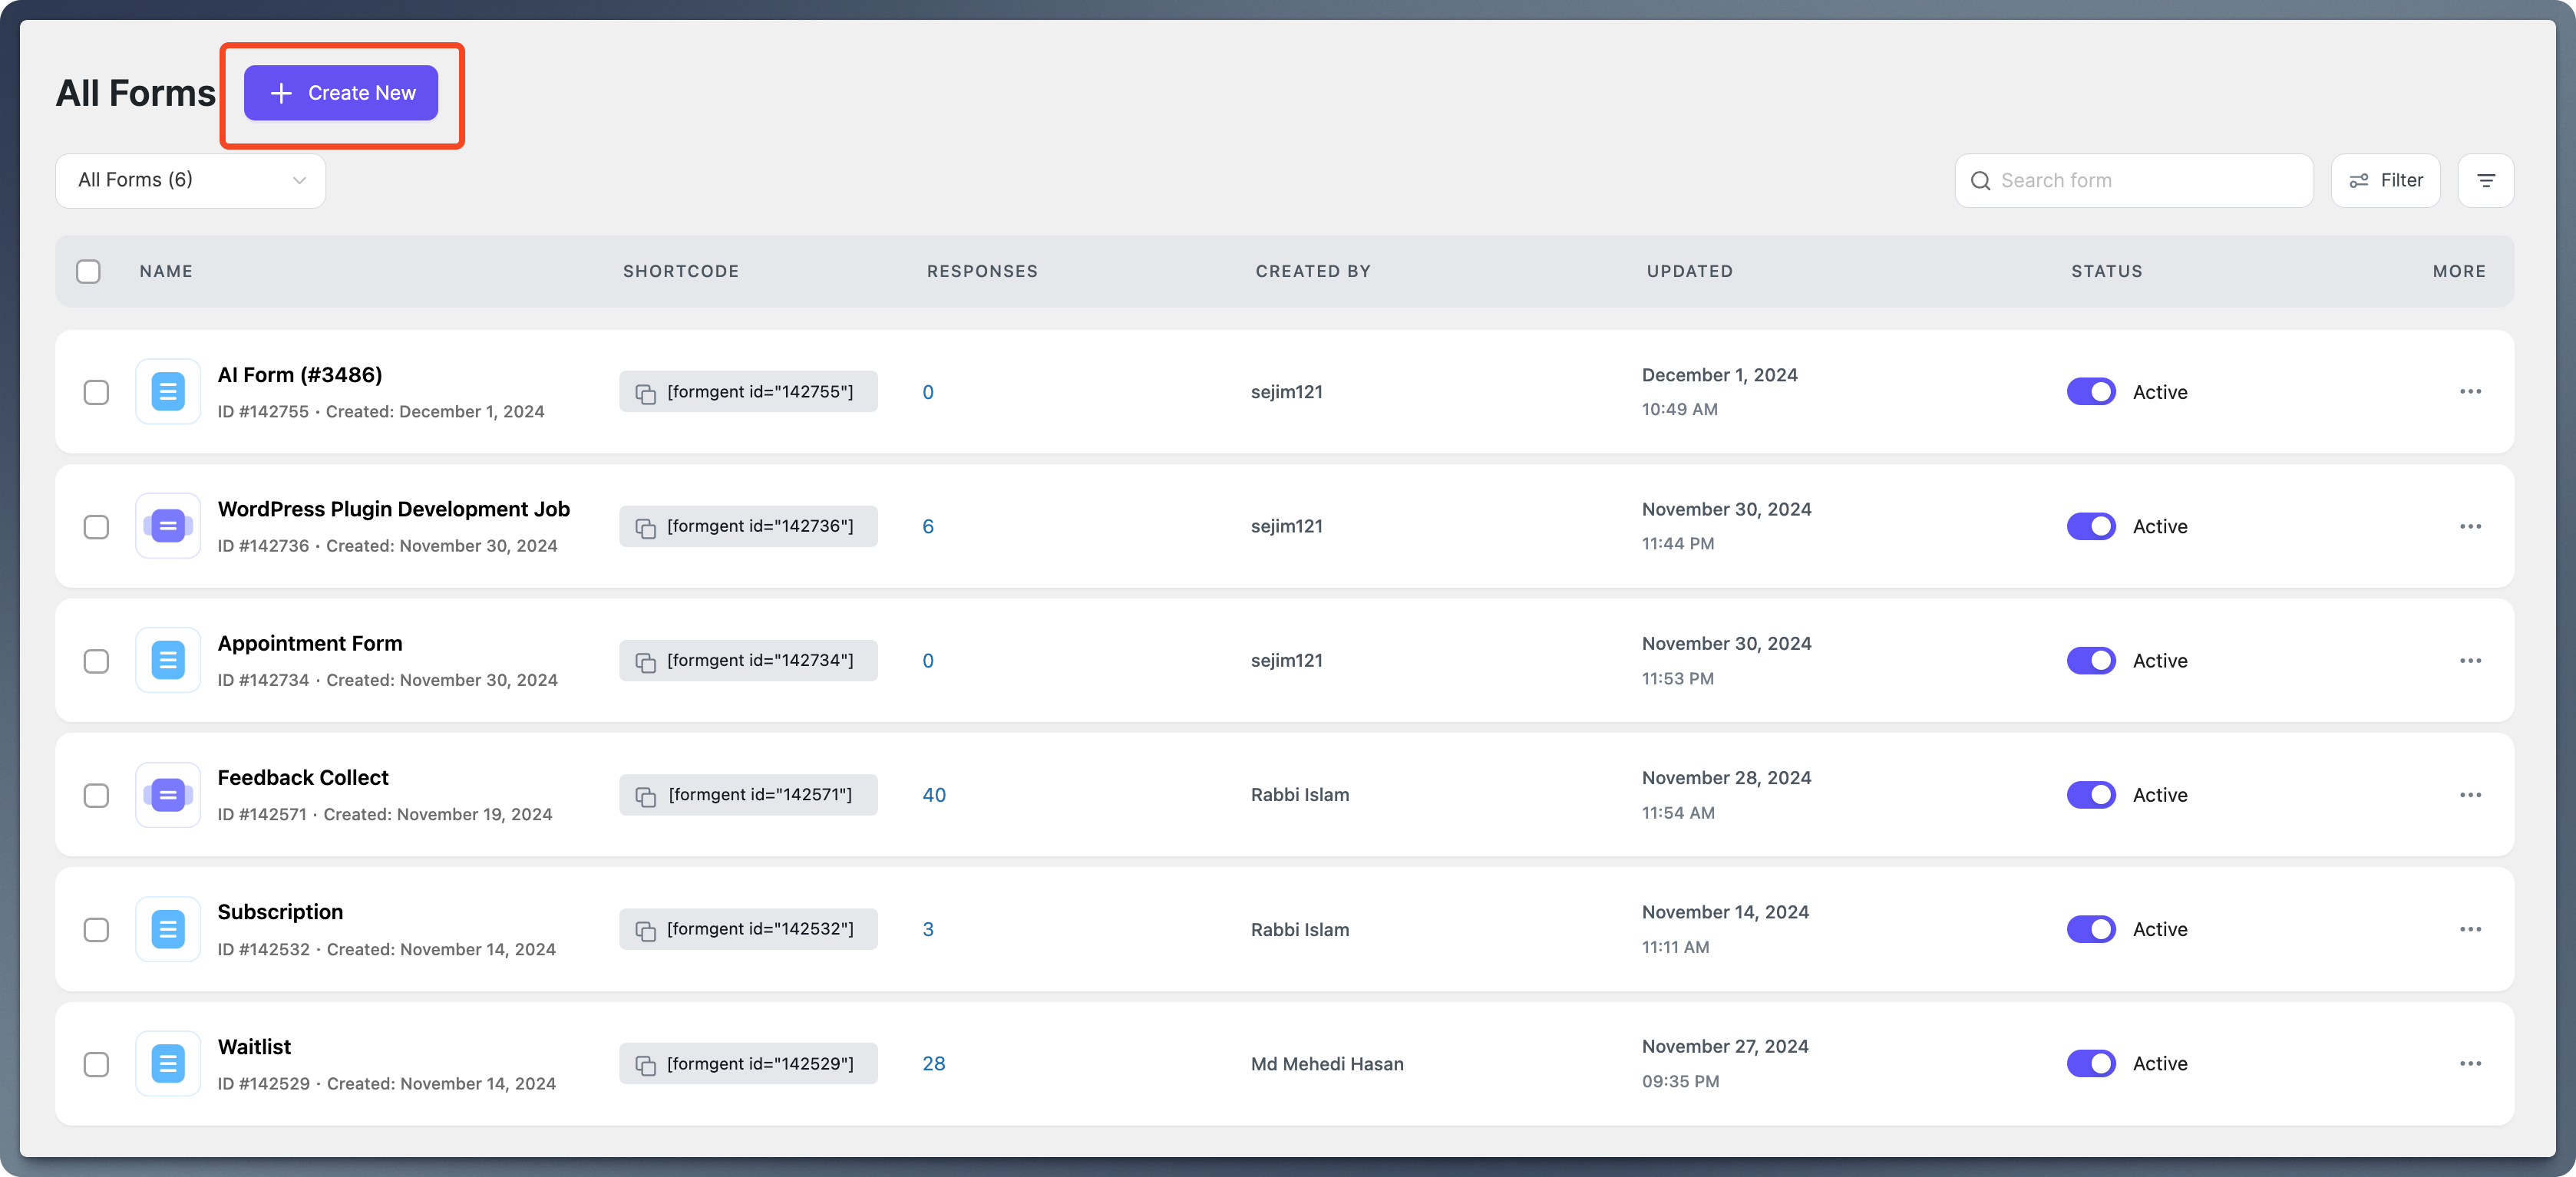
Install the FormGent plugin from your WordPress dashboard, then create a new form. You can start from a blank form or from an order-form template if one’s available — either way, the fields below work the same. FormGent’s own step-by-step guide to creating your first form covers this part in more detail if you want a closer look.
Step 2: Enable payments in Settings
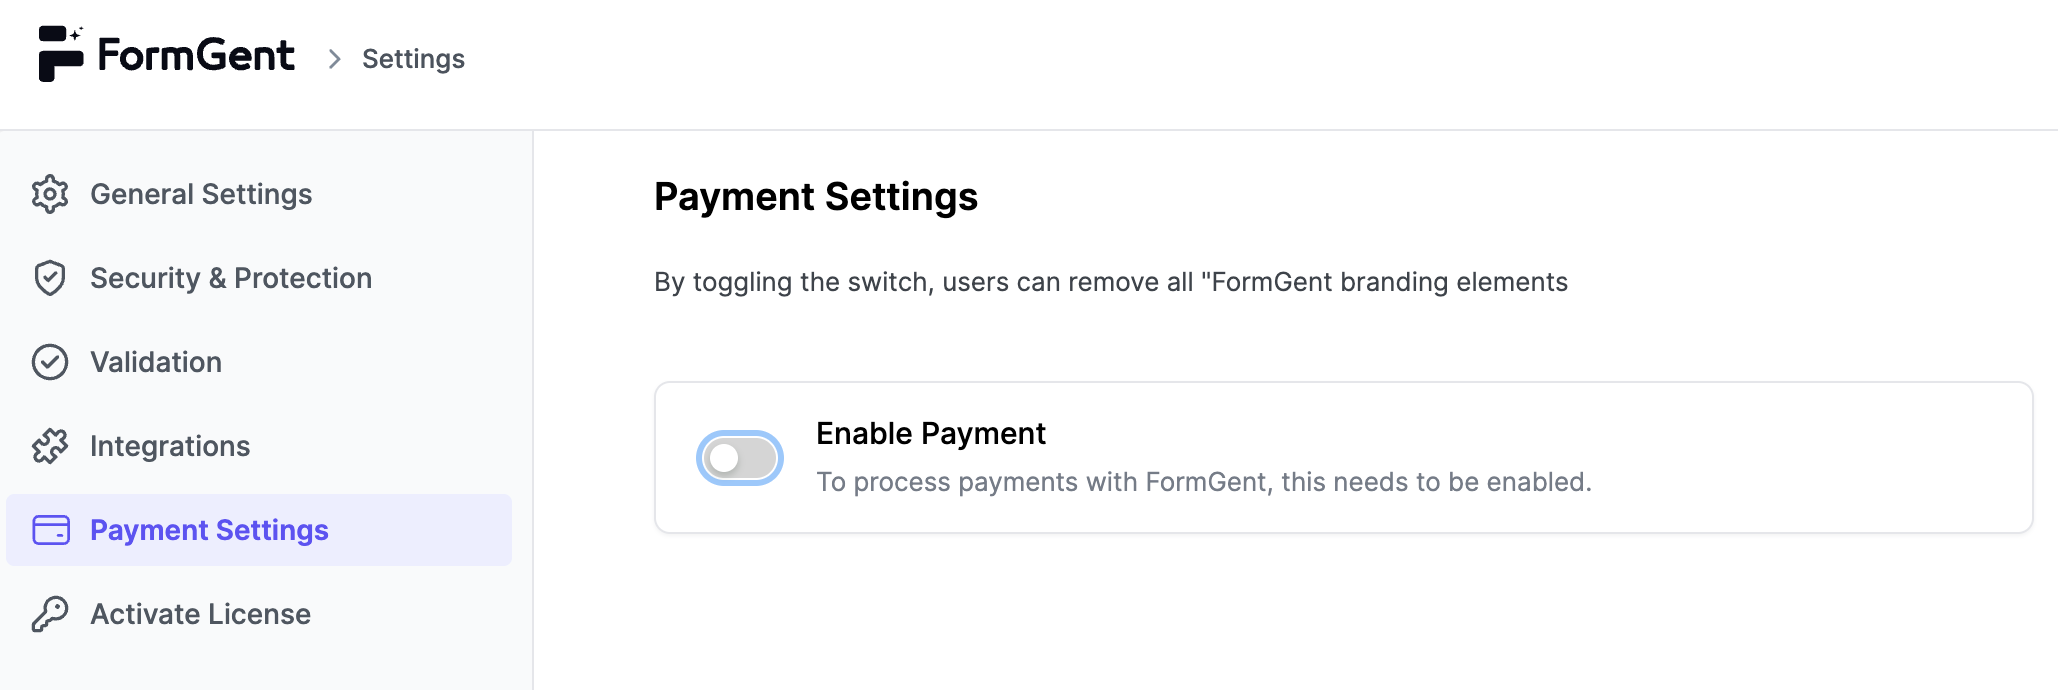
Before any of the payment-related fields will work, you need to turn payments on. Go to FormGent’s payment settings and flip the payment toggle. This is what activates the product, quantity, custom amount, and payment summary fields — they won’t appear as usable blocks until this is switched on.
Step 3: Add a Payment Item block for your products
The Payment Item block is your product list — one of the blocks available in FormGent’s editor. Add one for each product or service you’re selling, along with its price. You can choose how it displays: radio buttons for a single selection, checkboxes if buyers can pick more than one item, or a dropdown if you have a longer list.
Step 4: Add a Quantity block for each product
This is where a lot of order forms fall short. Search around and you’ll find WordPress form plugin users asking the same question: how do I let someone order several units of different products in one submission? Too often, the answer is they can’t — the plugin only supports one quantity for the whole order, not one per product.
FormGent’s Quantity block solves this directly. Attach one to each Payment Item. Set a sensible minimum and maximum (the default is 1 to 100). Now buyers can set an individual quantity for every product they select, instead of being stuck with one quantity for the entire order.
Step 5: Add a Payment Summary block
Drop in a Payment Summary block. It builds a live table automatically — item, price, quantity, total — and updates as the buyer makes selections. No hand-assembling a separate “Total” field. No wiring up a calculation yourself. The summary block handles the math and shows it all in one place.
Step 6: Connect a payment gateway
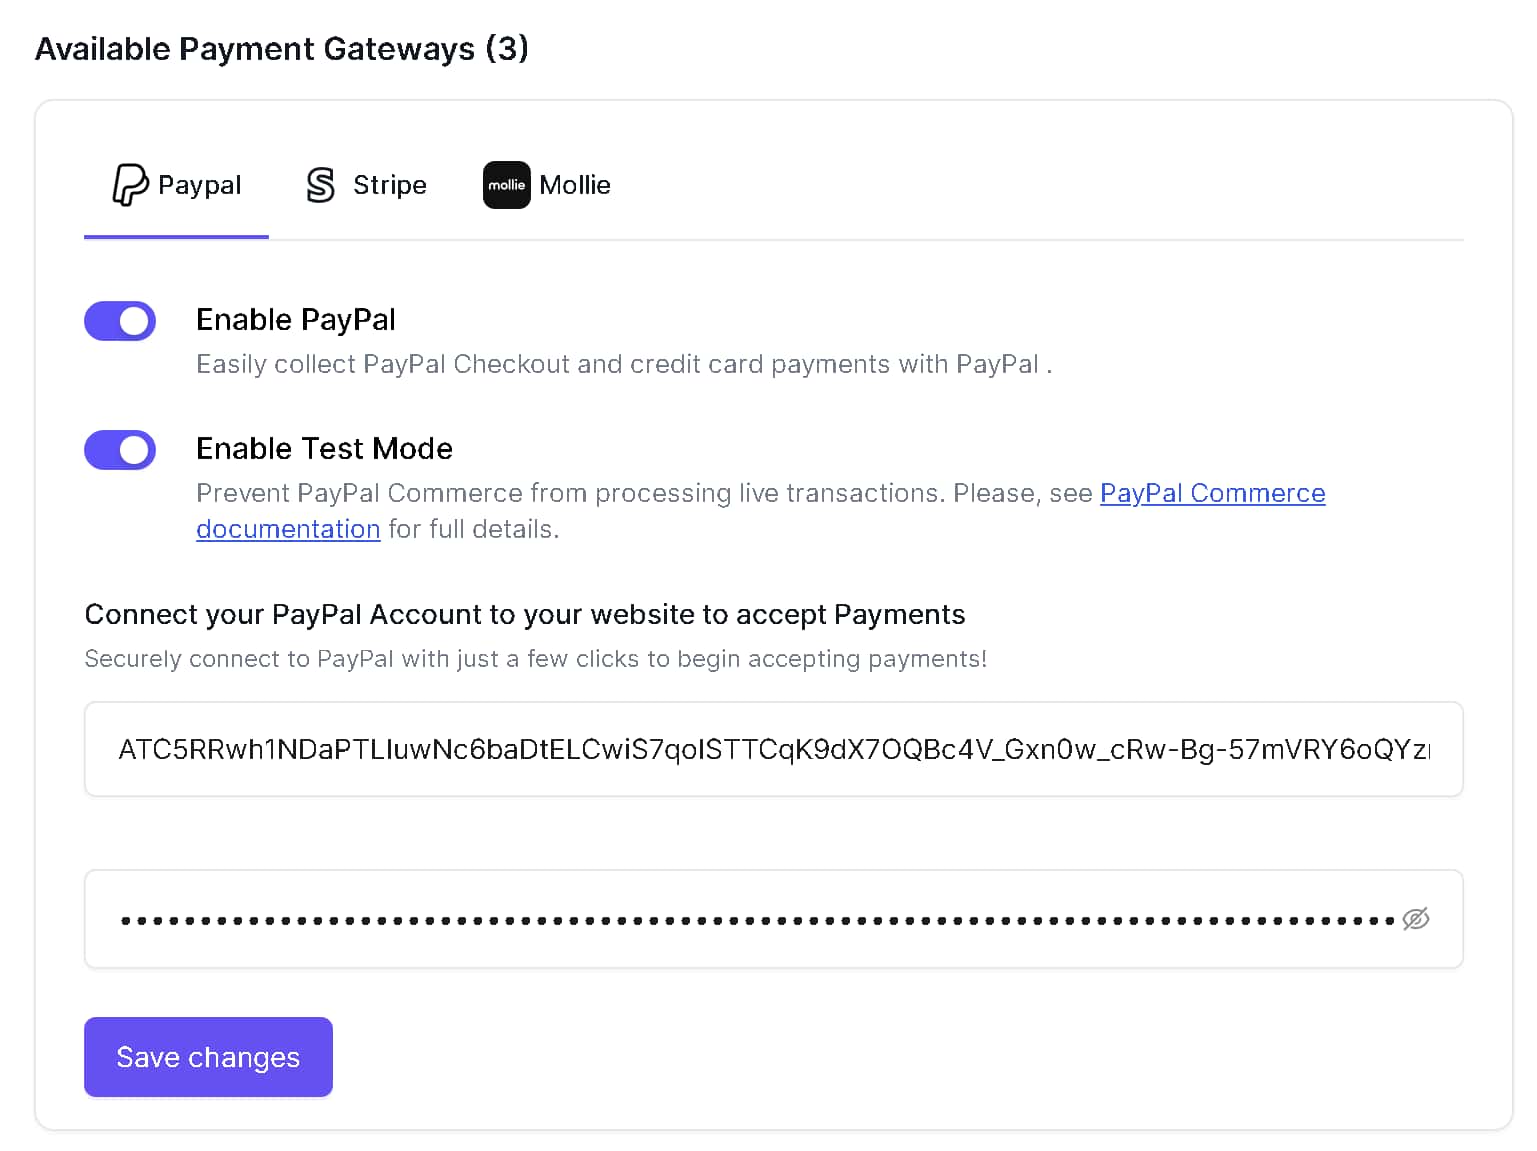
Connect Stripe, PayPal,or Mollie. All three are available on FormGent’s free plan. No license upgrade needed just to accept payments.
That’s not the case with every form plugin. Some require a paid tier just to unlock more than one gateway. Others add a transaction fee on the free version.
Using Mollie specifically? FormGent has a dedicated setup guide that walks through getting your API key and testing a transaction.
Step 7: Choose one-time or subscription billing
Decide whether this order form is for a single payment or a recurring one. Setting up a subscription? You’ll configure the billing interval, and you can add a free trial period if you want one.
One-time payments work with all three gateways. Need recurring payments? Stripe is the gateway to use on the free plan. Recurring PayPal billing specifically is a FormGent Pro feature — one-time PayPal payments are still free.
Step 8: Set up notifications and confirmation
Set up two things in FormGent’s single form settings: an admin notification, so you know the moment an order comes in, and a confirmation message or email for the buyer.
Make that confirmation count. Recap what they ordered — item, quantity, total. That way they have a record on hand, without needing to dig through their email later.
Step 9: Add spam and consent protection
Your form collects payment details and personal information, so protect it on two fronts. Add a CAPTCHA block to filter out automated bot submissions. Add a GDPR consent block too, if you’re collecting data that requires explicit consent under GDPR.
Both are dedicated blocks built right into FormGent — no separate plugin to bolt on. For a deeper look at spam prevention specifically, see FormGent’s guide on avoiding spam submissions.
Step 10: Publish and embed the form
Add the finished form to a page or post using the block editor, then publish.
Step 11: Test the full flow
Before you consider this done, submit a real test order yourself. Pick a product. Set a quantity. Go through checkout. Confirm that the notification and the confirmation message both fire correctly.
It’s the only way to catch a misconfigured gateway or a broken confirmation message before a real customer does.
Create this form with FormGent →
Good vs. Bad Order Form Examples
Small details make a big difference in how an order form performs. Here’s a direct comparison.
Field-by-Field Comparison
Same field, two ways to build it. Here’s what changes:
| Element | Weak example | Strong example |
| Product labels | “Item 1,” “Item 2” | “Classic Cotton T-Shirt — $18” |
| Quantity | No limit, free-text number field | Quantity block with a sensible min/max (e.g., 1–10) |
| Total visibility | Total only shown after submitting | Live Payment Summary table visible while filling out the form |
| Confirmation | Generic “Thank you” | Order recap with item, quantity, and total in the confirmation message |
| Error handling | Silent failure on an invalid quantity | Inline validation message next to the field |
Microcopy Examples
Small wording choices matter more than they seem to. A button labeled “Add to Order” tells the buyer exactly what’s about to happen; “Submit” doesn’t. Helper text matters too. Add a line under a Quantity field like “Max 10 per order,” and you head off confusion before it happens — not after someone tries to order 50 and hits an error.
Recommended Layouts
For a short list of products (say, one to five items), a single-page form works fine — buyers can see everything at once. Combining an order with extra information — a shipping address, event details, customer notes? That’s when things start to feel cluttered on one page. A multi-step form fixes that. Add a page break, and you split the product selection from the customer-details section, so each screen only asks for one thing at a time.
Order Form vs. WooCommerce: Which Should You Use?
This is one of the most common questions people run into once their order form starts getting real traffic. Here’s how to think about it.
An order form and WooCommerce solve overlapping but different problems. The decision mostly comes down to three things:
- How many products you’re selling
- Whether you need inventory or shipping automation
- How transactional the page needs to feel
When to Start with an Order Form
- You have a small, stable set of products or services (roughly under a dozen)
- You’re a service-based business without physical inventory to track
- You want something live today, not after a multi-day store setup
- Your payment needs are simple: one-time or subscription, no complex shipping rules
When to Move to WooCommerce
- Your catalog is growing past what a single form can reasonably display
- You need inventory tracking, so you don’t oversell a limited-stock item
- You need automated tax or shipping calculation
- You want a full browsable storefront rather than a single-page order flow
Worth being upfront on that third point. FormGent’s order form fields (see the full feature list) handle product selection, quantity, and totals. They don’t include built-in inventory tracking or automatic tax calculation. If those are must-haves for you, WooCommerce is the better fit.
Plenty of sites start with an order form and move to WooCommerce later, once volume justifies the extra setup. There’s no reason to build a full store before you need one.
Common Order Form Mistakes to Avoid
A few mistakes show up again and again. They’re worth calling out on their own:
- Hiding the total until after submission. This is one of the fastest ways to lose a buyer’s trust — show the running total the whole time, not as a surprise at the end.
- Using one free-text quantity field for the whole order instead of a quantity field per product. It’s the exact limitation buyers run into with plugins that don’t support per-item quantity.
- Skipping spam and consent protection on a form that handles payment and personal information — it’s not optional once real money and real data are involved.
- Publishing without testing the full payment flow. A preview isn’t the same as a real transaction going through your connected gateway.
- Overcomplicating a small order form with unnecessary multi-step pages when a single page would do the job faster.
- Promising more than the plugin delivers — for example, telling customers their order includes automatic tax calculation when that’s not something the form actually handles. Be upfront about what the form does and doesn’t do, and point to WooCommerce when a request genuinely needs it.
How to Track and Measure Your Order Form’s Performance
Once your order form is live, you’ll want to know whether it’s actually working. A few metrics matter more than others:
- Completion rate — the percentage of visitors who start filling out the form versus those who finish it. A low completion rate usually points to friction somewhere in the form itself.
- Drop-off rate — where in the form people abandon most often. If you’re using a multi-step layout, this becomes visible per step, which makes it easier to pinpoint the problem field.
- Conversion rate — how many form views turn into completed, paid orders. This is the number that ties most directly back to revenue.
- Submission quality — the percentage of entries with valid, usable data. A spike in incomplete or malformed submissions (missing quantity, invalid payment info) is a sign something in the form’s validation needs attention.
- Spam rate — how many submissions your CAPTCHA or GDPR blocks are catching over time. Watching this trend tells you whether spam protection needs tightening.
You can review entry-level data directly inside FormGent’s entries dashboard, and FormGent’s built-in reports and analytics view gives you visual charts and summaries without leaving WordPress. If you want deeper visibility — traffic sources, on-page behavior leading up to a submission — connecting Google Analytics gives you that layer on top, without replacing the entry data FormGent already tracks for you.
Pre-Publish Checklist
Run through this before your order form goes live:
- Every product or service has a clear name and price
- Quantity limits are set per product (not one unlimited free-text field)
- A Payment Summary table is added so totals are visible before submission
- At least one payment gateway is connected and tested in sandbox/test mode
- Notification emails are set up for both admin and buyer
- A confirmation message or redirect is configured
- A CAPTCHA and/or GDPR consent block is added if you’re collecting personal data
- The form has been tested with a real end-to-end submission
- The mobile layout has been checked
- Tracking is in place so you can measure how the form performs after launch
Related Guides and Next Steps
Now that your order form is live, a few related resources can help you take it further:
- See FormGent’s full feature list for a broader look at what’s available beyond order forms.
- Read the payment integrations documentation for more detail on connecting and configuring Stripe, PayPal, and Mollie.
- Browse the template library if you’d rather start from a template than build from scratch.
- If your order form includes one-off or recurring gifts, see how to create a donation form in WordPress for that specific use case.
- Building an order form as part of a bigger lead-generation push? How to build a lead generation form covers the adjacent workflow.
- For a full worked example close to this guide, see how to create a T-shirt order form.
- See how FormGent compares to other WordPress form plugins if you’re still evaluating.
There isn’t yet a dedicated FormGent guide specifically for payment form plugins or Stripe integration as standalone pages — see the Internal Link Status note below for what’s planned there.
Wrapping Up
Building an order form in WordPress doesn’t take a full ecommerce setup. It takes a product field, a quantity field, and a payment gateway.
What separates a good one from a mediocre one is the details most tutorials skip: quantity set per product, a running total your buyer can actually see, and a full test run before you go live.
Follow the steps above. Run through the checklist. You’ll end up with an order form that isn’t just functional — it’s genuinely easy for your customers to use.
Try the FormGent’s AI form builder to create your order form →
What is an order form in WordPress?
A WordPress order form lets visitors pick products or services, set quantities, and pay — all inside a page, without a full shopping cart. For example, a small bakery might use one to sell custom cake orders with a live-calculating total.
Do I need WooCommerce to sell products through a WordPress form?
No. For a small number of products or services, an order form with a payment field handles pricing, quantity, and checkout without installing a full store. WooCommerce becomes worthwhile once you need inventory tracking, shipping rules, or a large catalog.
How do I build an order form with FormGent?
Enable payments in Settings, then add a Payment Item block for your products, a Quantity block if needed, and a Payment Summary block for the live total. Connect Stripe, PayPal, or Mollie — all available on the free plan.
Which payment gateways can I use on a free WordPress order form plugin?
With FormGent, Stripe, PayPal, and Mollie are all available on the free plan.
Can I offer subscriptions or recurring payments through an order form?
Yes — FormGent’s Payment block supports subscription billing using Stripe and PayPal.
Is FormGent’s order form mobile-friendly?
Yes, provided the form is built with a plugin that renders responsive blocks. Always preview and test the form on a phone-sized screen before publishing, since layout issues are easy to miss on desktop.
Can I let customers order different quantities of different products in one form?
Yes — pair a Quantity block with each Payment Item so buyers can set an amount per product individually. This is a common gap in other WordPress form plugins, where quantity applies only to the whole order, not per item.
How do I stop spam submissions on an order form?
Add a CAPTCHA block to block automated bots, and a GDPR consent block if you’re collecting personal data. Testing the form with a real submission afterward confirms both are working as expected. FormGent’s guide to avoiding spam submissions covers this in more depth.
What’s the difference between an order form and a payment form?
A payment form usually collects a single fixed or custom amount; an order form lets buyers choose from multiple products, set quantities, and see an itemized total before paying. The building blocks overlap, but an order form needs product and quantity fields in addition to a payment field.
What are the best practices for an order form?
Show the total before submission, set sensible quantity limits, and confirm every order by email. For example, capping a limited-run product at “max 5 per order” prevents overselling confusion.


Leave a Reply