
How to Build a Lead Generation Form (Step-by-Step, 2026)
-
- Form Builder AI-Form Builder Tips and Tricks
- 9 mins read

People visit your website because they want something: an answer, a price, a useful resource, or help with a problem. A lead generation form gives them a simple way to ask for it. In return, you get the contact details you need to follow up.
The form does not need to be complicated. Start with a clear offer, ask only for useful information, and make sure every submission reaches the right place. This guide shows you how to plan, build, and improve a lead generation form with FormGent in WordPress.
What Is a Lead Generation Form?
A lead generation form collects details from someone who is interested in your business. Usually, that means an email address and sometimes a name or a short answer about what they need.
For example, a visitor might enter their email to receive a free checklist. Someone else might describe a project so you can send them a quote. In both cases, the visitor understands what happens after they fill out the form.
A general contact form serves a different purpose. It lets people send any question. A lead form is tied to one offer and a planned follow-up.
| Form | What the visitor wants | Typical next step |
|---|---|---|
| Contact form | To ask a question | Someone replies to the message |
| Lead generation form | To receive a guide, quote, demo, or other offer | The visitor receives the offer and, when appropriate, enters a follow-up process |
You can put a lead form in a blog post, on a landing page, near a pricing section, or on a page linked from an ad. Pick the spot where the offer makes sense to the visitor.
Plan the form before you build it
Answer three questions first:
- What will the visitor get? Say exactly what you offer, such as a checklist, a product demo, or a personal quote.
- What do you need to ask? Collect enough information to deliver that offer and take the next step.
- What happens after submission? Decide who receives the details and when the visitor will hear from you.
These answers make the rest of the setup easier. A free download may need only an email address. A quote request may require a few basic details about the project. Asking for an address or phone number on a simple download form may discourage people who are otherwise interested.
Pick a layout that fits the request
| Layout | What it looks like | Good use |
|---|---|---|
| One-page form | All questions appear together | Newsletter signups and downloads with few fields |
| Multi-step form | Questions appear in short groups | Quote requests that need more detail |
| Conversational form | One question appears at a time | Guided requests or surveys |
| Dedicated form page | The form has its own focused page | A specific campaign linked from an ad or email |
Choose the simplest layout that can collect what you need. A longer form can use several steps, but extra steps alone will not improve it. The questions must still feel relevant.
Build your form with FormGent
The following steps use FormGent as the WordPress form builder. Menu labels may vary slightly as the plugin changes.
1. Install the plugin
In your WordPress dashboard, open Plugins → Add New Plugin. Search for FormGent, select Install Now, and then select Activate.
2. Create a form
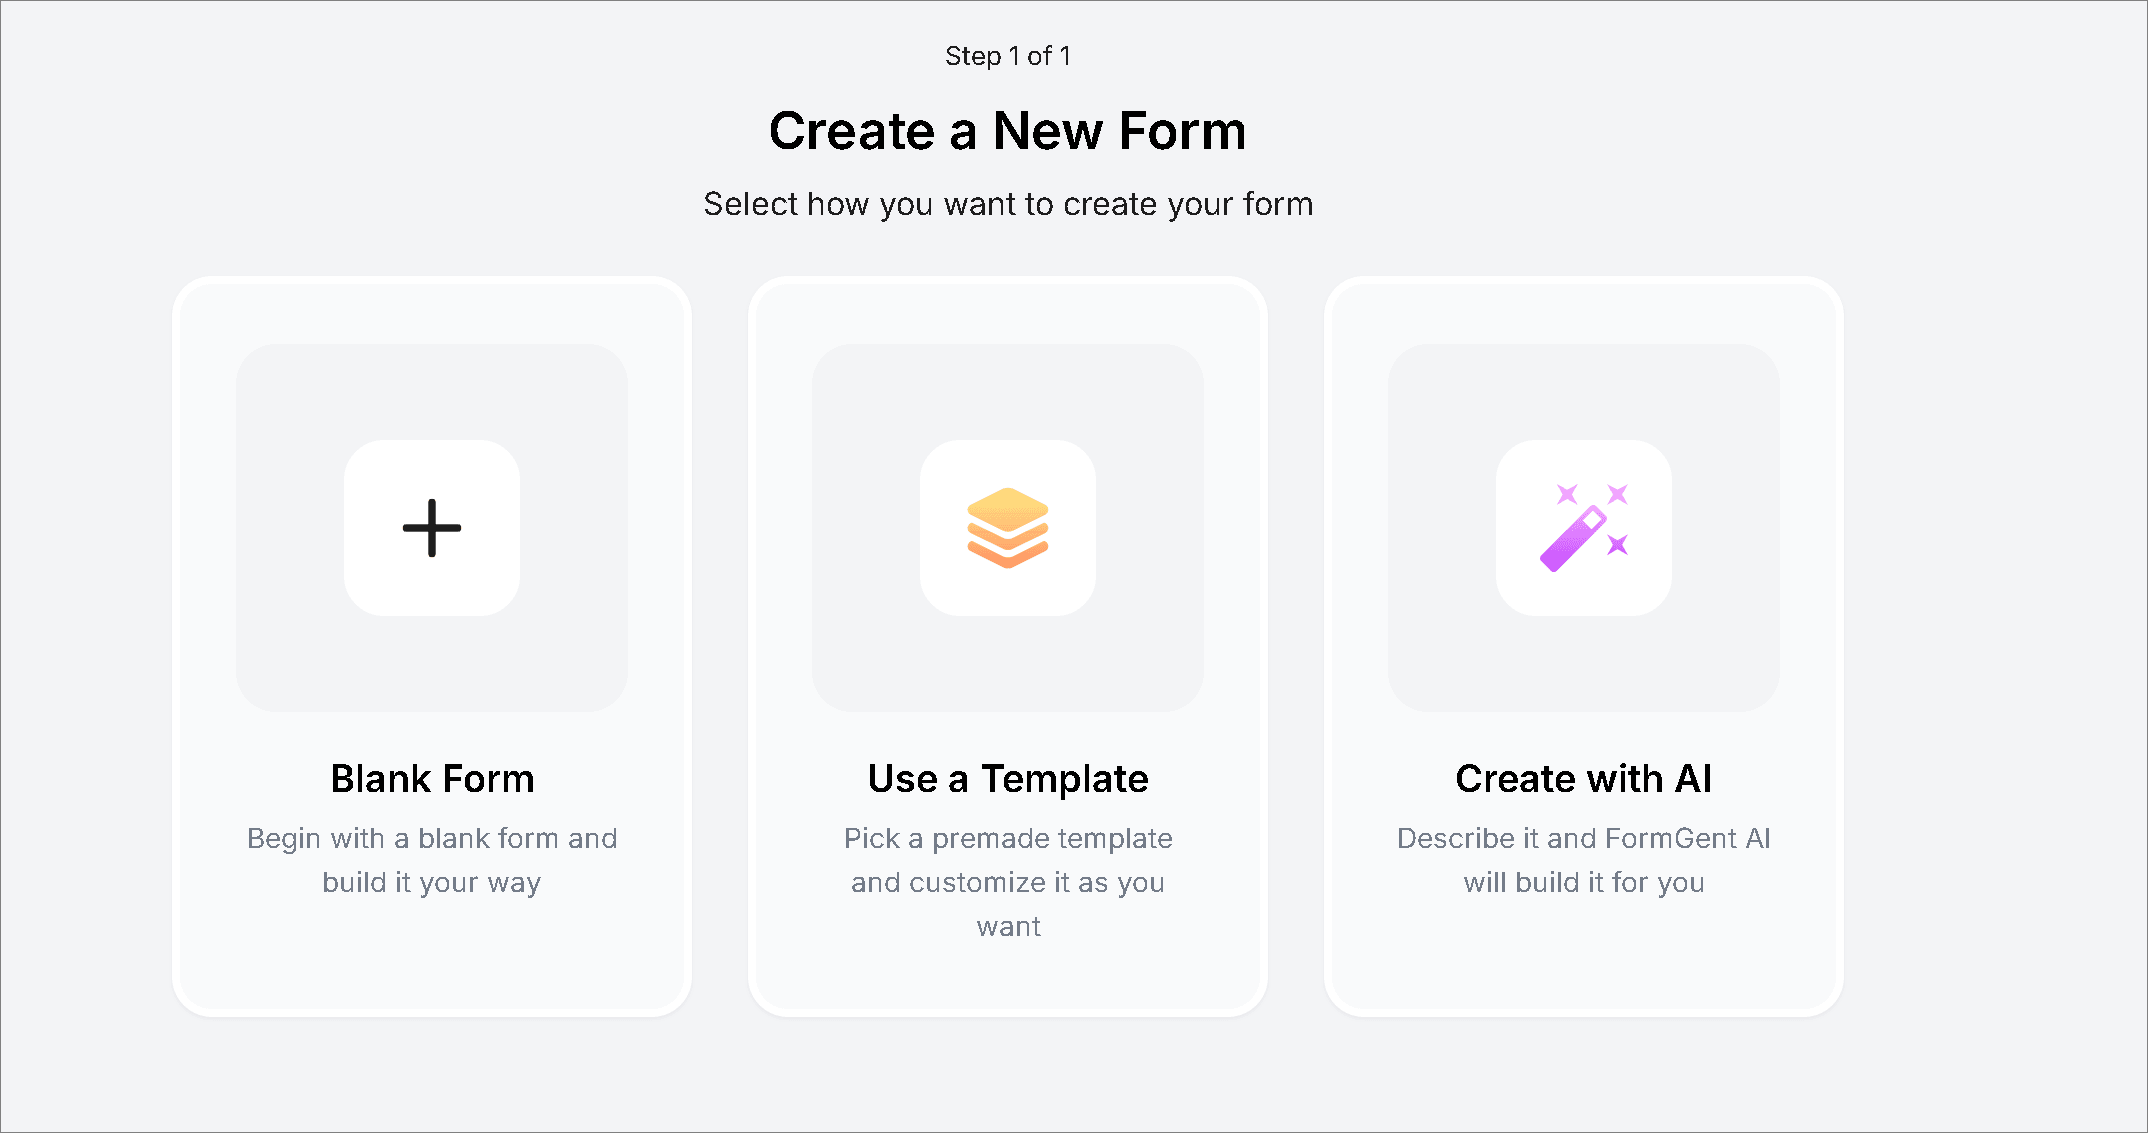
Open FormGent → Add New Form. You can start with a blank form, use an available template, or ask the AI form builder for a first draft.
If you use AI, describe both the offer and the fields. For example:
Create a form for a free website review. Ask for an email address, website URL, and one optional question about the visitor’s main challenge.
Check the result before publishing. Remove any field that does not help you deliver the review.
3. Add only the fields you need
Put the easiest questions first. For a free resource, an email field may be enough. For a service request, you could ask for an email address, the type of service, and a short description of the work.
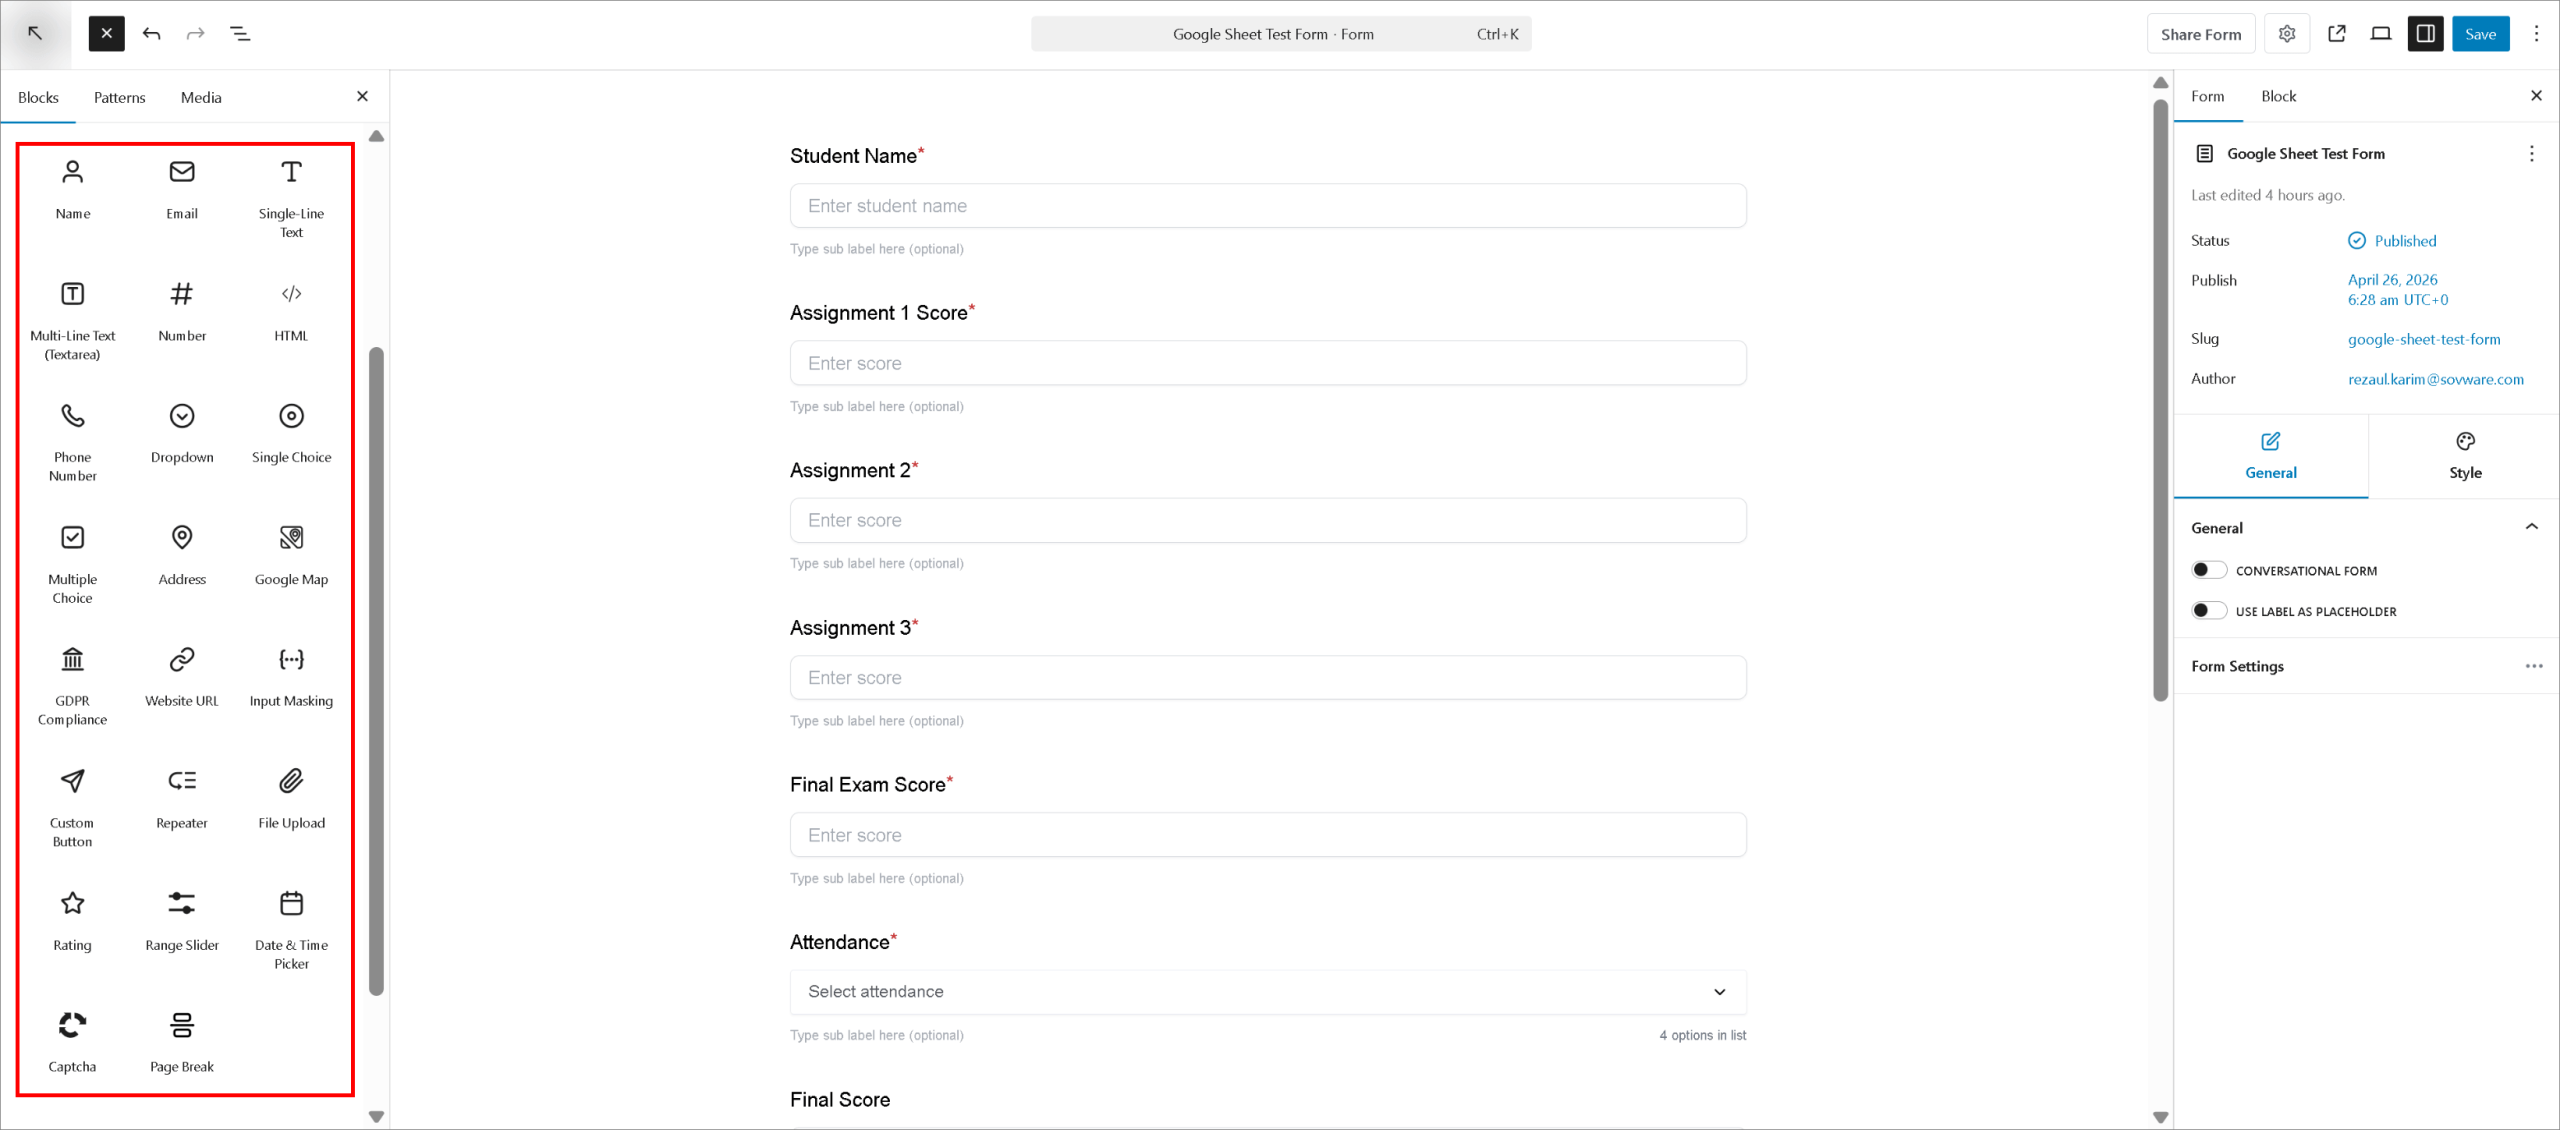
Use clear labels that stay visible while people type. Email address is more helpful than a blank field with a disappearing example inside it. If an answer has a small number of possible choices, a dropdown or choice field may be easier than asking the visitor to write everything out.
Mark a field Required only when you cannot complete the promised next step without it. If a phone number can help but email is enough for follow-up, make the phone field optional.
4. Show follow-up questions only when they matter
Conditional logic lets you display a question based on an earlier answer. Suppose your form asks, “What do you need help with?” If someone selects “Website redesign,” you can show an extra question about their existing site. Visitors requesting a new website do not need to answer that.
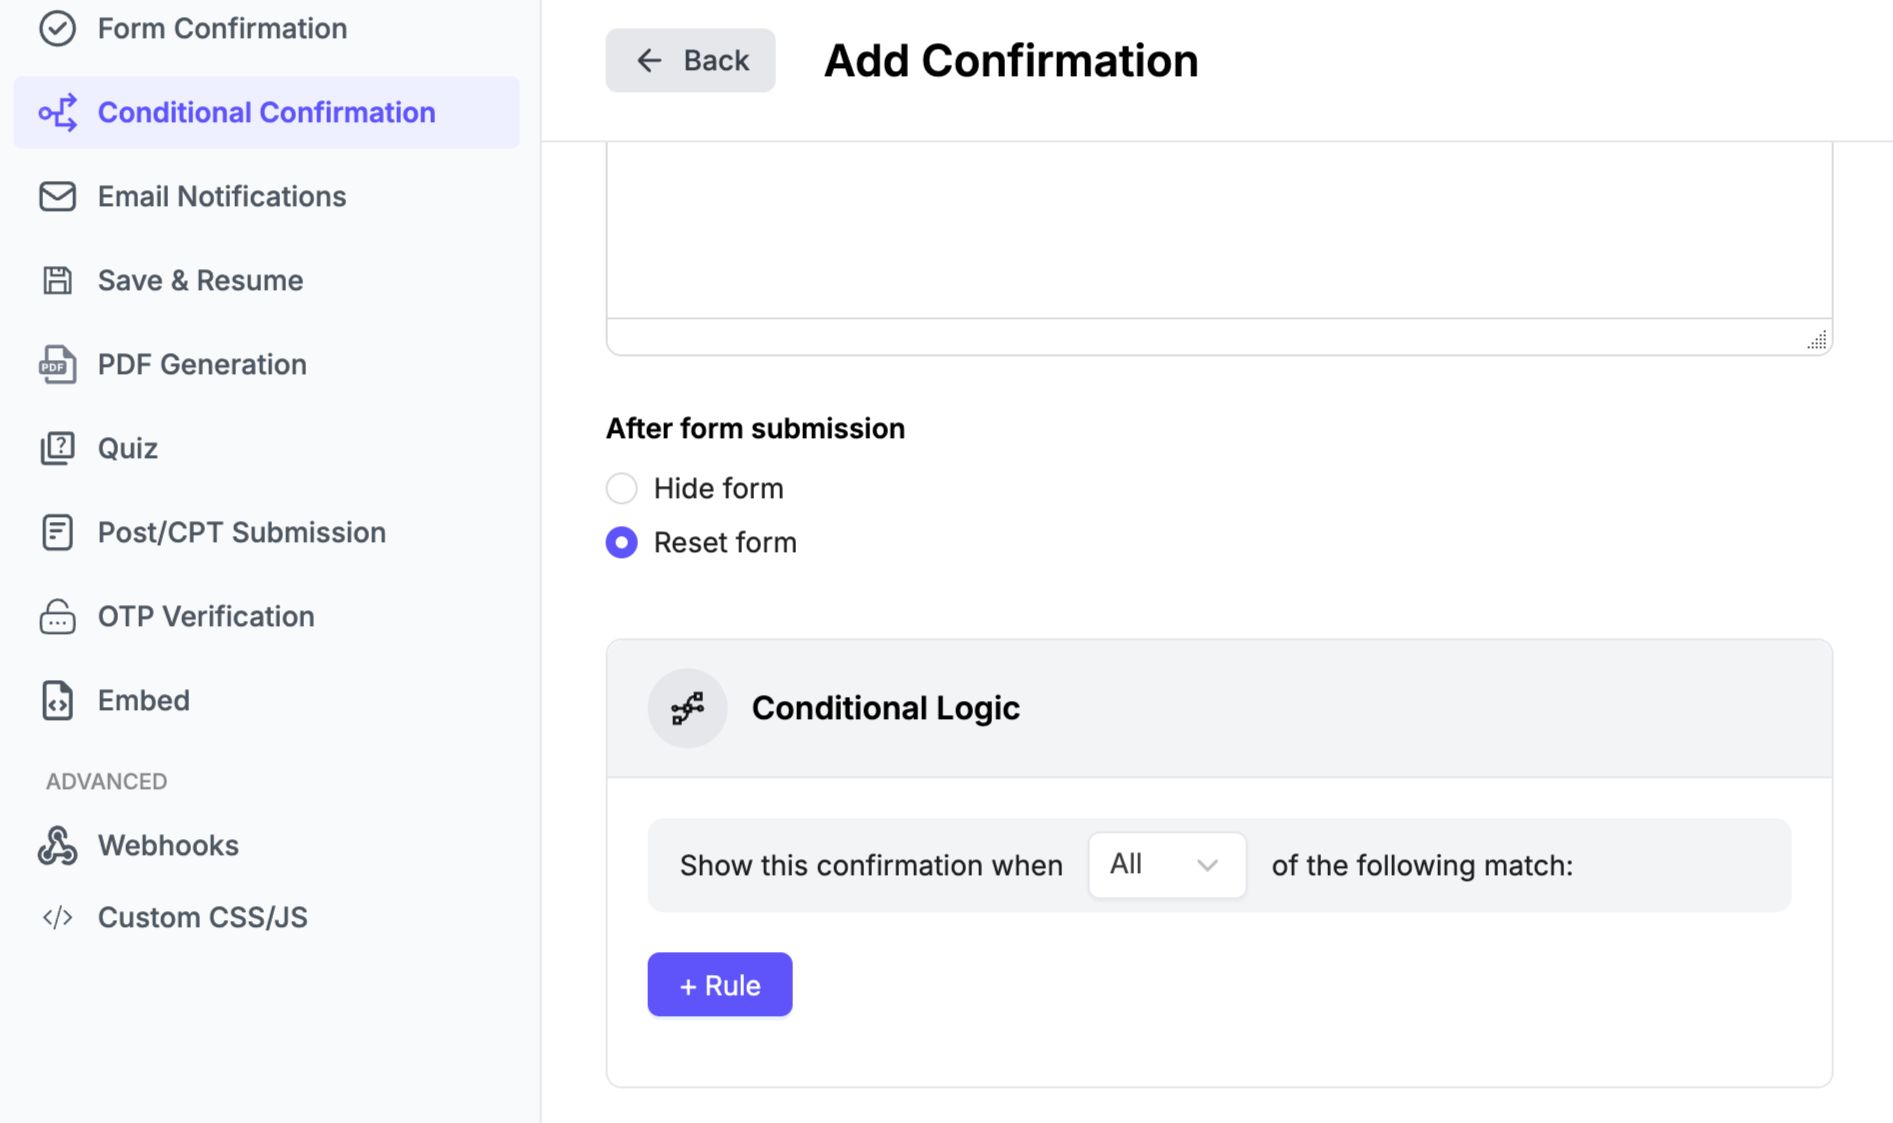
This makes the form feel more tailored without taking away important questions. Test every possible answer path to make sure no visitor reaches a confusing or incomplete form.
5. Make a longer form easier to finish
If you need several questions, group related ones together with FormGent’s Page Break element. For instance, you can start by asking what the visitor needs, then follow up with the best way to reach them. FormGent’s multi-step setup uses Page Break elements, including one at the end of the form, so check the preview and the plugin’s current instructions as you arrange the steps.
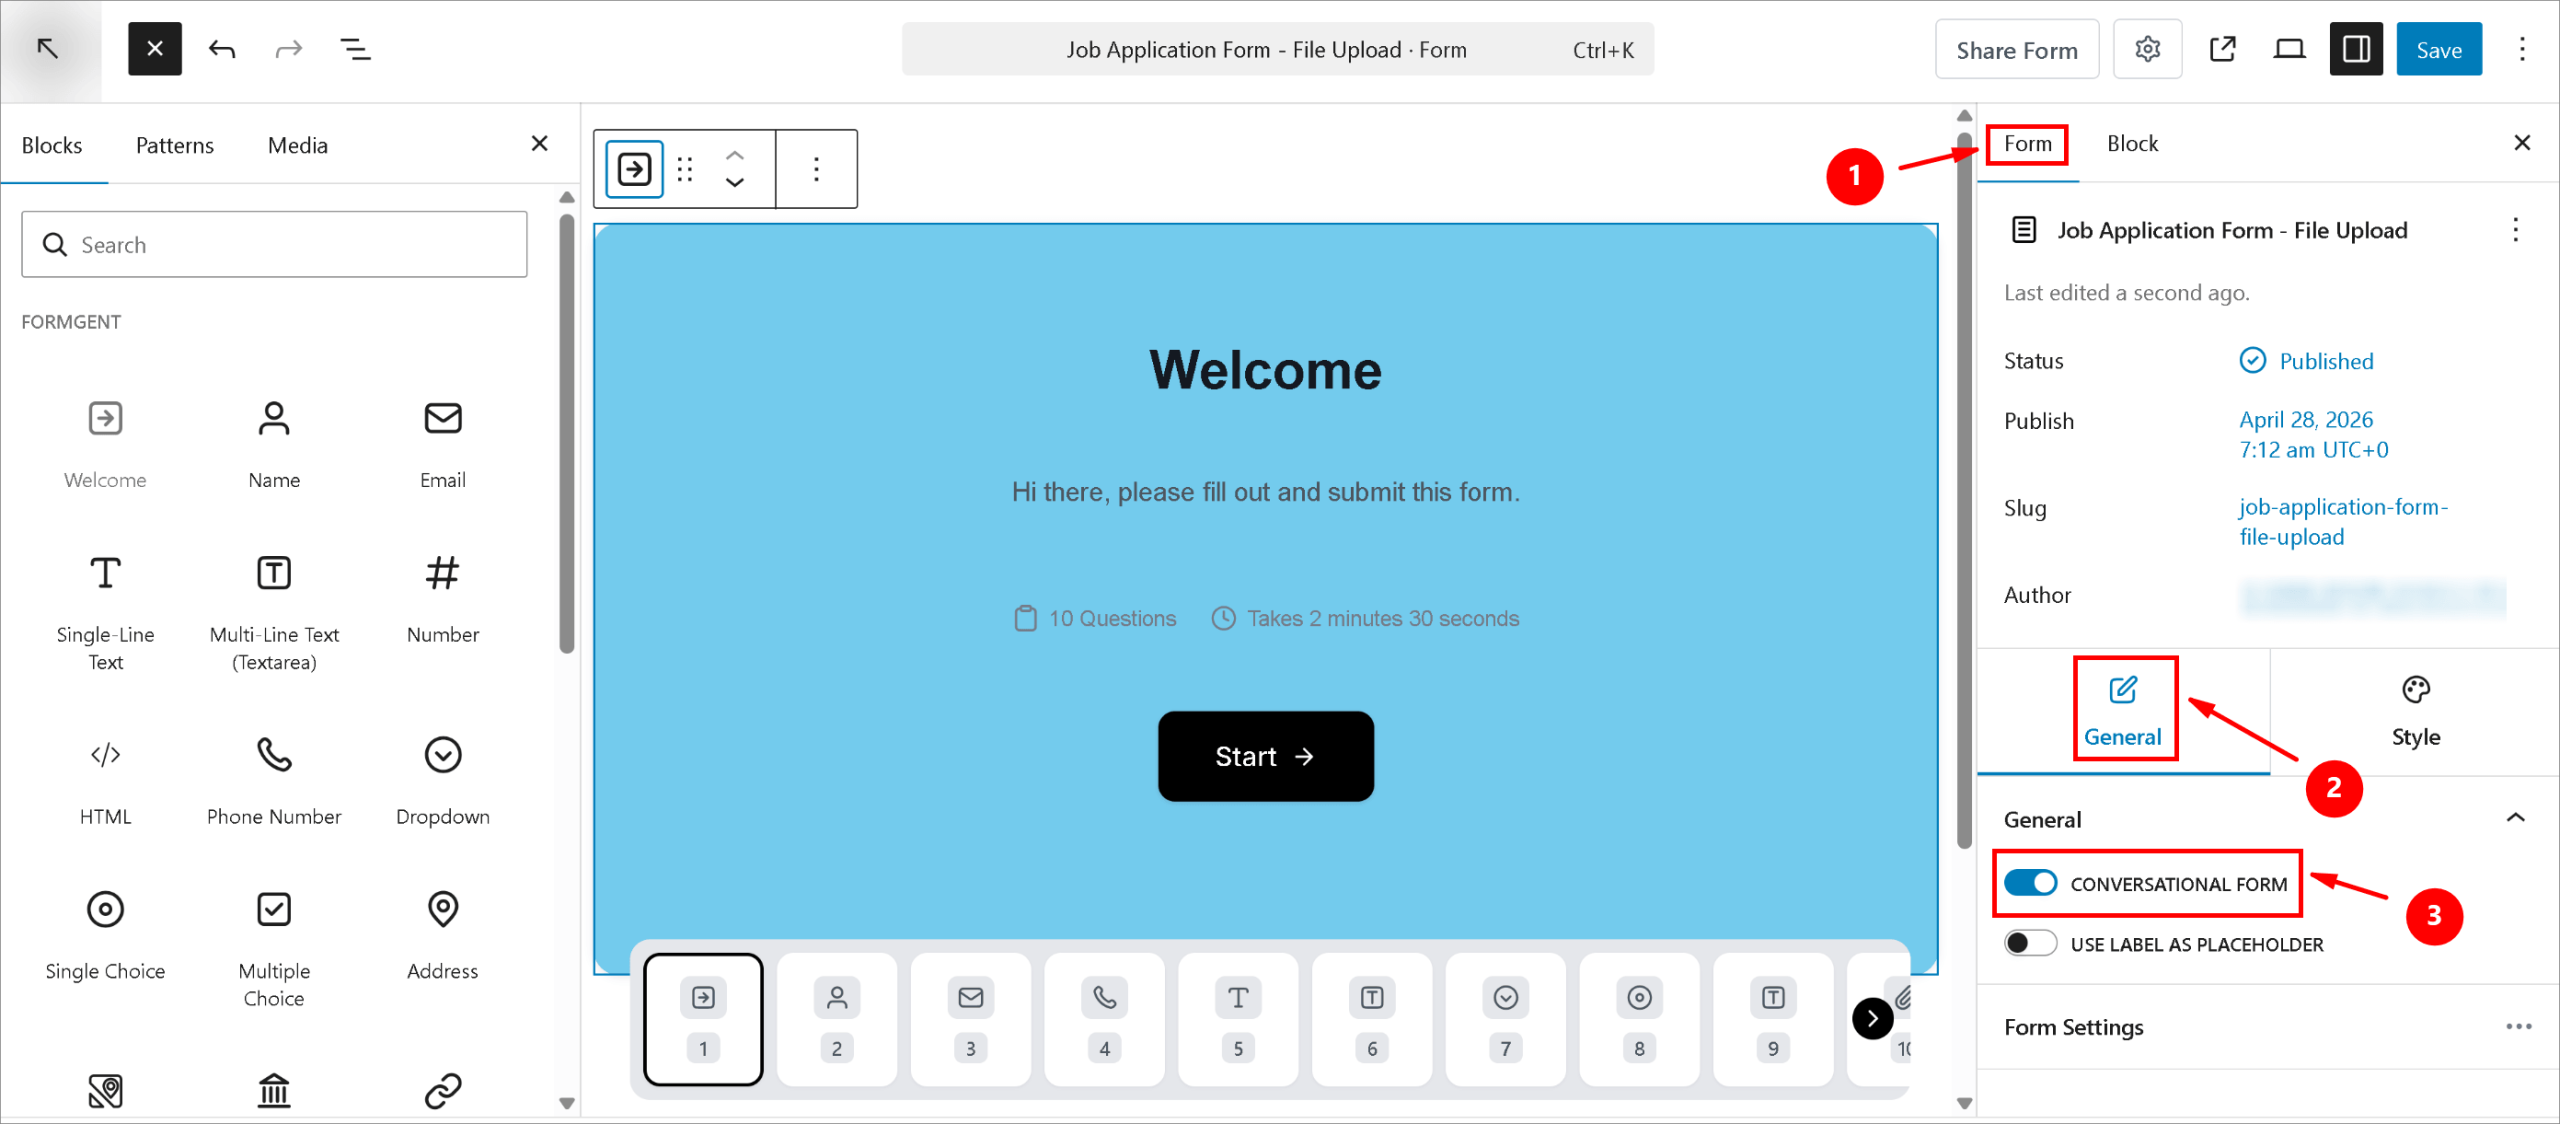
You can also select the conversational layout when creating a form if asking one question at a time fits the experience you want. Whichever layout you choose, make it easy to go back and correct an answer.
6. Set up the confirmation and alerts
Open Form Options and decide what the visitor sees after submission. You might show a thank-you message or send them to a thank-you page. Tell them what happens next: where to find the download, whether you will email them, or when they can expect a reply. Do not set a response-time expectation unless your team can actually deliver on it.
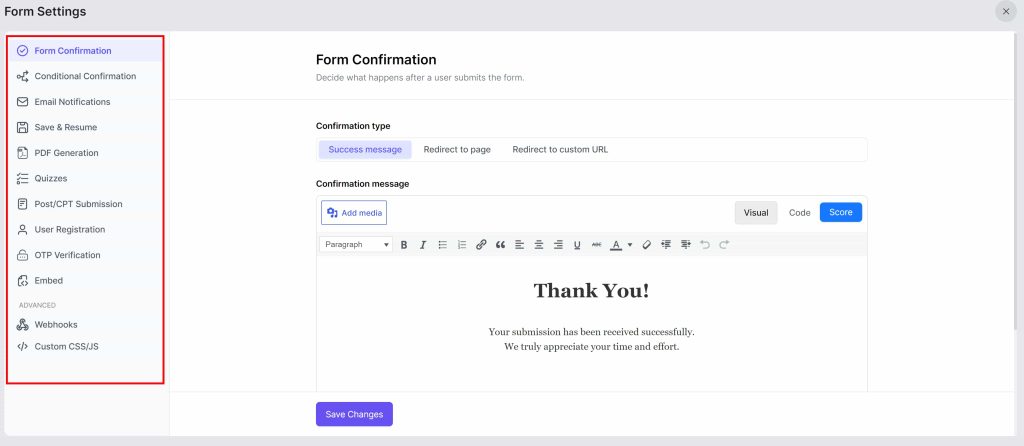
Set up email notifications for the person or team responsible for the lead. A working form is of little use if new requests sit unseen in the dashboard. For longer request forms, make sure features like Save & Resume match your plan and how people will use the form.
7. Send leads to your follow-up tool
In Integrations, connect the destination your team uses. Depending on the integration available to you, that could be a Google Sheet, a Mailchimp list, Zoho CRM, or an automation through Zapier. FormGent also offers a webhook option for other workflows on supported plans.
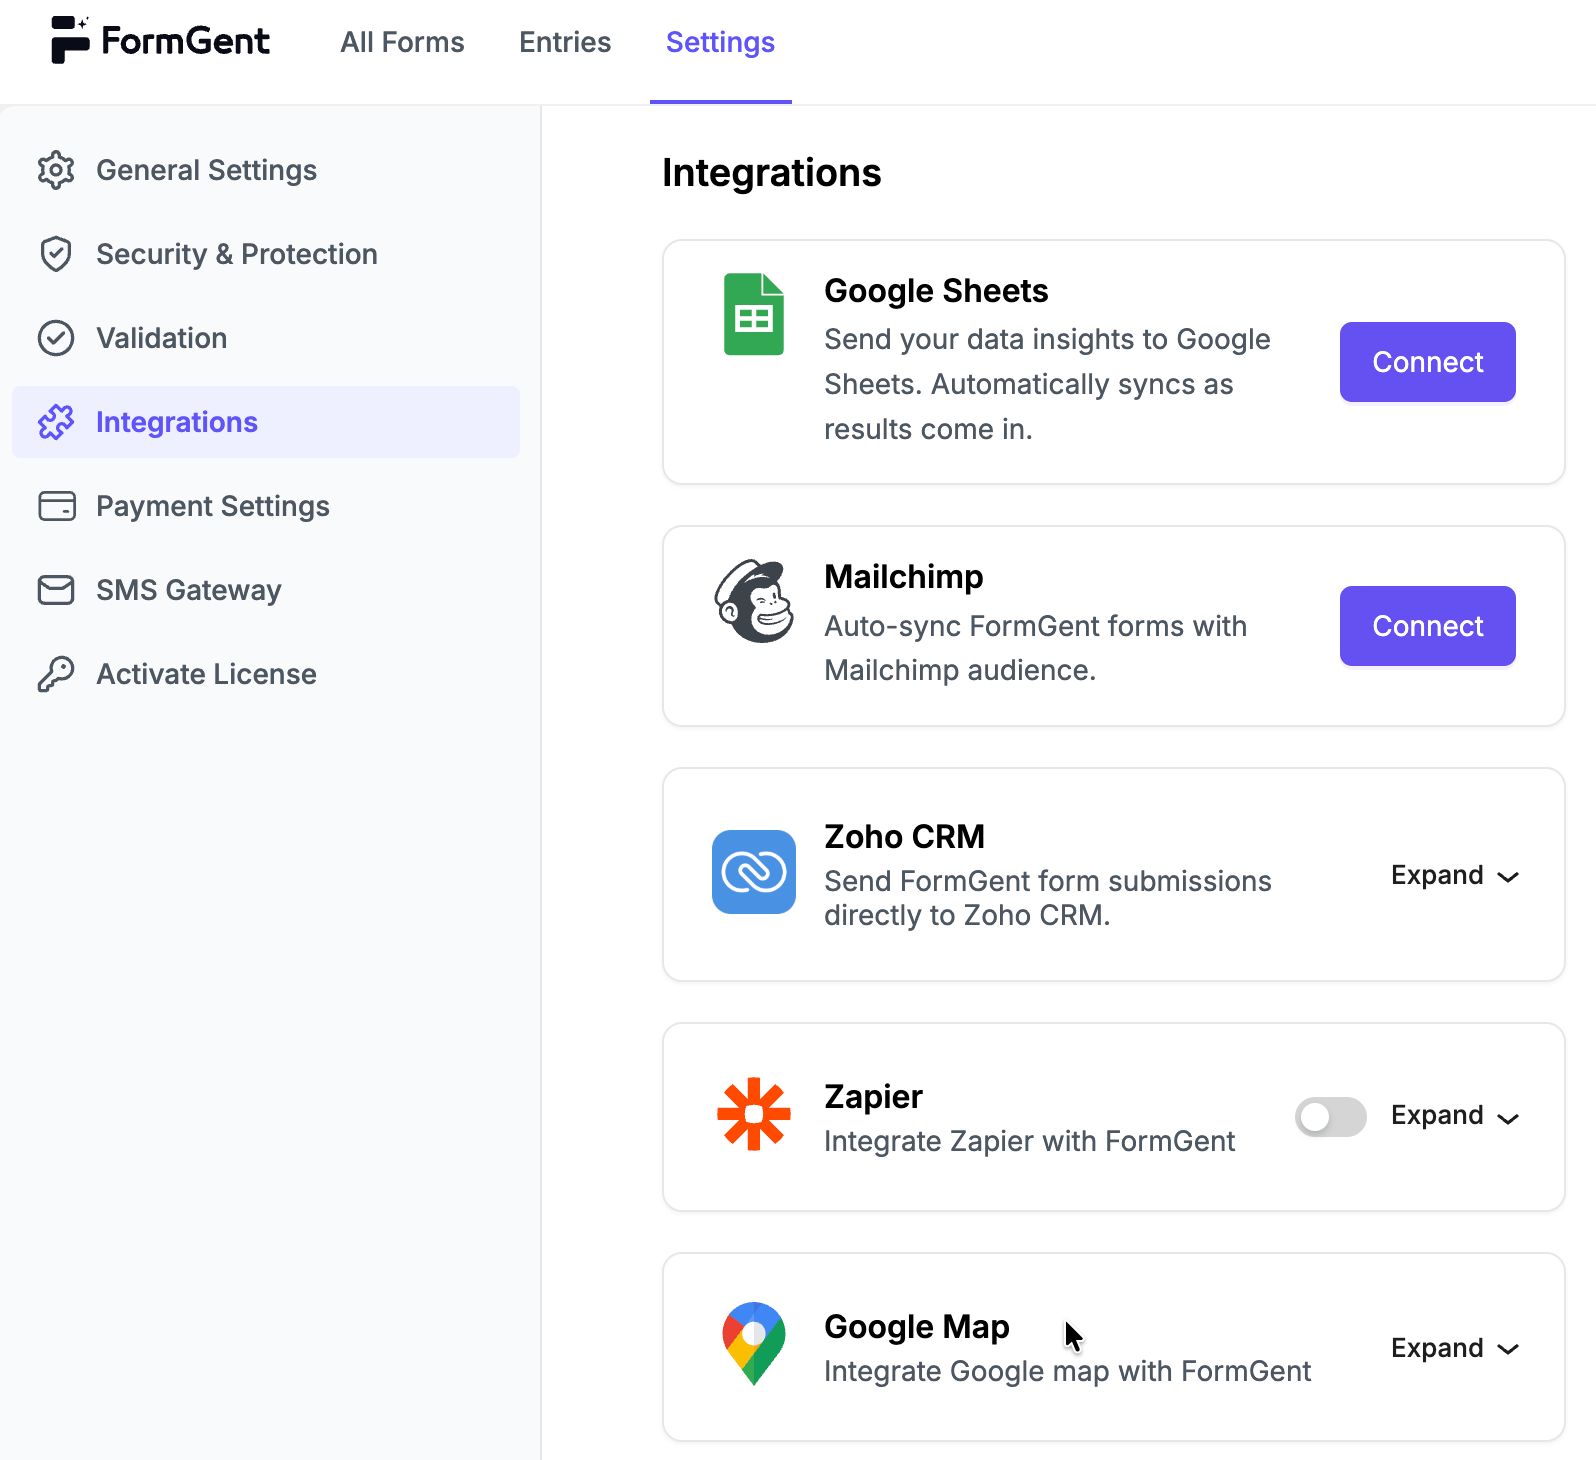
Map each field to the correct destination. If you plan to send marketing emails, collect the permission you need and make the purpose clear to visitors. A request for a quote and an agreement to receive a newsletter are different choices.
8. Finish the design and button text
Use the form’s style controls to keep the text, spacing, and button easy to read. Give the button a label that matches the result, such as Send My Checklist or Request a Website Review. Avoid a vague label when you can say what the click will do.
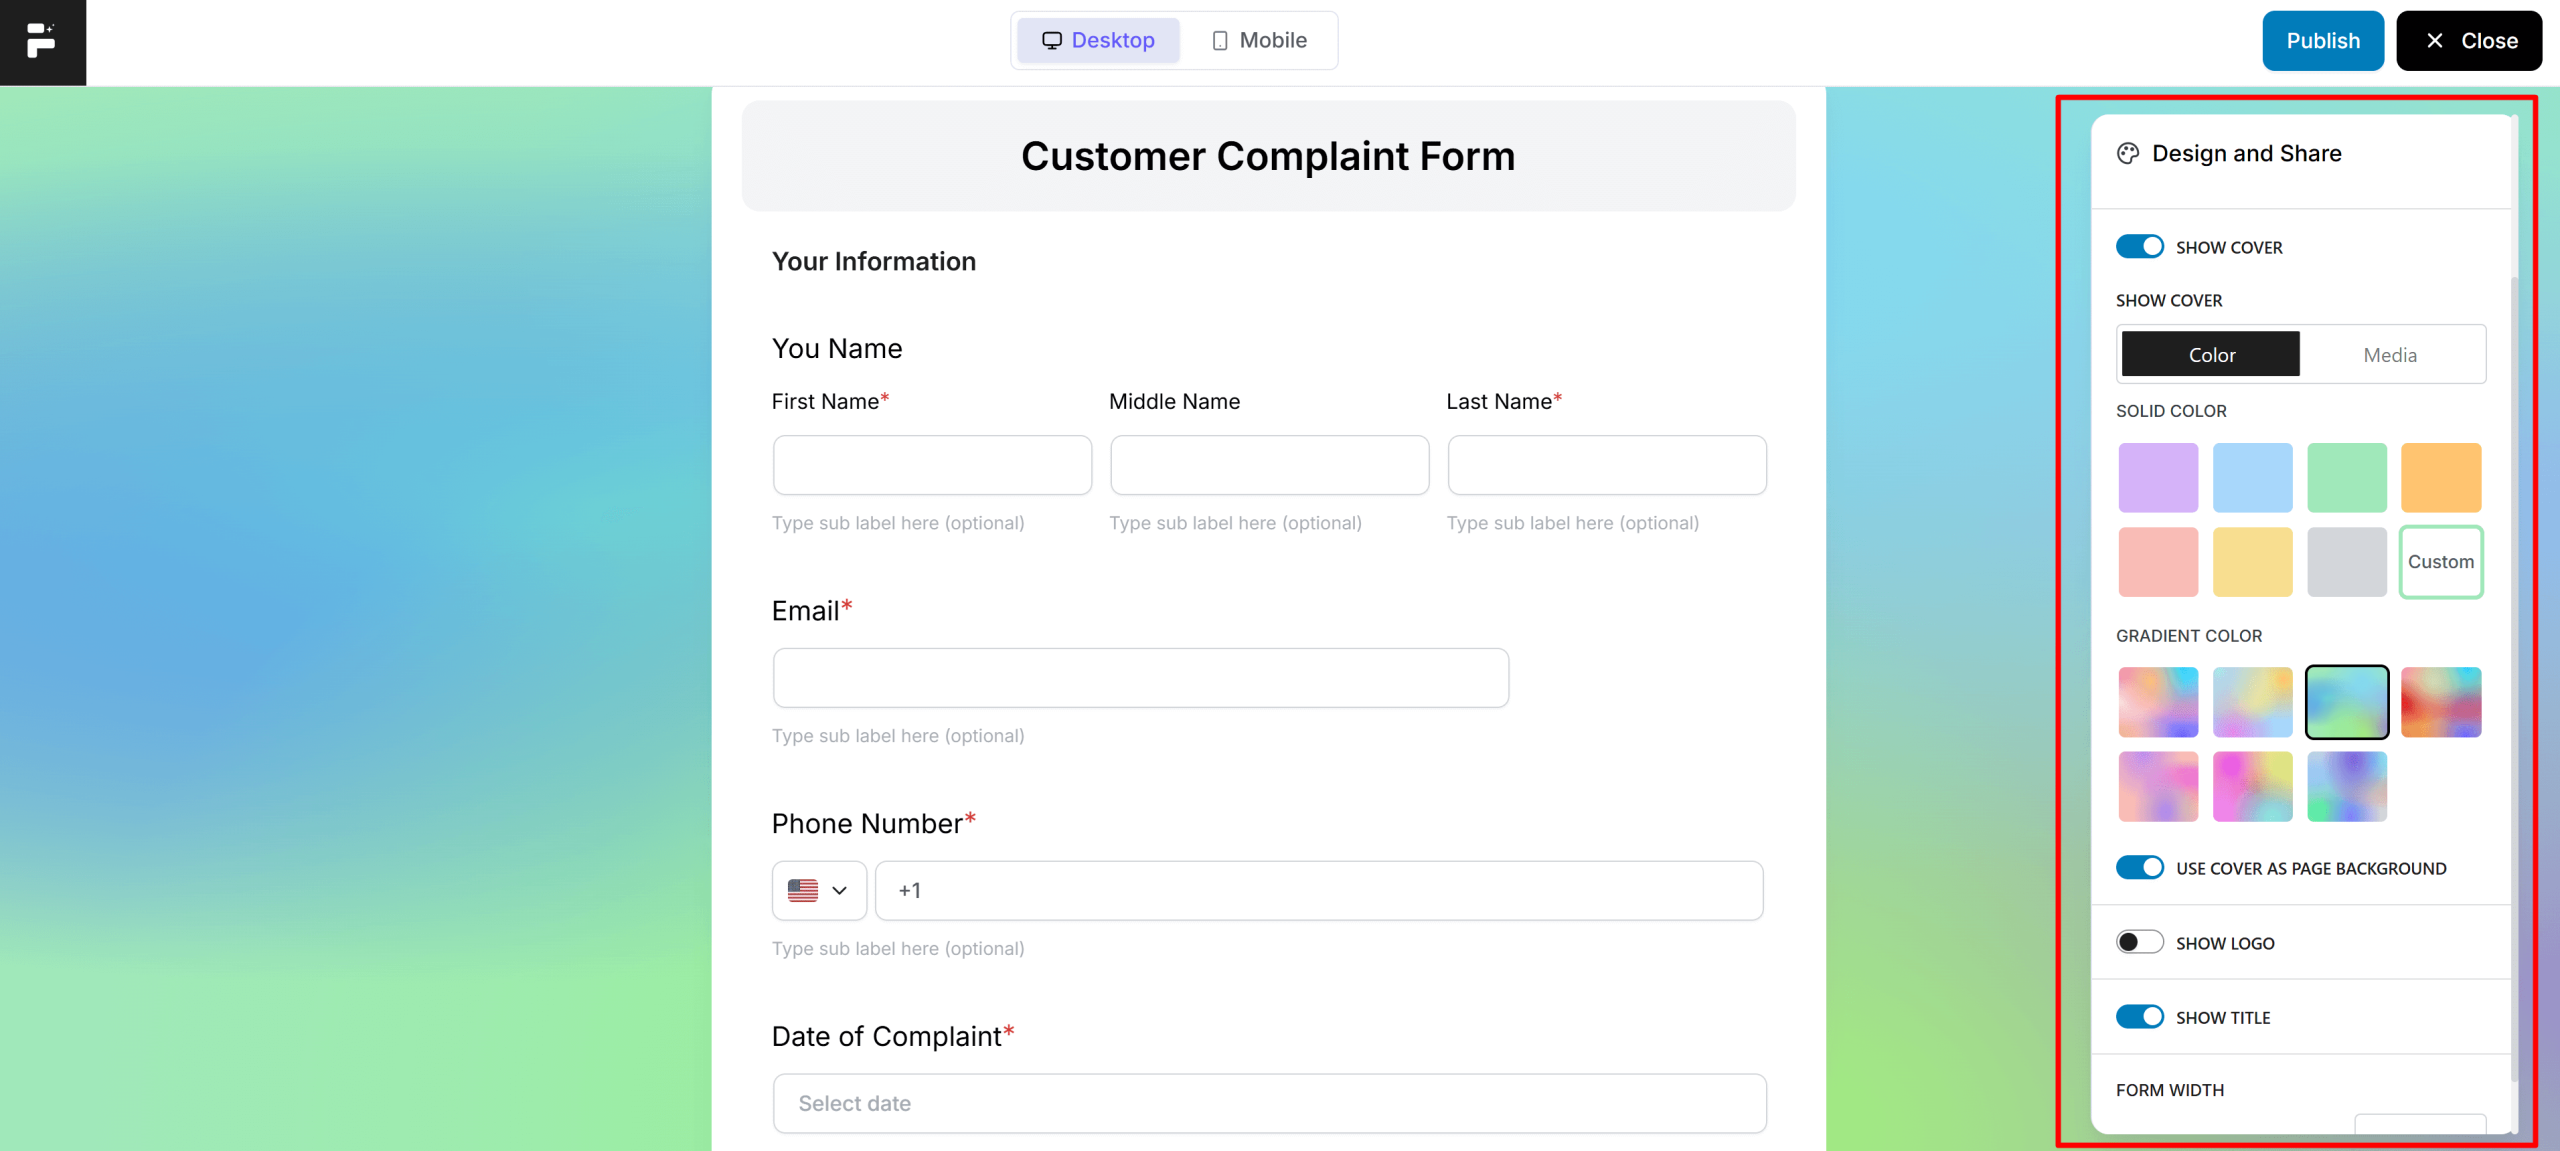
Add a short privacy note near the form and link to your privacy information. Only explain how you will actually use the details the visitor provides.
9. Publish and test it
Place the form in a page or post, use its shortcode where supported, or publish it on a dedicated page. Then submit it as a visitor would.
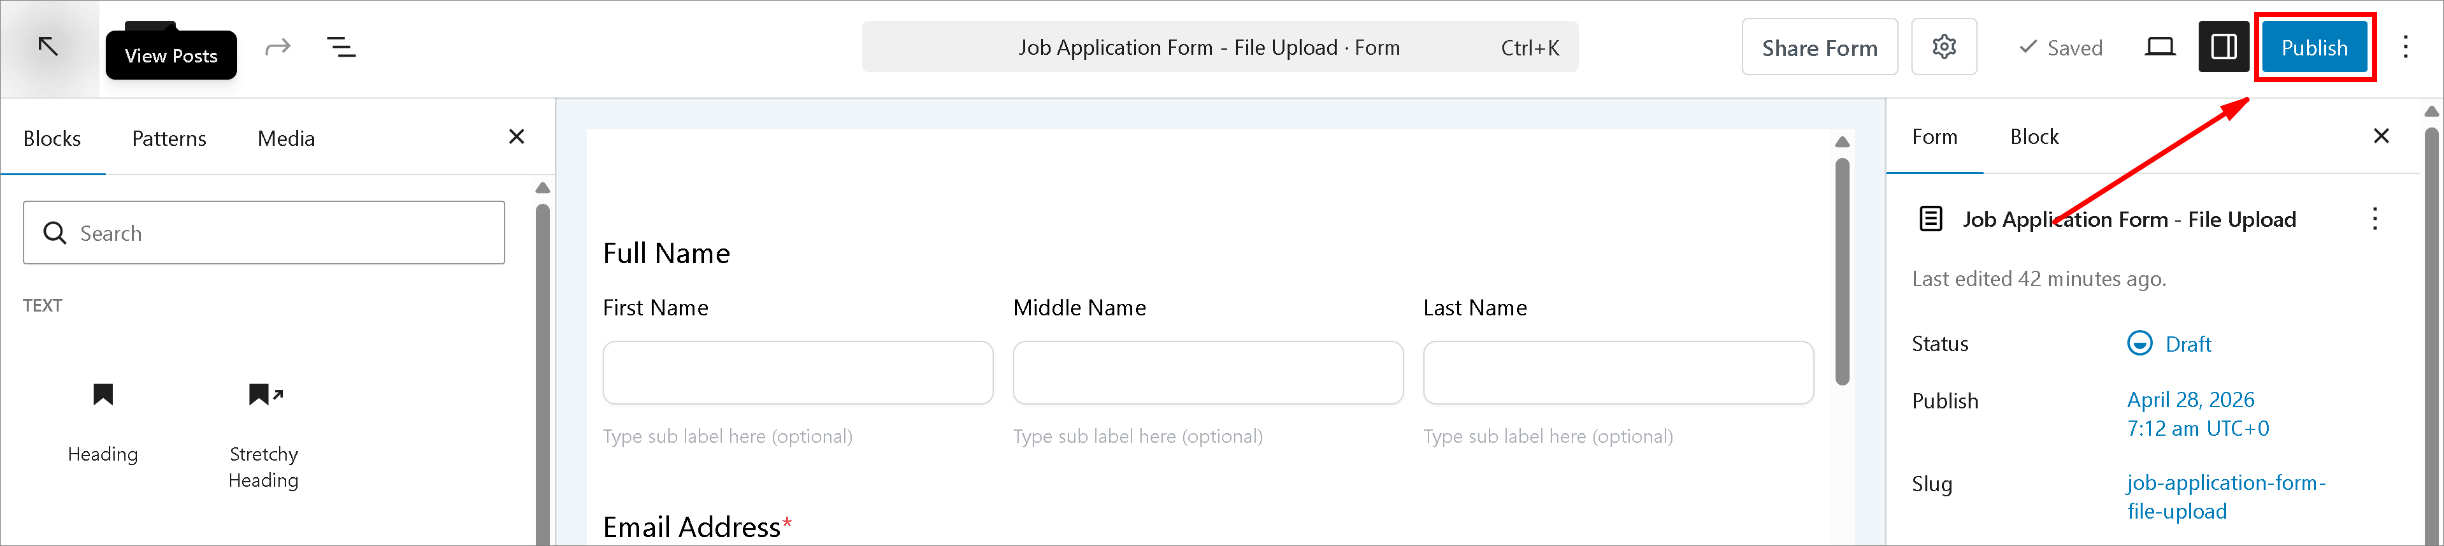
Check the confirmation, notification email, saved entry, and connected tool. Repeat the test on a phone. If the form branches based on answers, test each branch. Remove your test leads from live follow-up lists when you finish.
Three simple form examples
Free checklist
Offer: “Prepare your first website with a simple step-by-step planning guide.”
Fields: Email address. An optional first-name field is fine if you will use it.
Button: “Email Me the Checklist”
After submission: Send the checklist and show a clear confirmation.
Service quote
Offer: “Send your project details and we’ll prepare pricing for you.”
Fields: Name, email, service needed, and a short project description. Ask about budget or timing only if those answers change how you prepare the quote.
Button: “Request My Quote”
After submission: Send the details to the team member who prepares quotes and tell the visitor when to expect a reply.
Product demo
Offer: “Explore whether this product fits the way your team works.”
Fields: Work email, optional name, and one question about the team’s main goal.
Button: “Request a Demo”
After submission: Explain how scheduling will work and send the request to the right person.
These are starting points. Keep a question only if its answer will change your next action.
Help more people complete the form
A small adjustment to the offer or form can often be more useful than redesigning everything. Begin with these checks:
- Make the benefit visible. Put a short, specific description above the form so visitors know what they will receive.
- Keep labels and errors clear. If an email is invalid, explain the problem next to that field and keep the answers the visitor already entered.
- Make it work with a keyboard. Someone should be able to move through the fields and submit without using a mouse.
- Check the phone experience. Fields should fit the screen, text should be readable, and buttons should be easy to tap.
- Limit junk submissions. Turn on the spam protection that fits your form and confirm it does not block genuine visitors.
- Use a suitable placement. An embedded form can fit naturally beside a relevant article; a focused page can work well for a campaign. Test placement with your own audience.
Before publishing, check any consent and privacy requirements that apply to the people whose information you collect. Make the choices understandable and keep a link to your privacy information close to the form.
Measure what happens after launch
Count leads, but also check whether visitors can finish the form and whether those leads are useful to your team.
| Measure | How to calculate it | What it helps you see |
| Completion rate | Completed submissions ÷ form views × 100 | How often a view becomes a submission |
| Abandonment at a field | People who stop at that field ÷ people who reach it × 100 | A question that may need attention |
| Junk lead share | Spam or unusable submissions ÷ all submissions × 100 | Whether the form attracts usable contacts |
| Lead-to-customer rate | Customers from these leads ÷ leads collected × 100 | Whether the leads help your business |
Be consistent about what counts as a form view and a lead. FormGent’s free Summary view shows responses to questions; its deeper form analytics, including views and drop-off, are described as a Pro feature in the source article. You can also use a separate analytics setup if you need those measures.
There is no single completion rate that fits every form. A visitor who asks for a quote has a different reason to fill out a form than someone casually reading a blog post. Compare your form with its own past results, then change one thing at a time. If many visitors stop at a question, make it clearer, make it optional, or remove it if you do not need the answer.
Final check before you share the form
- Can a visitor understand the offer before entering any details?
- Are the required fields truly necessary?
- Does the button say what will happen?
- Are the privacy information and any needed choices clear?
- Can someone finish the form on a phone and with a keyboard?
- Do confirmation messages, alerts, and integrations work after a test submission?
- Does your team know who will follow up and when?
- Have you decided how you will review the form’s results?
Start with a short form that makes one clear promise. Once real visitors use it, their questions, submissions, and drop-off points will show you what to improve.
How many fields should I include?
Only ask for the details that are needed at this step. A download may need just an email address. A quote may need several details so you can give a useful response. There is no universal number that works for every offer.
Should I require a phone number?
Require it only if a phone call is essential to deliver what the visitor requested. If you can follow up by email, make the phone field optional or leave it out.
Is a multi-step form always better than a one-page form?
No. One short page is often easier for a simple signup. Multiple steps help organize a request that genuinely needs more questions. Test both the form and its results before deciding.
Where should I put the form?
Place it near content that explains the offer. That could be within a relevant post, on a service page, or on a dedicated campaign page. Check that the surrounding text and button describe the same next step.
What should happen after someone submits it?
Show a confirmation, deliver or explain the offer, and send the details to the right team or tool. If you say you will reply, set a realistic time and follow through.

Lead Forms vs Conversational Forms: Features & Use Cases
October 6, 2026[…] If you are building one from scratch, this guide explains how to build a lead generation form. […]