
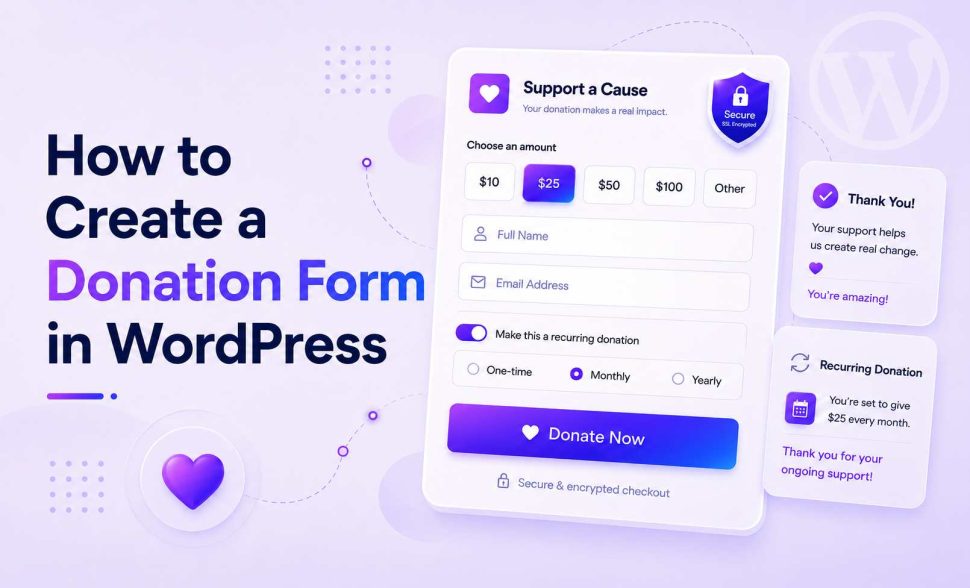
How to Create a Donation Form in WordPress
-
- Tips and Tricks Form Builder WordPress Plugins
- 18 mins read

Ever sent a supporter to a bare PayPal “Donate” button? Some of them probably bounced before the payment even loaded. That’s the problem with a plain donate link. It sends your donor to someone else’s checkout page. It tells you nothing about who gave. And it can’t ask them to give again next month.
A proper donation form fixes all three problems. Donors stay on your site. You capture their name and email, so you can say thank you (and ask again later). And if you set it up right, a one-time gift can turn into a recurring one with a single checkbox.
This guide walks through building a donation form in WordPress from scratch. We’ll cover how to pick the right tool for your situation, connect a payment gateway, build the actual form fields, handle receipts, and test everything before real donations start coming in. We’ll use FormGent as the working example. It’s a native WordPress form builder with Stripe, PayPal, and Mollie payment support built into the free plugin. Anywhere a feature needs FormGent Pro, or belongs to a different type of tool altogether, we’ll say so clearly.
Already read our guide on how to create a payment form in WordPress? A lot of the basics here will look familiar — gateways, the Payment block, testing in sandbox mode. This guide goes further into what’s specific to donations: suggested-amount design, one-time vs. recurring giving, donor receipts, and the questions nonprofits actually ask.
What You Need Before You Start
- An SSL certificate (HTTPS) on your site. Every payment gateway requires it. If your site is still on
http://, fix that first — most hosts offer free SSL through Let’s Encrypt. - A merchant account with at least one payment processor — Stripe, PayPal, or Mollie. The form plugin connects to an account you already control; it doesn’t replace one.
- A decision on one-time only, recurring only, or both. This affects which plugin tier you need, so it’s worth settling before you start building (more on this in the next two sections).
Why a Donation Form Beats a Bare “Donate” Button
A PayPal donate button technically works, but it comes with real costs you don’t see until you’re relying on it:
| “Donate” button/link | Dedicated donation form | |
|---|---|---|
| Checkout happens on your site | No — donor is redirected away | Depends on gateway (see gateway comparison below) |
| Collects donor name/email for your records | No | Yes |
| Supports recurring/subscription gifts | Only through PayPal’s own subscribe-button setup | Yes, when the form plugin supports it |
| Matches your site’s branding | No — donor sees the gateway’s page immediately | Yes — form lives on your page |
| Sends automatic receipts | Only whatever the gateway itself sends | Yes, configurable |
The redirect is the biggest issue. Every extra step between “I want to give” and “payment confirmed” loses a percentage of donors, and mobile donors are especially likely to abandon a flow that bounces them into another app or a slow-loading external page.
Choose the Right Tool: Dedicated Fundraising Plugin vs. General Form Builder
Before you build anything, figure out which type of tool you actually need. One heads-up: most articles on this topic come from a single vendor. They’ll only ever point you toward their own product.
Dedicated fundraising plugins, like Charitable and GiveWP, are made for nonprofits running ongoing campaigns. You get campaign pages, a visual progress bar for your fundraising goal, and a donor management dashboard. Paid tiers add peer-to-peer fundraising and employer donation matching. Running several campaigns at once with public progress tracking? This is usually your better starting point.
General-purpose form builders with payment blocks work differently. FormGent, WPForms, and Gravity Forms all fall into this group. They’re faster to set up if you already use the plugin for other forms on your site. They’re cheaper to start with, too — FormGent’s core payment gateways are free. And they’re flexible enough to drop a donation ask into any form, like adding an optional “add a donation” field to an event registration form. What they don’t do is run a public fundraising campaign with a goal thermometer or a donor portal.
Neither is objectively “better” — they solve different problems. Quick gut-check before you commit:
- Do I need a public campaign page with a progress bar? → dedicated fundraising plugin.
- Do I need peer-to-peer fundraising or employer matching? → dedicated fundraising plugin (neither FormGent nor most general form builders offer this).
- Do I mainly need a clean, embeddable form that takes one-time or recurring gifts? → a general form builder like FormGent works well and costs less to start.
- Do I want the donation ask to live inside another form (e.g., “add a $10 donation” on an event signup)? → a general form builder is the only realistic option.
- What gateways do my donors already trust? → check the gateway comparison table below before picking either path.
From here on, this guide follows the general-form-builder path with FormGent. For most small nonprofits, community groups, and individual fundraisers, it’s the faster, cheaper route. Even so, the core ideas here apply no matter which tool you pick: setting up a gateway, choosing one-time vs. recurring, sending receipts, and testing before you launch.
Comparing Payment Gateways for Your Donation Form
FormGent’s free plugin ships with three gateways built in — Stripe, PayPal, and Mollie — with no gateway locked behind a paywall. That’s worth calling out, because several competing form plugins only include one gateway for free and charge extra to unlock the others.
| Stripe | PayPal | Mollie | |
|---|---|---|---|
| Checkout experience | Hosted checkout page, redirect | Redirect to PayPal | Hosted checkout page, redirect |
| Card data touches your server | No | No | No |
| Recurring/subscription donations in FormGent | Yes — FormGent Pro | Yes — FormGent Pro | Not supported |
| Test mode | Explicit toggle in Settings | Explicit toggle in Settings | No separate toggle — mode is read from the API key itself (keys starting with live_ run live; anything else runs as a test key) |
| Best fit | Donors who want a familiar card checkout | Donors who already trust and use PayPal | Nonprofits with European donors (strong local payment method coverage) |
One question donors ask a lot: is this actually secure? With all three gateways, yes — the card number gets entered on the gateway’s own checkout page, not in a field on your WordPress site. Your server never sees that number, let alone stores it. Because the payment page itself lives on the gateway’s side, most small sites end up qualifying for SAQ A, the easiest of the PCI DSS self-assessment tiers — it’s designed for exactly this setup, where the merchant never handles cardholder data directly. In practice, that means HTTPS on your site plus a reputable gateway is all the “compliance” a small nonprofit needs to manage. Stripe, PayPal, and Mollie are doing the heavy lifting.
Don’t assume — check a few things gateway-by-gateway before you launch. What currencies does each one actually support? What do they charge in processing fees? Is Apple Pay or Google Pay available? These details change over time, so get them from each processor’s current pricing page rather than trusting a number from this guide, or anywhere else.
Setting Up FormGent for Donations
Step 1: Install and Activate FormGent
From your WordPress dashboard, go to Plugins → Add New, search “FormGent,” then Install Now and Activate. It’s free in the WordPress.org plugin directory — no credit card required to get started. (Full install walkthrough: how to create a form in WordPress.)
Step 2: Connect a Payment Gateway
Go to FormGent → Global Settings → Payment. This is where gateway connections, default currency, and the success/failure page assignments all live — set once, and every payment-enabled form on your site uses these settings.
- Stripe — enter your Stripe API keys (Publishable and Secret) and use the Test Mode toggle while you’re setting things up.
- PayPal — enter your PayPal app credentials (Client ID and Secret) with its own Test Mode toggle.
- Mollie — paste your API key from your Mollie dashboard. There’s no separate test toggle here: FormGent reads the mode directly from the key itself — a key starting with
live_runs live, anything else runs as a test key.
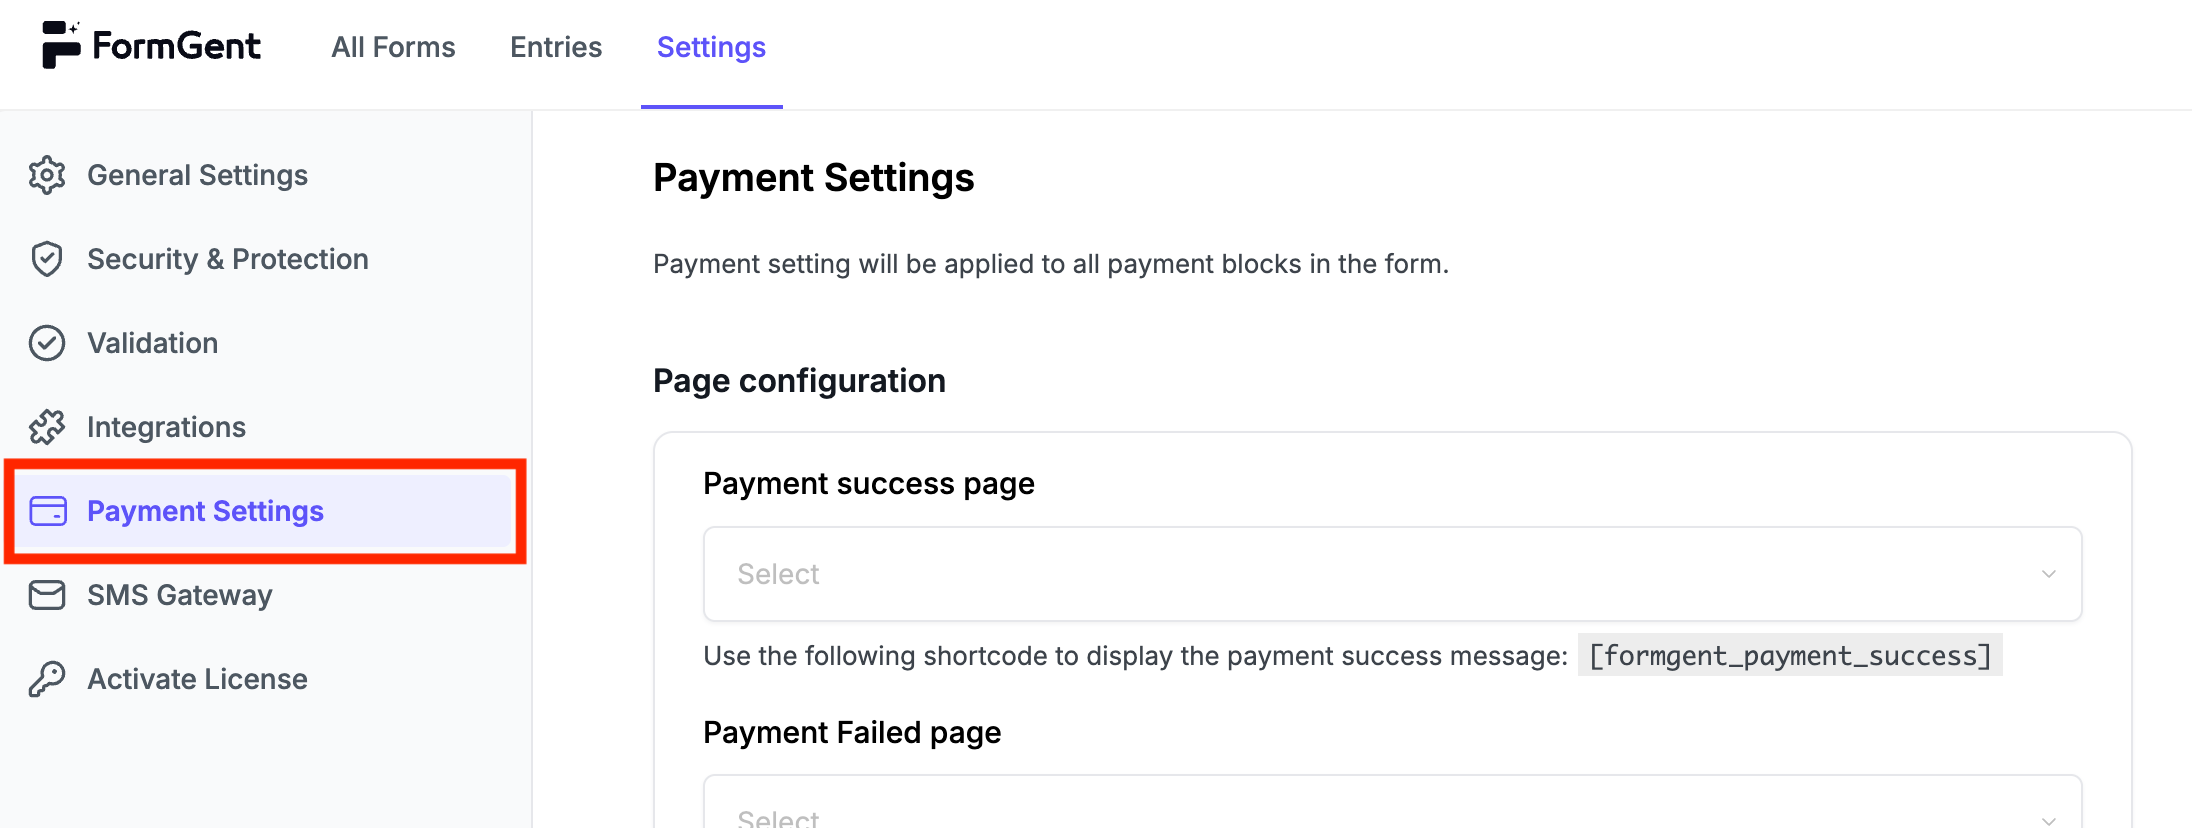
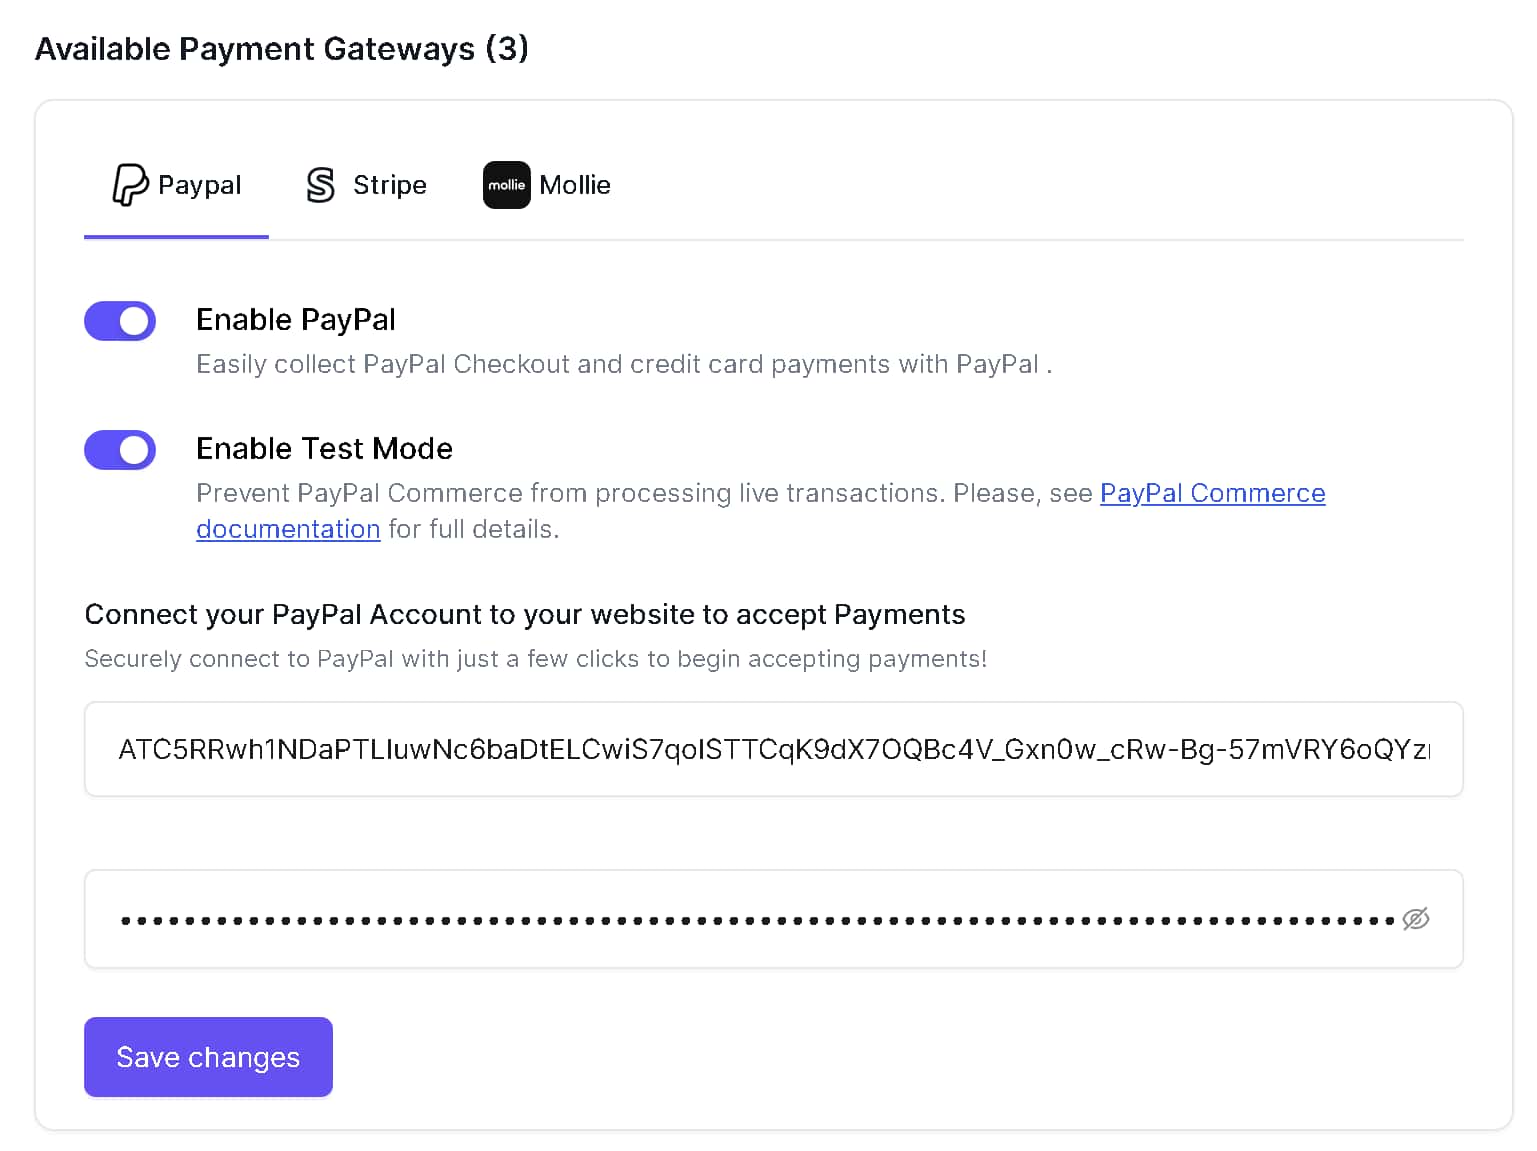
There’s no OAuth “connect” flow for any of these — you’re pasting API credentials directly from your gateway account. Full field-by-field reference: Payment Integrations (PayPal & Stripe) and Mollie Payment Gateway.
While you’re in Payment settings, also set your default currency and how the currency symbol displays (e.g., $100 vs. 100$), and assign your Payment Success Page and Payment Failed Page — FormGent generates these automatically and expects the and shortcodes on them respectively.
Step 3: Create Your Donation Form
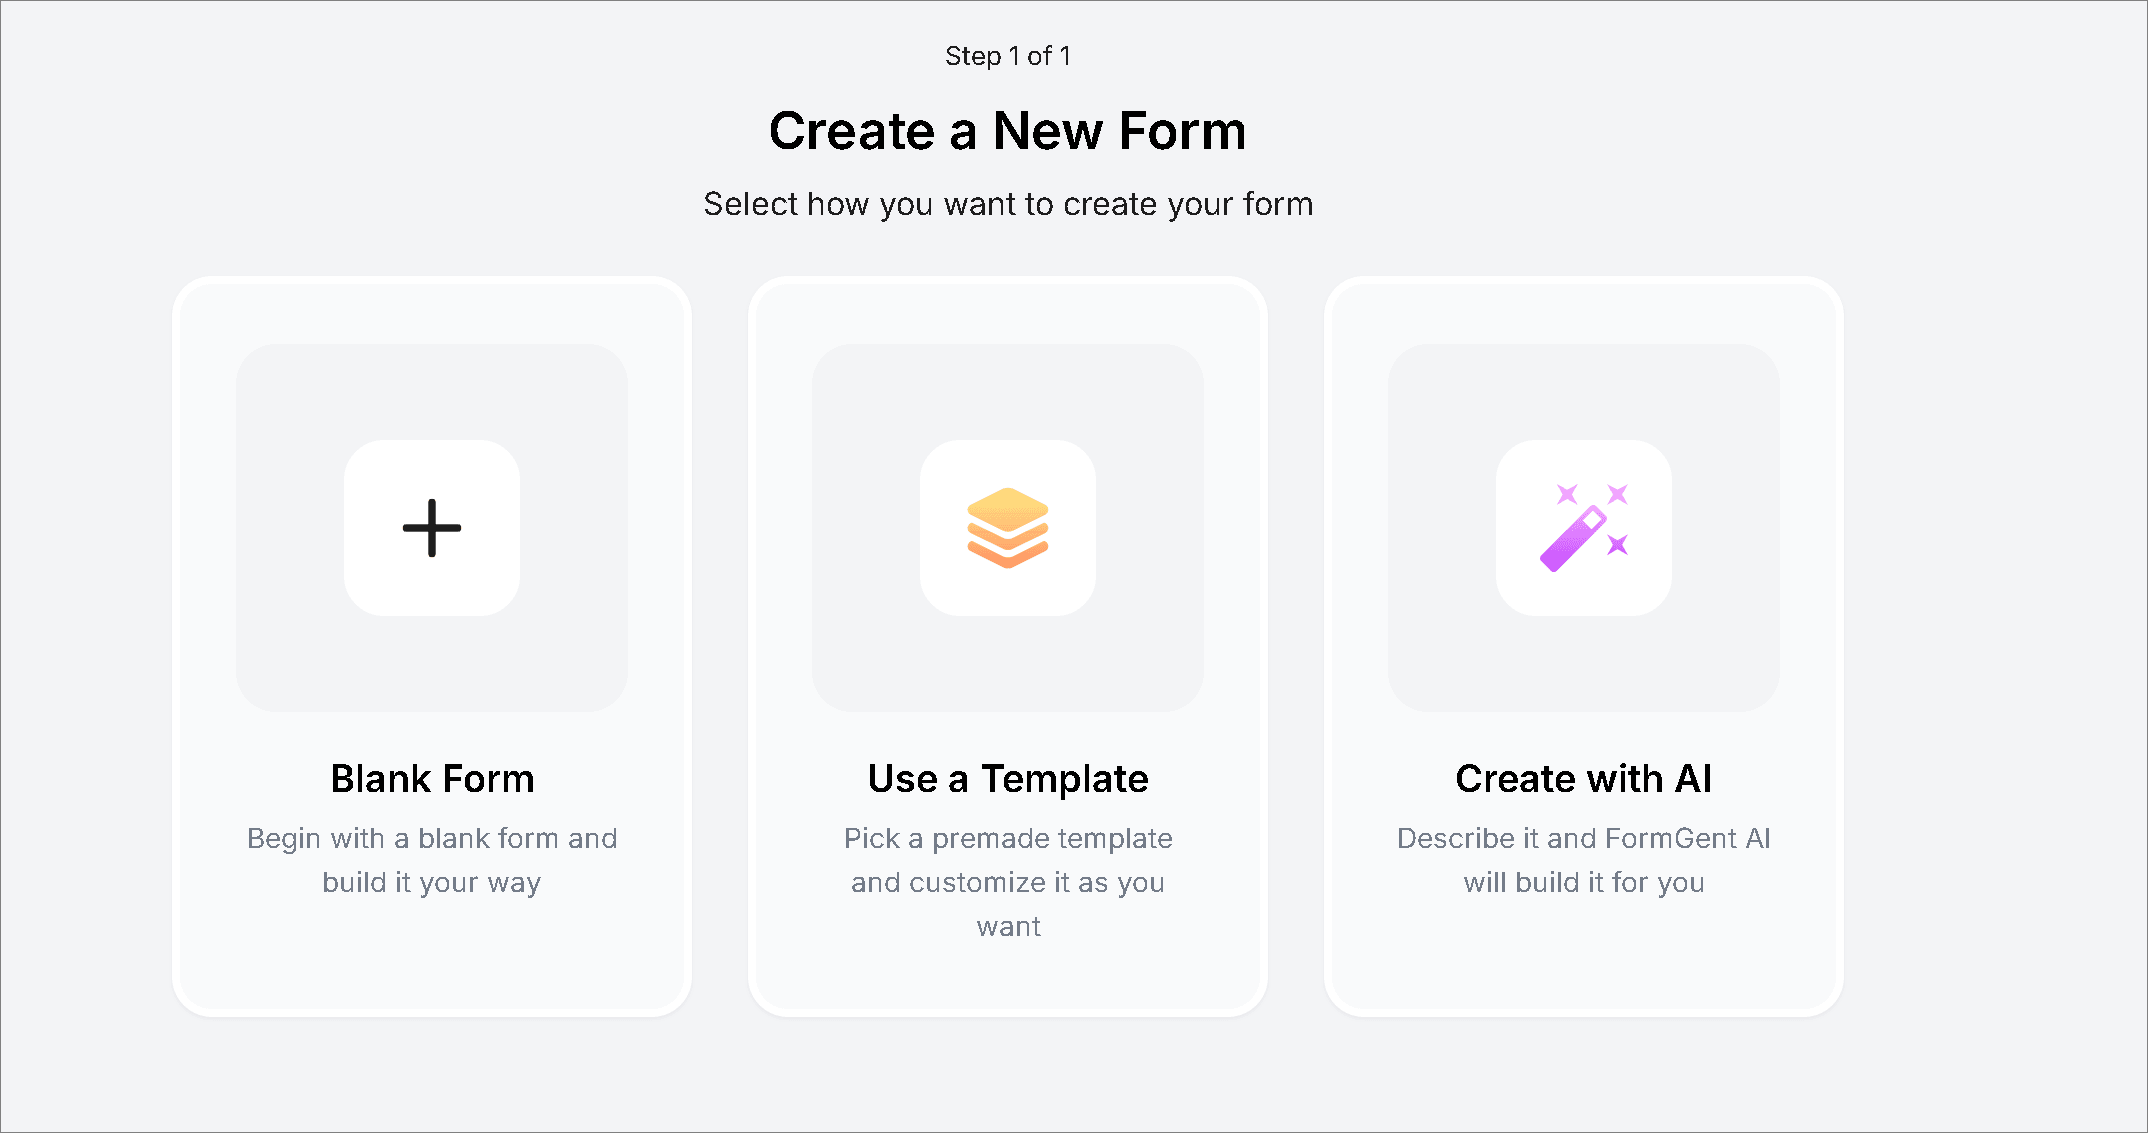
Head to FormGent → All Forms → Create New. From there, you’ve got three starting points: a blank form, a template pulled from the template library, or FormGent’s AI generator. With the AI option, you just describe the form in plain language. Tell it you need a nonprofit donation form with a few preset giving tiers and a field for donors to enter their own amount, and it builds a working draft you can then adjust.
You’ll also pick a layout: Classic, where every field sits on one page, or Conversational, which asks one question at a time in a chat-style flow. That choice matters more for donation forms than you’d think. The major dedicated donation plugins don’t even offer a conversational, one-question-at-a-time flow. So if your form runs a bit long — say it also collects a tribute message or a newsletter opt-in alongside the gift — switching to conversational is a real way to avoid dumping a wall of fields on the donor all at once.
Building the Donation Form Fields
FormGent’s payment functionality isn’t one generic “payment field” — it’s a small set of dedicated blocks that work together:
- Payment — the core block. Set Payment Type (One-Time, or Subscription if you’re on FormGent Pro), choose which Payment Methods donors can use (Stripe, PayPal, and/or Mollie), and set Amount Type to either Fixed or tied to a Custom Payment Amount field.
- Payment Item — use this to offer a list of suggested amounts (e.g., $25, $50, $100) as selectable options, each with its own price.
- Custom Payment Amount — a free-text field that lets a donor type in their own amount, with optional minimum/maximum limits. This is the field that makes a “choose your own amount” donation form possible.
- Quantity — pairs with Payment Item when someone might select more than one priced option; less commonly needed for a straightforward donation form.
- Payment Summary — shows an itemized total on the form before the donor pays, useful when you’re combining suggested amounts with a custom-amount option.
Combining Suggested Amounts With a Custom Amount
Most donation forms follow the same simple pattern. Offer preset amounts with Payment Item. Add an “Other amount” option with Custom Payment Amount. Then show the running total with Payment Summary. To make it work, set the Payment block’s Amount Type to Custom and link it to your Custom Payment Amount field. That way, whether the donor picks a preset tier or types in their own figure, it all flows into the same transaction.
Collecting Donor Details
Add standard fields for name and email — email is required in every case since it’s how the receipt gets delivered. Add address or phone only if you actually need them for your records; every extra required field is a small tax on completion, and donation forms are especially sensitive to friction.
A Tribute or Dedication Message (Optional)
GiveWP and Charitable both ship with a purpose-built tribute field; FormGent doesn’t have an equivalent block. You can still get the same result with an ordinary text field — just label it something like “Giving in memory or honor of someone? Tell us who (optional)” — but it’s a repurposed general field rather than a dedicated donation feature, and it’s worth knowing that difference going in.
One-Time vs. Recurring (Subscription) Donations
Here’s the line to know clearly: recurring/subscription donations are a FormGent Pro feature, and they currently work with Stripe and PayPal only — Mollie does not support subscriptions in FormGent at all. If a form is set to Subscription payment type, Mollie simply won’t appear as a selectable payment method, by design.
To offer recurring giving:
- On the Payment block, set Payment Type to Subscription (FormGent Pro).
- Configure the billing interval (e.g., monthly, yearly) and, if relevant, a cycle limit.
- Choose Stripe and/or PayPal as the available payment methods — Mollie won’t show up here.
Want to let donors pick between a one-time gift and a recurring one, right from the same form? Add a choice field like “Make this a monthly gift?” and use conditional logic to send them down the right payment path based on how they answer (see the conditional logic section below).
Why bother with recurring at all? Monthly donors are worth more to a nonprofit over time than one-time givers — a recurring gift turns an unpredictable donation into steady, predictable revenue. M+R’s 2026 Benchmarks report puts monthly donor retention at 71% after 12 months, compared to roughly 24% for new one-time online donors. That’s nearly three times the staying power. It’s the real case for building recurring in from day one, rather than bolting it on later.
Making Fields Show or Hide Based on Donor Choices (Conditional Logic)
FormGent’s conditional logic engine lets you show or hide fields, steps, or actions based on how a donor answers an earlier question — the same engine used across every FormGent form type, not something donation-specific. Two patterns come up constantly on donation forms:
- Show the Custom Payment Amount field only when the donor selects “Other amount” instead of one of your preset Payment Item options.
- Show a recurring-frequency selector only after the donor checks “Make this a monthly gift.”
For the full mechanics of setting up rules, see Mastering Conditional Logic in Forms.
Spam and Fraud Protection
Donation forms attract more than ordinary spam — bots and fraud attempts specifically target payment forms, not just contact forms. FormGent supports four spam-protection options you can enable per form: Honeypot (on automatically, no setup), Google reCAPTCHA, hCaptcha, and Cloudflare Turnstile. For a comparison of which to use, see how to avoid spam submissions with an online form builder.
Notifications, Receipts, and Going Live
Admin and Donor Email Notifications
Head to Form Options → Email Notifications and set up at least two notifications. One should alert you or your team whenever a donation comes in. The other confirms the gift to the donor. Both can pull dynamic tags straight from the submission — donor name, amount, and so on — so the donor’s confirmation email can spell out exactly what they gave.
Automated PDF Receipts (FormGent Pro)
Here’s the honest answer: PDF Generation is a FormGent Pro feature, and you set it up per form under Form Settings → PDF Generation. There’s a pre-built Invoice template designed just for payment, donation, and subscription forms, with tags like {{payment_billing_name}}, {{payment_transaction_id}}, {{payment_date}}, {{payment_amount}}, and {{payment_items_table}} already in place. Once your template is built, insert its tag — it’ll look something like {{pdf:3}} — into either the confirmation message or an email notification. From there, it becomes a clickable download link the donor sees right after they give. That’s a real donation receipt, not just a confirmation email.
On the free plan, donors still get an email confirming their gift. They just won’t get an auto-generated PDF receipt attached unless you upgrade.
Success and Failure Pages
Skip the generic “thanks” message. FormGent has two shortcodes — and — that show donors a page matching what actually happened at checkout. Set these up once under Global Settings → Payment → Page Configuration, and every form afterward will reflect the real payment result from the gateway.
Testing Before You Go Live
First, turn on Test Mode for Stripe and PayPal, or use a Mollie test-prefixed API key. Then submit a real test donation with your gateway’s published test card numbers, and check three things:
- Does the entry show up in FormGent’s Entries dashboard with the right amount?
- Does the donor confirmation email actually send?
- Does the transaction appear in your gateway’s own sandbox dashboard?
Don’t skip this step. It’s the only way to catch a misconfigured amount type or a missing success page before a real donor runs into it.
Switching to Live Payments
Once everything checks out, turn off Test Mode for Stripe and PayPal. For Mollie, just swap in your live API key — remember, there’s no separate toggle for that gateway, so pasting in the live key is what flips it into live mode. Republish the form, and you’re ready to accept real donations.
Embedding the Donation Form on Your Site
You’ve got several ways to get a FormGent form onto your site. Use the Gutenberg block (“Dynamic Forms”) in the block editor, or paste a shortcode into any page or post. If your site runs on Elementor, there’s a native Elementor widgettoo. Need to share the form without embedding it anywhere? Grab the direct shareable form URL and link to it from an email or social post. And if the form needs to live somewhere outside WordPress entirely, an iframe embed handles that.
For a straightforward donation page, the block or shortcode on a dedicated “Donate” page is the most common setup. For smaller asks, embedding the form in a blog post footer or a sidebar widget works well too.
Reducing Donation Form Abandonment
- Keep required fields to the minimum: name, email, amount, payment method. Every optional field you make required is a reason to leave.
- Got a longer form — one that also collects a tribute message or a newsletter opt-in? Try the conversational layout from earlier. Showing one field at a time cuts down on the “wall of fields” feeling that makes donors give up.
- Show a clear, itemized total with the Payment Summary block so donors never hit a surprise amount at the payment step.
- Want a progress bar showing how close you are to your fundraising goal? That’s a dedicated-fundraising-plugin feature. Charitable and GiveWP both have it. FormGent and other general form builders don’t — that kind of public campaign tracker belongs to a different type of tool (see the comparison earlier in this guide).
Viewing and Managing Donations
Every submission tied to a Payment block lands in FormGent’s Entries dashboard, under FormGent → All Forms → [your form] → Entries. Each one carries a payment status: Pending, Paid, Failed, Cancelled, Refunded, Unpaid, or Expired. Checking that status is the fastest way to tell whether donations are actually going through — on a healthy form, most entries that reach the gateway should end up Paid.
If a donation sits at Pending or Processing longer than you’d expect, don’t assume something’s broken on the FormGent side. It usually just means the gateway hasn’t confirmed a final status yet — some payment methods take a little longer than others. Check the transaction directly in your Stripe, PayPal, or Mollie dashboard first.
Connecting Your Donation Form to Other Tools
All of these connect under FormGent → Settings → Integrations, and none of them require FormGent Pro:
- Google Sheets — every donation logs to a spreadsheet automatically, no Zapier or API key needed.
- Mailchimp — a one-click OAuth connection; add new donors to a newsletter audience automatically.
- Zoho CRM — a one-time OAuth client setup, then map form fields to Zoho Leads/Contacts per form.
- Zapier — connects FormGent to 7,000+ apps (Slack, CRMs, spreadsheets) using an Authorization URL and Secret Key found under Settings → Integration → Zapier.
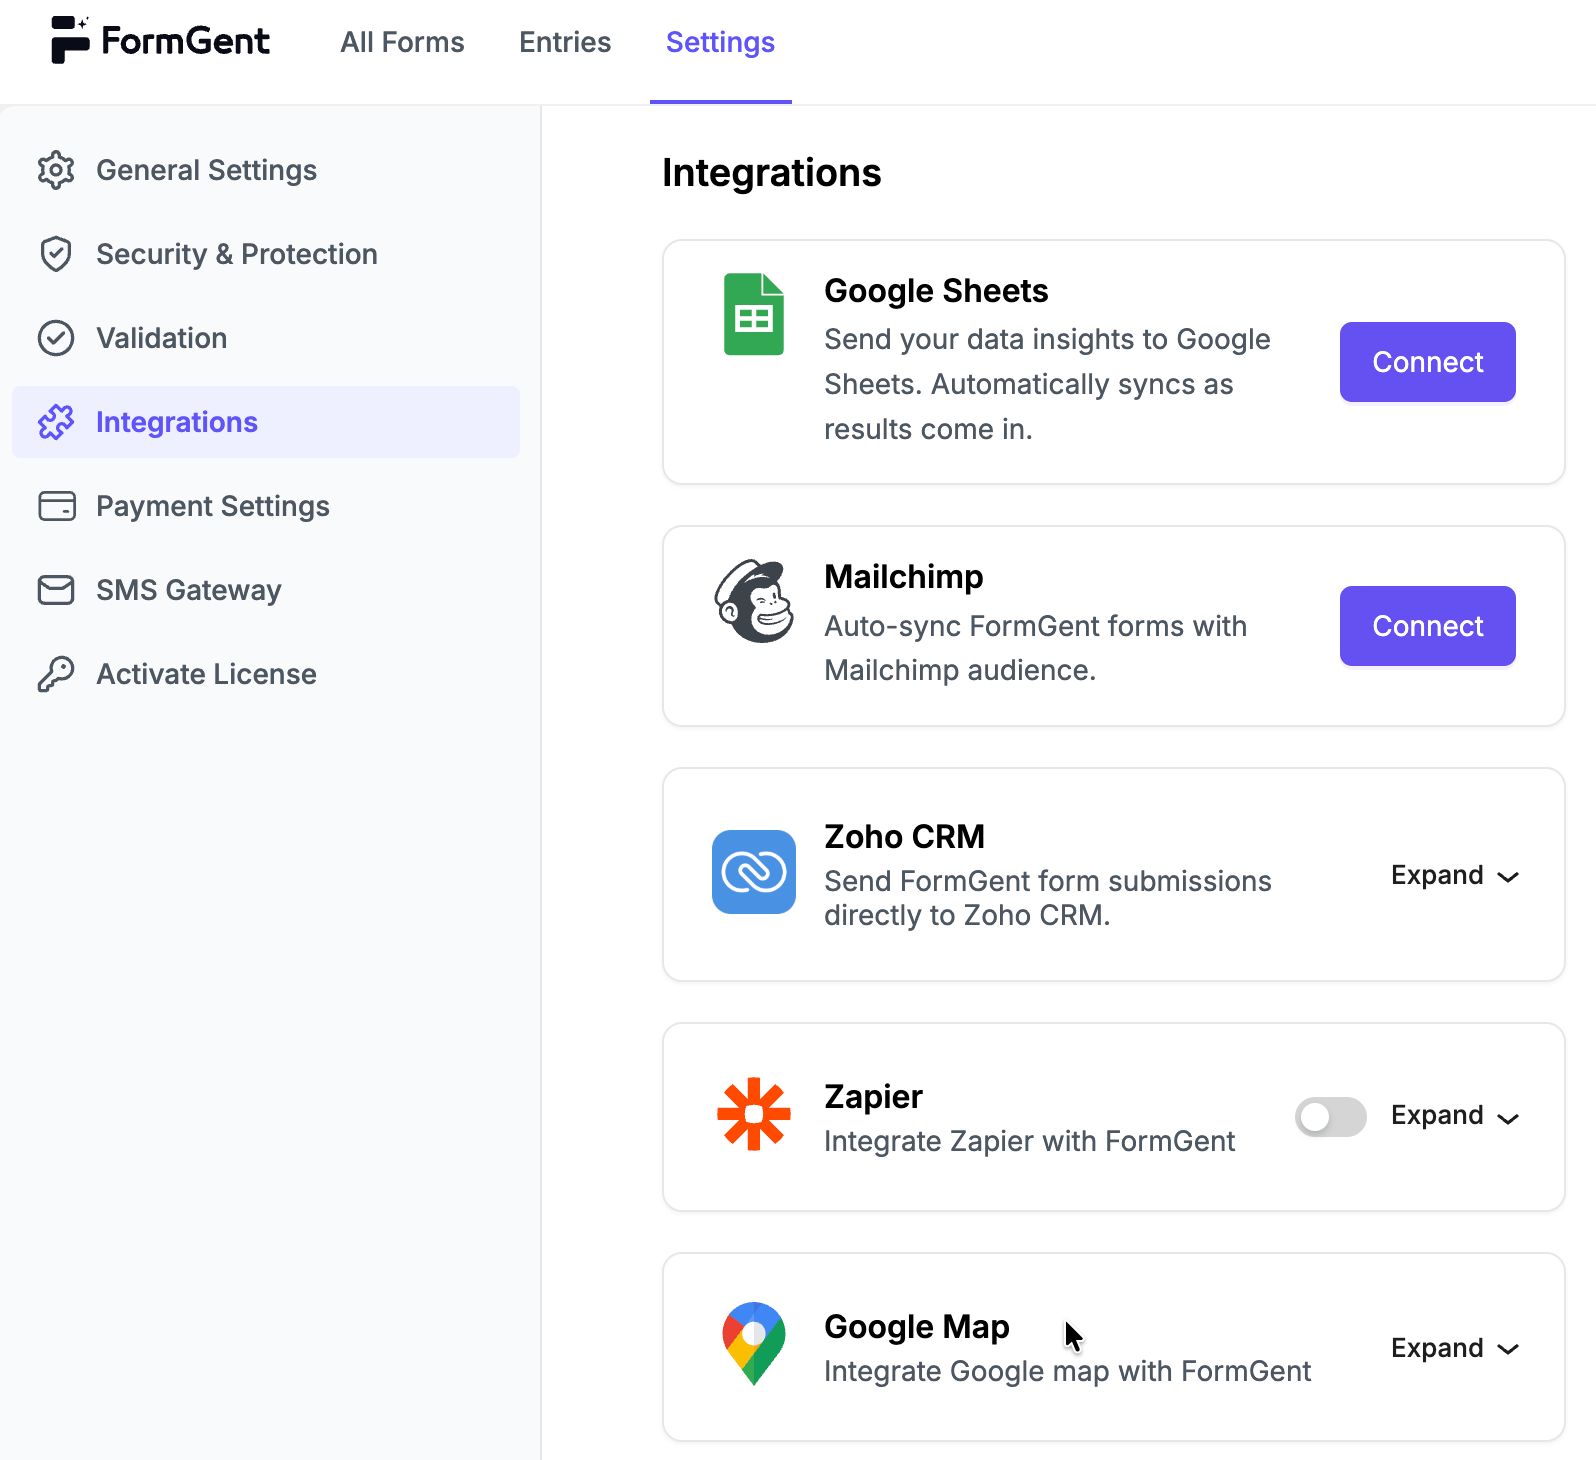
Deeper, developer-style Webhooks for pushing raw submission data to other tools on every donation is the one integration that requires FormGent Pro. See connecting WordPress forms to Google Sheets for the no-code setup.
Privacy, Accessibility, and Legal Basics
Data privacy. Stick to collecting what you actually need from a donor — name and email cover most cases. Your privacy policy should say plainly how that data gets stored and used. And worth remembering: with a hosted-checkout gateway like Stripe, PayPal, or Mollie, the card number itself never even reaches your WordPress database.
Accessibility. Keep field labels clear. Make sure the payment fields work with keyboard navigation. And write specific error messages instead of a vague banner at the top of the form — “Enter a valid email address,” not “Something went wrong.” This matters more here than almost anywhere else on your site, because a donor who gets confused at the payment step is a donation you just lost.
Tax receipts. Is a gift tax-deductible? What exactly does a receipt need to say? Both depend on your country and your organization’s registered status — and this guide can’t answer either one for you. Before you finalize your receipt template, check the exact requirements with a tax professional or your local nonprofit regulator. This isn’t legal or tax advice.
Troubleshooting Common Issues
- Payment shows “Pending” or “Processing” and never updates. The gateway hasn’t confirmed a final status yet — this is normal for some payment methods. Check the transaction directly in your Stripe/PayPal/Mollie dashboard. For Mollie specifically, webhooks won’t reach a local (
localhost,.local,.test) site — test final webhook behavior on a public staging or live domain. - A gateway doesn’t appear as an option on the form. Confirm it’s enabled in Global Settings → Payment, that credentials are saved, and — for Subscription-type forms — remember Mollie is intentionally excluded since it doesn’t support recurring payments.
- Test-mode donation doesn’t show in Entries. Double-check your Stripe/PayPal Test Mode toggle is actually on, or that your Mollie key is a test-prefixed key, not a live one.
- Mode looks wrong for Mollie. FormGent reads live vs. test mode directly from the key you paste — keys starting with
live_run live, anything else runs as test. If the mode looks wrong, check the exact key you entered. - Currency doesn’t match what you expected. Check the default currency set in Global Settings → Payment against your gateway account’s own currency configuration.
Wrapping Up
A little intention goes a long way here. Pick the right gateway for your donors. Show clear suggested amounts. Offer recurring giving if you need it. Get a receipt into the donor’s inbox. Do those things, and your form will earn more trust — and more repeat gifts — than a bare “Donate” button ever could.
Getting started is simple. Install the free FormGent plugin, connect Stripe, PayPal, or Mollie, and build your form with the Payment and Custom Payment Amount blocks. When you’re ready for recurring giving or automated PDF receipts, FormGent Pro is there to add on.
Build your donation form with FormGent →
What’s the difference between a donation form and a “Donate” button?
A donate button redirects visitors off your site to complete payment and gives you no donor data. A donation form keeps the donor right on your page. It collects their name and email for your own records. And you can set it up to accept recurring gifts. A plain button can’t do any of that.
Can I accept both one-time and recurring donations on the same WordPress form?
Yes. Add a choice field asking whether the donor wants to make it a monthly gift, then use conditional logic to route them toward a one-time or subscription payment configuration. Recurring donations require FormGent Pro with Stripe or PayPal.
Which payment gateway should I use for donations — Stripe, PayPal, or Mollie?
All three work for one-time donations in FormGent’s free plugin. Stripe and PayPal also support recurring donations (Pro only); Mollie is one-time-only. Choose based on which your donors already know and trust, and whether you need recurring giving.
Do I need a paid plugin to accept donations in WordPress?
No — FormGent’s free plugin includes Stripe, PayPal, and Mollie for one-time donations, with no gateway paywall. You’d need FormGent Pro specifically for recurring/subscription donations and automated PDF receipts.
Is a WordPress donation form PCI compliant?
With Stripe, PayPal, or Mollie, donors enter their card details on the gateway’s own checkout page — never on your WordPress server. Pair that with HTTPS on your site, and you’re covered for most small nonprofit setups. You’re leaning on the gateway’s compliance rather than building your own.
Can donors get an automatic receipt for their donation?
Yes. Every plan can send an email confirmation with the donation details. An auto-generated PDF receipt (using the pre-built Invoice template) requires FormGent Pro.
Can I add a donation form to my sidebar or widget area?
Yes, using the shortcode in a Shortcode/block widget, or the Gutenberg block if your sidebar supports blocks.
What happens if a donor’s payment fails?
They land on your Payment Failed page (the one using the shortcode). In your Entries dashboard, that donation shows up as Failed, Cancelled, or Expired — whichever matches what happened at the gateway.
Do I need a business/merchant account to accept donations?
Yes — you need an account with at least one payment gateway (Stripe, PayPal, or Mollie) before you can connect it to your form. The form plugin doesn’t replace that account, it connects to it.
Can I collect donations without a dedicated fundraising plugin?
Yes. A general-purpose form builder with payment blocks, like FormGent, handles one-time donations just fine. Add recurring on a paid tier, and it handles those too — without dragging in the campaign pages and donor portals that come with a dedicated fundraising plugin. Check the comparison earlier in this guide to see which setup actually fits your situation.


The Simple Way to Create an Order Form in WordPress
August 22, 2026[…] your order form includes one-off or recurring gifts, see how to create a donation form in WordPress for that specific use […]