
How to Create a Payment Form in WordPress
-
- Tips and Tricks AI-Form Builder Form Builder
- 16 mins read

You can add a secure payment form to any WordPress page in minutes using a form plugin connected to a payment gateway like Stripe, PayPal, or Mollie — you don’t need a separate online store to do it. This guide walks through the full process of building a WordPress payment form: planning it, connecting a gateway, adding the right fields, testing it safely, and measuring whether it’s actually working, using FormGent’s native AI-assisted form builder as the working example throughout.
Whether you’re collecting a one-time consulting fee, running a donation campaign, or setting up a recurring membership charge, the steps below apply. Let’s get into it.
Create this form with FormGent →
What does “how to create a payment form in WordPress” mean?
A WordPress payment form is a form embedded directly on a page or post that collects money — and usually some contact information — through a connected payment gateway such as Stripe, PayPal, or Mollie. The visitor fills in their details on your form, then completes the actual charge on the gateway’s own secure, hosted checkout page before landing back on your site automatically — no separate storefront, and no card data ever touching your WordPress server.
This is different from running a full online store. A payment form is the right tool when you’re selling a small number of fixed items, collecting donations, taking deposits, or invoicing for a service. A full ecommerce plugin like WooCommerce is the right tool when you need a shopping cart, inventory tracking, shipping rules, and tax logic across a large product catalog. Most small businesses, consultants, agencies, and nonprofits never need the second thing — they need the first.
Payment form vs. online store: which do you need?
| Scenario | Use a payment form | Use a full store (WooCommerce) |
| Selling 1–5 fixed-price items or services | ✅ | Optional |
| Variable or donation amounts | ✅ | ❌ (needs extra configuration) |
| Shopping cart with multiple items per order | ⚠️ Possible with payment item and quantity fields | ✅ |
| Recurring or subscription billing | ✅ (Stripe or PayPal, FormGent Pro) | ✅ |
| Full inventory, shipping, and tax rules | ❌ | ✅ |
If your use case matches the left column more than three times, a dedicated payment form — not a full store — is the faster, lighter build. FormGent’s WordPress Payment Form Plugin is built specifically for that scenario: native WordPress form creation with one-time payments via Stripe, PayPal, or Mollie built into the free plugin, no separate cart system required.
Why it matters for WordPress forms
The way you build a payment form directly affects whether people actually complete their payment. Because the actual charge happens on the gateway’s own hosted checkout page (Stripe Checkout, PayPal, or Mollie’s payment page) rather than in a raw text field on your site, visitors get a checkout experience they already recognize and trust — the friction to manage is the hand-off, not the payment screen itself. A clear form, a fast redirect, and an unmistakable confirmation on return are what keep that hand-off from feeling jarring.
Beyond conversion, a well-built payment form protects data quality. Clean, structured fields — name, email, amount, product — flow directly into your notifications, your CRM, or a connected spreadsheet, instead of arriving as a vague email you have to manually reconcile against your bank statement. That structure is also what makes automation possible: a properly configured form can trigger a confirmation email, add a contact to your CRM, and log the transaction, all without you touching a spreadsheet.
Trust matters just as much as mechanics. Visitors are handing over financial information, and small UX details — a visible security cue, clear field labels, a professional confirmation message — measurably affect whether they follow through.
What a poorly built payment form costs you
- Abandoned payments — unclear pricing, too many fields, or a confusing redirect cause people to back out before paying.
- Duplicate or failed charges — vague error states lead customers to resubmit, sometimes triggering multiple charges.
- Support tickets — confused customers email or call asking “did my payment go through?” when the confirmation experience is unclear.
- Chargebacks — unclear billing descriptors or missing receipts increase the odds a customer disputes a legitimate charge.
Getting the fundamentals right the first time avoids all four of these. FormGent’s Form Analytics and Email Notifications features exist specifically to close these gaps — you’ll see how they fit into the workflow below.
Step-by-step implementation
Here’s the complete process for building a payment form in WordPress, from planning through publishing. We’ll use FormGent as the working example, and call out where your choices branch — which gateway, one-time vs. recurring — along the way.
Step 1: Plan the form
Before you open the form builder, answer four questions:
- Is this a one-time or recurring charge? A single consulting fee is one-time. A membership or retainer is recurring — note that recurring/subscription billing in FormGent requires FormGent Pro with Stripe or PayPal (Mollie doesn’t support subscriptions).
- Is the amount fixed or variable? A $49 flat fee is fixed. A donation or “pay what you like” form needs a variable, customer-entered amount.
- What information do you actually need from the payer? Name and email at minimum; shipping address only if you’re sending something physical; anything else is friction you should question.
- What should happen right after payment? A success message, a redirect to a specific page, and a confirmation email are all standard — decide which combination fits your use case.
Step 2: Connect a payment gateway
FormGent’s free plugin supports three gateways out of the box: Stripe, PayPal, and Mollie. To connect one:
- Create an account with your chosen gateway if you don’t already have one.
- In your WordPress dashboard, go to FormGent → Settings → Payment. Set your store’s currency and symbol position first — these apply globally to every payment form.
- Enter the credentials for the gateway(s) you want to enable:
- Stripe — your Publishable Key and Secret Key, plus a Test Mode toggle.
- PayPal — your Client ID and Secret Key, plus a Test Mode toggle.
- Mollie — your API Key (use a test-prefixed key from your Mollie dashboard while you’re testing, then swap in your live key when you’re ready to go live).
- Save your settings. There’s no separate OAuth “connect” step — you’re pasting in API credentials directly from your Stripe, PayPal, or Mollie account dashboard.
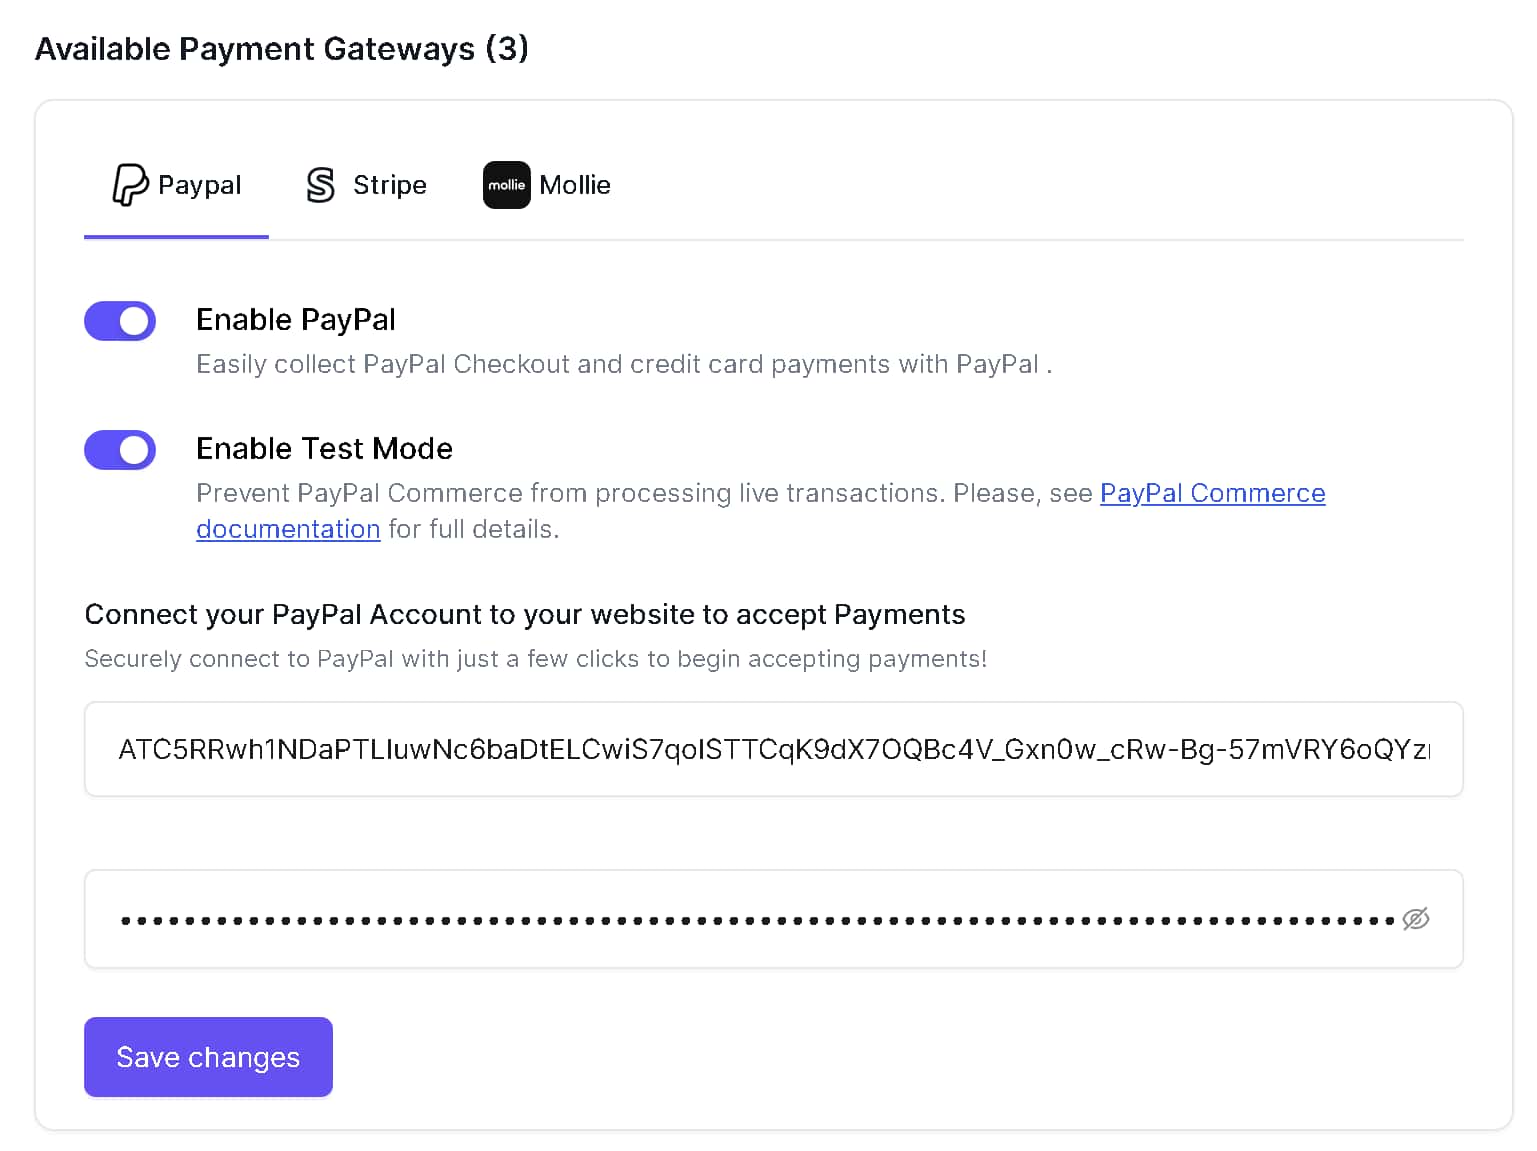
One security note worth understanding even if you’re not technical: none of these three gateways collect card details on your WordPress site. When a visitor pays, FormGent hands the transaction off to the gateway’s own hosted, PCI-compliant checkout page — Stripe Checkout, PayPal’s approval flow, or Mollie’s payment page — where the customer actually enters their card details. Your server never sees or stores raw card numbers; the gateway redirects the customer straight back to your site once the payment succeeds or is canceled.
Step 3: Create the form (AI or manual)
You have two paths into the form builder. For the general mechanics of the FormGent editor — installing the plugin, the two build paths, field settings, and publishing — see our full walkthrough on how to create a form in WordPress; the steps below focus on what’s specific to payments.
AI path: Open FormGent → New Form and choose the AI generator. Describe what you need in plain language — for example: “Create a one-time payment form for a $49 web design consultation, collecting name and email.” FormGent’s AI form builder generates a starting form with the relevant fields already in place, which you can then adjust.
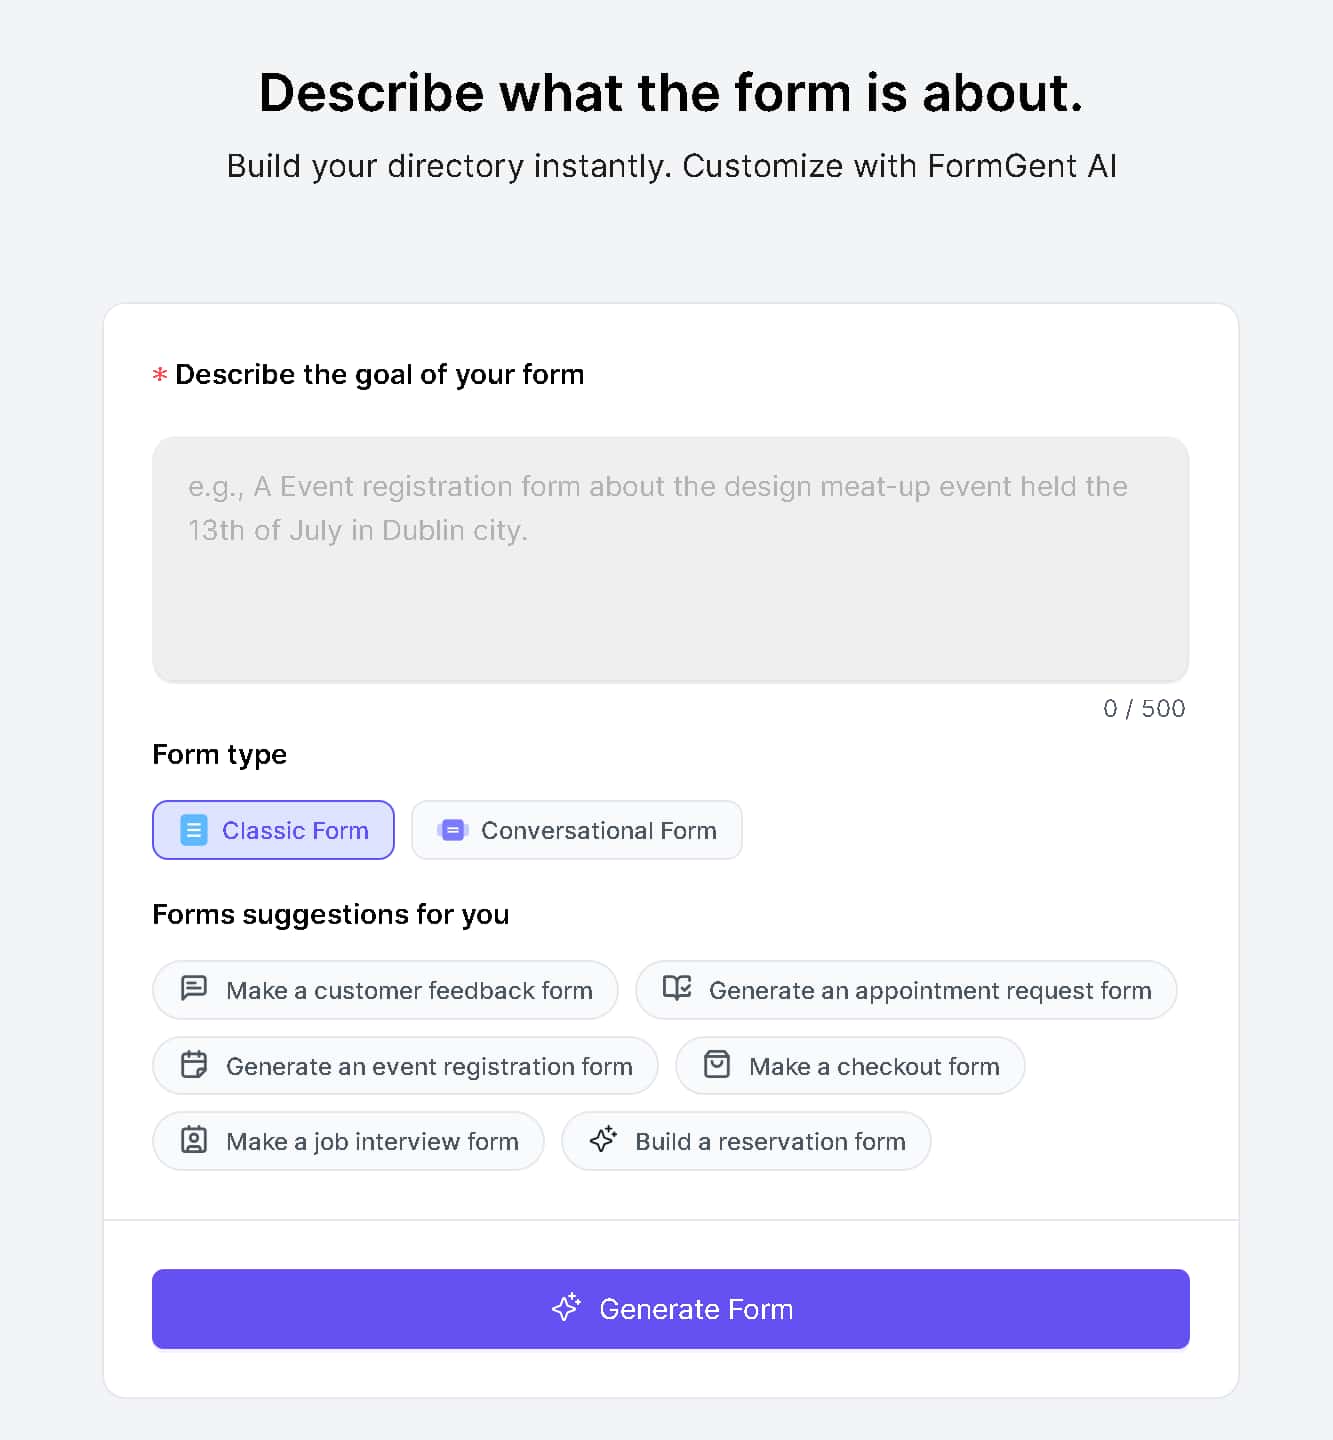
Manual path: Choose Blank Form, then drag fields into place from the field panel — full control, more clicks.
Either path gets you to the same place: a form with the right fields, ready to configure.
Step 4: Add and configure the Payment block
FormGent’s payment functionality is built from a small set of dedicated blocks rather than one generic “payment field” — worth knowing so the settings below make sense in the actual editor:
- Payment — the core block. Set Payment Type (One-Time, or Subscription if you’re on FormGent Pro), choose which Payment Methods to allow (Stripe, PayPal, and/or Mollie), and set Amount Type to either a Fixed price or tied to a Custom Payment Amount field for variable pricing.
- Payment Item — add this when you’re offering more than one priced option (a dropdown or choice list of products/services, each with its own price).
- Custom Payment Amount — a field that lets the visitor type in their own amount, with optional minimum/maximum limits — this is what powers donation and “pay what you like” forms.
- Quantity — adds a quantity selector tied to a Payment Item, for orders where someone might buy more than one of something.
- Payment Summary — displays an itemized order summary/total on the form before the customer pays.
For a simple fixed-price form, the Payment block alone (Amount Type: Fixed) is usually all you need. For a donation form, pair the Payment block (Amount Type: Custom) with a Custom Payment Amount field. For a small product order, add Payment Item, Quantity, and Payment Summary alongside the Payment block.
Step 5: Add supporting fields
- Name — optional for a simple one-time payment, but required for subscriptions since you’ll need it for recurring billing records.
- Email — required in every case; it’s how receipts and confirmations get delivered.
- Address/shipping — only if you’re shipping a physical product.
- Notes/message — optional, useful for donation context or custom order instructions.
Step 6: Configure notifications and confirmation
Set up two things before you test:
- Admin notification — an email alert to you (or your team) whenever a payment comes in.
- Customer confirmation — a success message, a redirect to a specific page or URL after successful payment, and a confirmation email that functions as the customer’s receipt. If you want a proper document instead of just an email, FormGent’s free-plugin PDF Generator can produce an invoice-style PDF from the submission.
Step 7: Test the form
Never skip this step. With Test Mode enabled (and a Mollie test API key in place, if that’s your gateway), submit a transaction using your gateway’s published test card numbers — Stripe and PayPal both publish these for developers. Confirm three things: the entry appears in your FormGent dashboard, the confirmation email actually sends, and the test transaction shows up in your gateway’s test/sandbox dashboard.
Step 8: Publish and embed
FormGent forms can be added to your site several ways: a Gutenberg block in the block editor, a shortcode, an Elementor widget if you use Elementor, a direct shareable form URL, or an iframe embed. Preview the form before publishing to confirm it displays and behaves as expected.
Step 9: Switch to live mode and go live
Once testing is complete, turn off Test Mode for Stripe and PayPal (and swap in your live Mollie API key), republish, and you’re ready to accept real payments.
One-time vs. recurring vs. donation payments — which setup to choose
| Payment type | Best for | Key setting |
| One-time, fixed amount | Single service, product, or deposit | Payment block, Amount Type: Fixed |
| One-time, variable amount | Donations, tips, “pay what you want” | Payment block, Amount Type: Custom, paired with a Custom Payment Amount field |
| Recurring/subscription | Memberships, retainers, ongoing courses | Payment block, Payment Type: Subscription, with billing interval and cycle limit — requires FormGent Pro, Stripe or PayPal only |
Examples
Seeing the difference between a form that converts and one that doesn’t usually comes down to small wording and layout choices, not big structural ones.
Good vs. bad payment form examples
| Element | ❌ Weak example | ✅ Strong example |
| Field label | “Amount” | “Consultation fee (USD)” |
| Button text | “Submit” / “Next” | “Pay $49 now” |
| Error message | Generic banner at the top of the form | Inline message directly under the affected field: “Enter a valid email address” |
| Donation amount prompt | “How much would you like to give?” with a bare number field | A Custom Payment Amount field with a suggested range and a clear minimum |
| Confirmation message | “Thank you.” | “Thanks, [Name] — your $49 payment is confirmed. A receipt has been sent to [email]. Questions? Reply to this email.” |
The pattern in every row is the same: be specific, be concrete, and tell the person exactly what just happened or what’s expected of them next. These aren’t payment-specific rules — they come straight from general form design best practices around labeling, error states, and action-specific buttons, applied to the payment context.
Recommended layouts for common use cases
- Simple service payment: name, email, a Payment block set to Fixed amount, pay button. Nothing else. Every additional field is a reason to abandon.
- Donation form: name, email, a Payment block set to Custom amount paired with a Custom Payment Amount field, optional message field.
- Product/order form: a Payment Item field for the product options, a Quantity field, a Payment Summary showing the running total, and shipping fields only if the product is physical. See our walkthrough on creating a T-shirt order form for a worked example of this exact layout applied to a physical product.
Field reference table
| Field/block | Purpose | Required? | Notes |
| Name | Identify the payer | Optional for one-time; required for subscriptions | A single “Full Name” field is usually enough unless your billing system needs first/last split |
| Delivers the receipt and confirmation | Required | Always validate the format before processing | |
| Payment (Fixed amount) | The transaction value for a single fixed price | Required | Set under the Payment block’s Amount Type setting |
| Custom Payment Amount | Lets the payer enter their own amount | Situational | Used for donations/”pay what you want”; supports optional min/max limits |
| Payment Item + Quantity | Multi-option or multi-unit pricing | Situational | Use when there are two or more priced options, or someone might buy more than one |
| Payment Summary | Itemized order total before checkout | Optional but recommended | Improves transparency and reduces payment-page surprises |
| Payment gateway selection | Chooses which of Stripe/PayPal/Mollie the visitor can pay with | Required | Set in the Payment block’s Payment Methods option; the actual card entry happens on the gateway’s own hosted checkout page |
| Notes/message | Extra context from the payer | Optional | Useful on donation or custom-order forms |
Checklist
Run through this before you flip the form to live mode:
- SSL/HTTPS is active on the page hosting the form
- Payment gateway credentials are entered under FormGent → Settings → Payment (Stripe Publishable/Secret Key, PayPal Client ID/Secret Key, or Mollie API Key) and Test Mode has been verified
- The form has been tested successfully with a test-mode transaction
- Required fields — name, email, and the Payment block — are present and marked required
- Currency and amount formatting are correct
- A success message and/or redirect is configured for after payment
- The customer receipt/confirmation email is configured and has been tested
- The admin notification email is configured and has been tested
- Spam/bot protection is enabled — FormGent supports Google reCAPTCHA, hCaptcha, Cloudflare Turnstile, and honeypot protection; see our guide on how to avoid spam submissions with an online form builder if you’re deciding which method to use
- Mobile layout has been checked — fields, buttons, and error states all display correctly
- Test Mode has been switched off for Stripe/PayPal (and a live Mollie key is in place) before publishing
- A privacy or refund policy is linked near the payment button, if applicable
FormGent’s spam protection options and Form Confirmation Messages settings cover several of the items on this list directly, without needing a separate plugin.
How to measure success
Publishing the form isn’t the finish line — knowing whether it’s actually working is. A payment form has two funnels to watch, not one: whether people fill it out, and whether they actually complete the charge once they’re handed off to the gateway. Here’s what to track on each side.
Payment-specific metrics
Every submission tied to a Payment block lands in one of a fixed set of payment statuses — Pending, Paid, Failed, Cancelled, Refunded, Unpaid, or Expired — visible against each entry in your Responses area. That status breakdown is where payment-specific success actually lives:
- Payment success rate — Paid entries divided by all entries that reached the gateway (Paid + Failed + Cancelled + Expired). This is the number that tells you whether the payment itself is working, separate from whether the form is filled out.
- Cancelled-at-gateway rate — how many people reach Stripe, PayPal, or Mollie’s hosted checkout page and back out (Cancelled), rather than never starting the form at all. A high cancelled rate points at the gateway hand-off itself — unclear pricing before the redirect, an unexpected total, or a slow/confusing return trip — not at your form fields.
- Failed/declined rate — entries marked Failed. A rising failure rate is usually a card-decline or currency/amount configuration issue on the gateway side, worth checking against your Stripe/PayPal/Mollie dashboard rather than treating as a form UX problem.
- Refund rate — entries that move to Refunded after being Paid. This is a trust and expectations signal: a rising refund rate often means the confirmation experience, pricing clarity, or the product/service itself is causing buyer’s remorse, not the form.
- Stuck Pending/Expired/Unpaid entries — sessions that never resolve one way or the other. A form that regularly leaves entries stranded in Pending or Expired is worth a periodic sweep; it’s operational debt (someone started paying and the loop never closed), not something to chase up as a lead.
- Average transaction value and total revenue — FormGent tracks status per entry rather than an aggregate revenue dashboard, so for revenue-level reporting, cross-reference your entries against your connected gateway’s own dashboard (Stripe, PayPal, or Mollie), which is the authoritative source for actual money moved.
Form-side metrics
These sit upstream of payment and tell you whether people are getting to the Payment block at all:
- Completion rate — submissions divided by form views.
- Drop-off rate — where in the form people abandon, down to the specific field or step, before they ever reach the gateway.
- Conversion rate — completed payments divided by total visitors to the page the form lives on.
- Spam rate — the percentage of submissions blocked or flagged by your spam protection.
As a rough guide, a short, well-designed payment form (three to five fields) should see meaningfully higher completion rates than a longer one — every additional field is a small tax on completion. If drop-off is concentrated at a single field, that field is almost always the problem; if the drop is happening at the gateway hand-off instead, that’s a payment-side issue, not a form-design one — which is exactly why it’s worth tracking the two funnels separately.
FormGent’s built-in Form Analytics surfaces views, submissions, and conversion rate directly in your dashboard, and entries — including their payment status — can be exported for deeper analysis; FormGent Pro adds completed-submission counts and field-level drop-off summaries on top. For a broader walkthrough of tracking setup, see our documentation on how analytics works, and if completion rate specifically is the problem, Form Design Best Practices: How to Create User-Friendly and Conversion-Optimized Forms goes deeper on the fixes.
Related guides and product pages
We’ve covered almost everything you need to build a working payment form in WordPress. If you want a payment form that collects your money without any hassle — secure gateways, clean confirmations, and receipts built in — FormGent’s payment features are built to get you there in minutes, not hours.
If you want to explore more advanced features and use cases, here are some handpicked resources to check out next:
How to Connect WordPress Forms to Google Sheets Without Zapier or API Setup
Mastering Conditional Logic in Forms: A Guide to Personalized User Experiences
How To Automate Website Form Submissions Into Zapier (Step-By-Step With FormGent)
Mastering Conditional Logic in Forms: A Guide to Personalized User Experiences
For the full picture of what’s possible with native WordPress Form Builder beyond payments, have a look on amazing features of FormGent that are Free!
FAQs
What is creating a payment form in WordPress?
Creating a payment form in WordPress means embedding a form on a page or post that collects payment through a connected gateway like Stripe, PayPal, or Mollie, then returns the visitor to your site once they’ve paid. For example, a consultant might add a simple form with a fixed $49 fee, a name field, and an email field to their services page. Tools like FormGent build this natively inside WordPress forms.
Why does creating a payment form matter for WordPress forms?
It matters because how the form is built directly affects whether people finish paying. A form with clear pricing, a smooth hand-off to the gateway’s checkout page, and an unmistakable confirmation converts better than one with vague amounts or an unclear “did it work?” ending. For example, a donation form with a confusing amount field will see more abandoned submissions than one with a clear custom-amount field and a confirmation message.
How do I implement a payment form with FormGent?
Enter your gateway credentials (Stripe, PayPal, or Mollie) under FormGent → Settings → Payment, then build the form using either the AI generator or the manual drag-and-drop builder, add a Payment block with your chosen amount type, and test in Test Mode before switching to live. For example, prompting the AI with “one-time $49 consultation payment form” generates a starting structure automatically.
What are the best practices for a WordPress payment form?
Keep the form short, add a Payment Summary so buyers see exactly what they’re paying for, test every transaction in sandbox mode before going live, and always configure both an admin notification and a customer confirmation/receipt. For example, a donation form with a clear Custom Payment Amount field and a specific confirmation message consistently outperforms a bare, unlabeled amount field.
What examples should I follow when building a payment form?
Follow the good-vs-bad patterns above: specific field labels (“Consultation fee (USD)” instead of “Amount”), action-specific buttons (“Pay $49 now” instead of “Submit”), and confirmation messages that restate the amount and next steps. For example, a receipt-style confirmation reduces “did my payment go through?” support requests.
What related pages should I read next?
Start with the WordPress Payment Form Plugin hub for the broader form-type overview, then the Payment Forms with Stripe or PayPal feature pages for gateway-specific setup, and the Payment Form Template if you’d rather start from a ready-made structure. For example, if your use case is donations specifically, the donation form guide covers variable-amount configuration in more depth.
How do I securely collect payments on a WordPress payment form?
Use a gateway that processes the actual charge on its own hosted, PCI-compliant checkout page rather than a plain text card field on your site, enable SSL/HTTPS, and always test in sandbox mode first. FormGent’s Stripe, PayPal, and Mollie integrations all work this way by design — card details never pass through your WordPress server.
How do I test a payment form before going live?
Use your gateway’s published test card numbers (or a Mollie test API key) with Test Mode enabled, then confirm the entry appears in your dashboard, the confirmation email sends, and the transaction shows in your gateway’s sandbox dashboard. For example, Stripe’s test cards let you simulate both successful and declined payments before real money is involved.
Can I collect recurring or subscription payments with a WordPress form?
Yes, with FormGent Pro — set the Payment block’s Payment Type to Subscription and configure a billing interval (daily, weekly, monthly, or yearly) and a cycle limit. This is currently supported with Stripe and PayPal; Mollie is one-time payments only.
Do I need a developer or coding skills to add a payment form?
No. FormGent’s drag-and-drop and AI-generated builders require no code — you enter your gateway API keys once, then choose fields visually and publish. For example, describing your form in a sentence to the AI generator produces a working starting form in seconds.
Where should I place a payment form on my site for the best results?
Common effective placements include a dedicated checkout-style page for focused conversions, embedded directly in a product or service page for context, or in a footer for smaller contributions. For example, a nonprofit might place a donation form both on a dedicated donate page and as a smaller embedded version in blog post footers.
What’s the difference between a payment form and a full online store?
A payment form handles a small number of fixed or variable-price items, donations, or deposits without a shopping cart; a full store like WooCommerce handles multi-item carts, inventory, shipping, and tax rules at scale. For example, a single consulting fee needs only a payment form, while a retailer selling dozens of products needs a full store.


How to Create a Custom User Registration Form in WordPress
September 29, 2026[…] For the full walkthrough, gateway setup, amount types, subscriptions, and testing before you go live, see our guide on how to create a payment form in WordPress. […]