
How to Create a WordPress Newsletter Signup Form with FormGent
-
- Tips and Tricks Form Builder FormGent Integrations
- 5 mins read
Email is still the most reliable way to reach your audience. Unlike social media algorithms, a newsletter lands directly in your subscriber’s inbox. The catch? You first need an easy way to collect those email addresses on your WordPress site.
This guide walks you through creating a WordPress newsletter signup form using FormGent — from building the form to connecting it with your email marketing service and publishing it on your site.
What you need before you start
Three things, and only three:
- FormGent installed and activated on your WordPress site (the free version is enough for everything covered in this guide)
- An active account with your preferred email marketing service — Mailchimp, Zoho CRM, or anything you connect through Zapier
- A WordPress page or post where the form will live
That’s it. No paid add-ons, no developer help, no additional plugins.
How to Create a WordPress Newsletter Signup Form
Step 1: Install FormGent
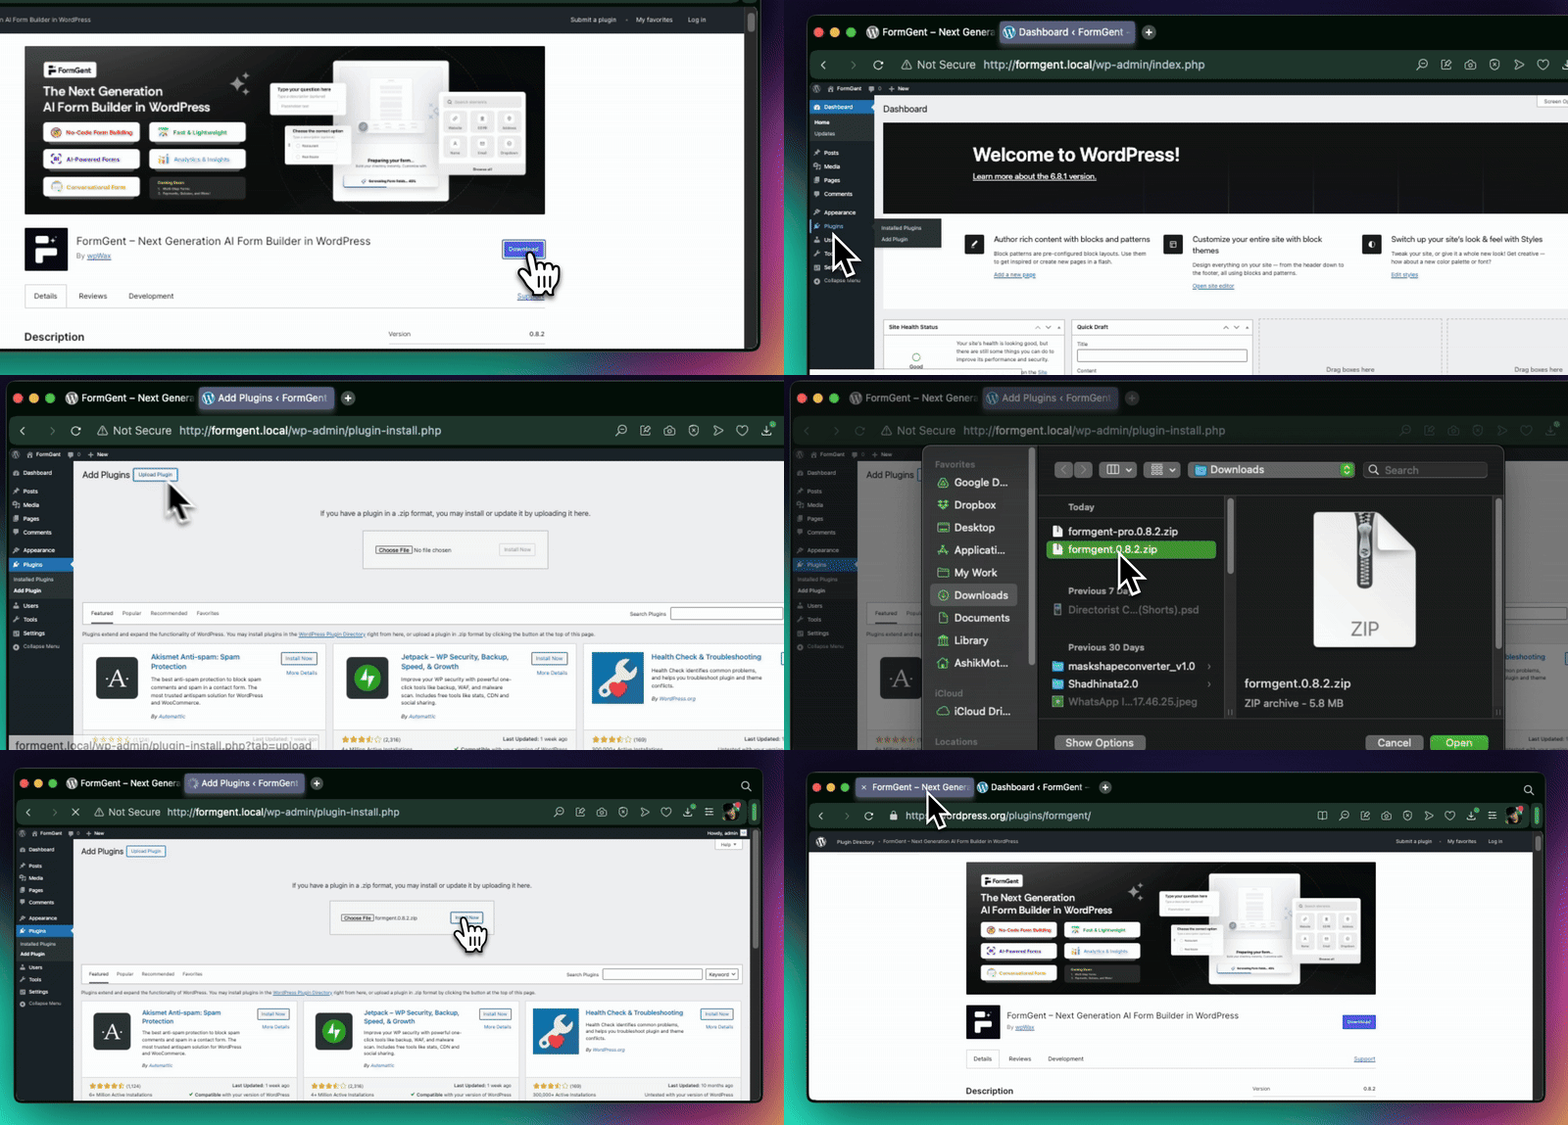
Download FormGent for free from the WordPress plugin repository or install it directly from your WordPress dashboard.
Go to Plugins > Add New, search for “FormGent”, click Install Now, then Activate. Once active, a FormGent menu item appears in your WordPress sidebar.
Step 2: Build your signup form
You have three ways to create the form: build it manually with drag-and-drop, using the pre-made templates or let the AI generate it from a plain-English prompt.
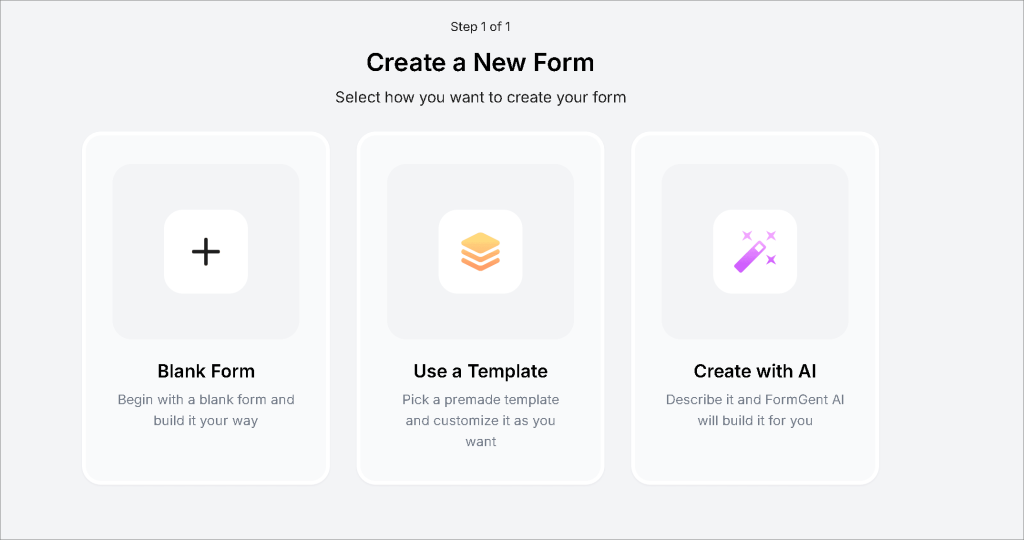
Option A: Use AI to generate the form
From the FormGent dashboard, click Create Form and choose the AI Form option. Type a prompt like:
“Create a newsletter signup form with first name and email fields”
FormGent generates the form in a few seconds. You can then review and adjust the fields as needed.
Option B: Build it with drag-and-drop
Click Create Form, select a blank template, and you land in the drag-and-drop form editor. For a basic newsletter signup, add these blocks from the left panel:
- Name (for personalization in your email campaigns)
- Email (required field — this is what gets sent to your list)
- Custom Submit Button (edit the button label to something like “Subscribe” or “Join the list”)
Keep it short. A two-field form — name and email — converts significantly better than a longer one. People sign up faster when the ask is small.
FormGent’s editor is WordPress-native, so it feels like working inside Gutenberg. You can adjust field widths, add placeholders, set the email field as required, and add a GDPR compliance checkbox if your audience is in the EU.
Step 3: Connect your email marketing service
Once your form is built, you need to route new signups to your email list. FormGent includes integrations with Mailchimp, Zoho CRM, and Google Sheets built into the free plan, and connects to 7,000+ additional tools through Zapier.
Connecting Mailchimp
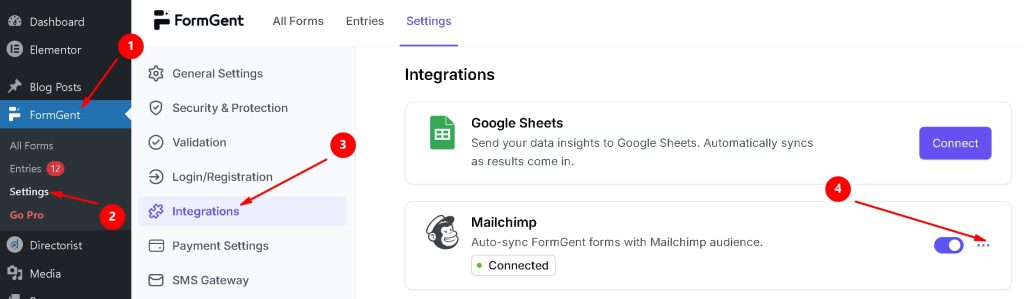
In the form editor, open the Integrations tab and select Mailchimp. Authenticate using your Mailchimp account via OAuth — no API keys to copy and paste manually.
After connecting, select the audience list you want signups added to. Then map your form fields: match the Email field to your Mailchimp email merge tag, and Name to the first name field. Save the integration.
From this point on, every submission routes the subscriber’s name and email directly into your Mailchimp list.
To connect with Mailchimp, follow this tutorial – How to Add a Mailchimp Signup Form in WordPress
Using Zapier for other email platforms
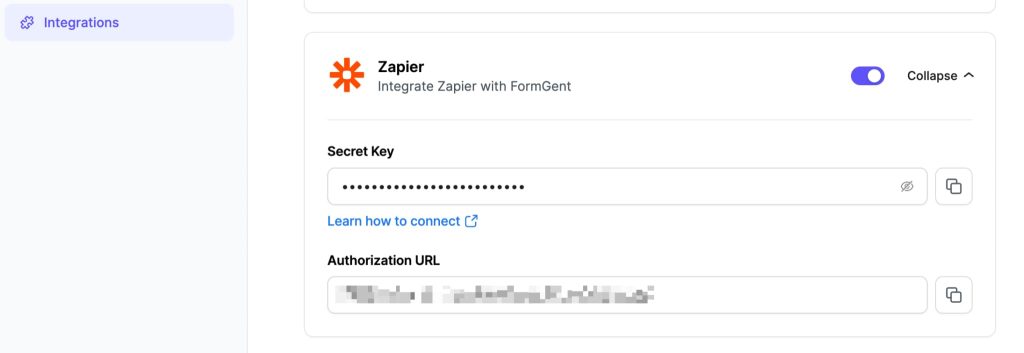
If you use ConvertKit, ActiveCampaign, AWeber, Klaviyo, or another platform, connect it through Zapier. Under Integrations, select Zapier and use the FormGent REST API endpoint as the trigger. Zapier handles the routing to whichever tool you use — and with 7,000+ apps available, very few services are out of reach.
To connect with Zapier, follow this tutorial – How To Automate Website Form Submissions Into Zapier (Step-By-Step With FormGent)
Step 4: Route signups to different lists using Conditional Logic
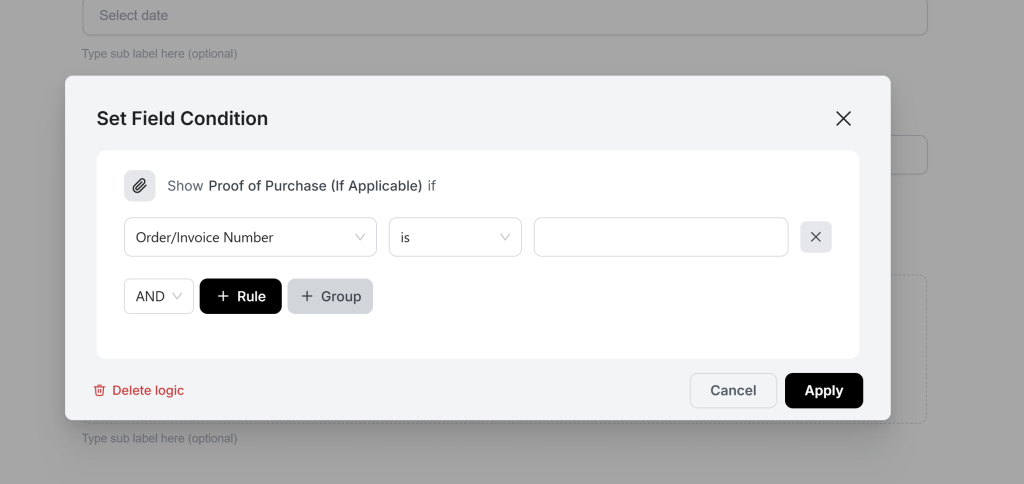
If your site covers more than one topic, you can let subscribers choose what they want to hear about and route them to the right list automatically.
Add a Single Choice or Dropdown field to your form. Label the options to match your lists — for example, “Product updates” and “Weekly tips”. Then open the Conditional Logic panel and create a rule for each option: if the subscriber selects “Product updates”, trigger the Mailchimp integration mapped to that list; if they select “Weekly tips”, trigger the one mapped to the other.
This runs entirely in the free plan. No add-on purchase required.
If you want to set conditional logic in your Newsletter Signup Form, then follow this guide – Mastering Conditional Logic in Forms: A Guide to Personalized User Experiences
Step 5: Publish the form on your site
FormGent gives you two ways to add the form to any page or post.
Shortcode
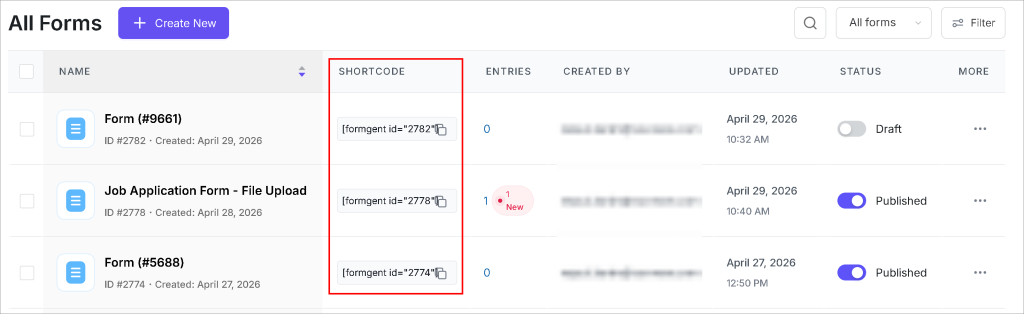
From the FormGent dashboard, copy the shortcode next to your form (it looks like
). Paste it into any page, post, or widget area. The form renders on the front end automatically.
Gutenberg block
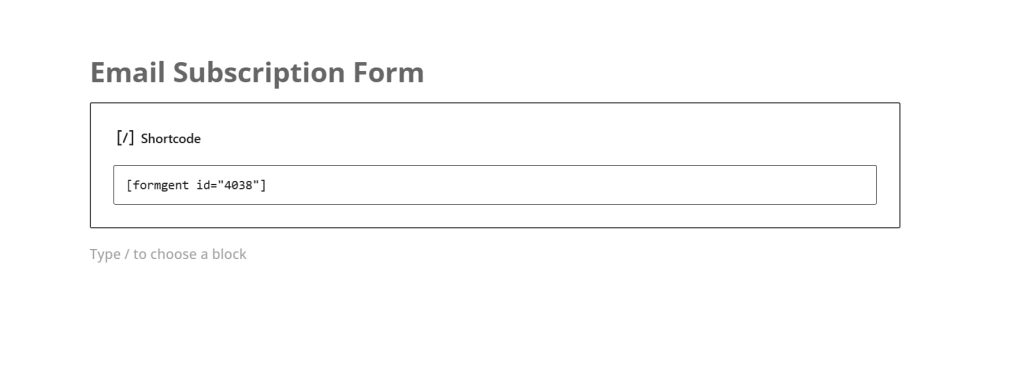
Open the page or post in the block editor. Click the + icon to add a block and search for “FormGent”. Select your newsletter form from the dropdown. A live preview appears inside the editor. Publish or update the page and the form is live.
Both methods work without touching any code.
Optional: Try a conversational form for better engagement
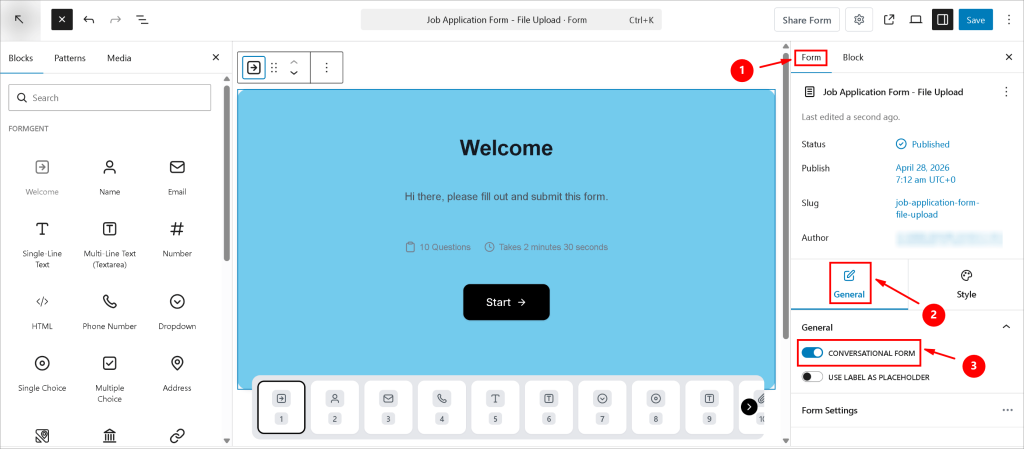
Standard forms work well. Conversational forms often work better.
A conversational signup form shows one question at a time, like a chat. The user answers the name question, moves to the email question, then hits submit. This format feels less like filling out a form and more like a quick exchange, which can improve completion rates on landing pages and pop-up placements.
In FormGent, switch to conversational mode from the form settings with a single toggle. The fields, integrations, and conditional logic you’ve already set up carry over automatically.
You now have a working newsletter signup form
Once your form is live and connected to your email service, every new subscriber goes straight into your list without any manual work on your end.
A few things worth remembering as you grow your list: keep your form short, make the value of subscribing clear (what will they actually get?), and place the form where your most engaged readers are — inside blog posts, at the end of articles, or in a dedicated subscribe page.
FormGent’s free plan handles everything covered in this guide: form building, Mailchimp integration, conditional logic, and Zapier connections. If you later need features like PDF generation, OTP email verification, Save and Resume for longer forms, or advanced analytics, those are available in the Pro plan.

Rezaul Karim
Rezaul Karim is a passionate Digital Marketer driven by curiosity and creativity in the ever-evolving world of online marketing. With over 6 years of hands-on experience in Content Writing, Copywriting, SEO, and Social Media Marketing, he brings a strategic edge to crafting content that engages and converts. Always eager to explore new trends and tools, Rezaul thrives on finding smarter ways to connect brands with their audiences. Outside of work, he enjoys diving into books or recharging in nature.

Leave a Reply