

Create and Add Contact Form Builder in WordPress (Easy Guide)
-
- Tips and Tricks
- 6 mins read

Are you looking to create and add a contact form to your WordPress Site?
Creating a contact form can collect genuine responses without filling your inbox with junk emails. Forms aren’t only used for communication but are also a crucial bridge connecting you to your audience.
However, creating the forms is just the beginning. You also need to confirm with your audience that their responses have been received, and make sure the entries are saved on your form, the contact form builder dashboard.
In this blog post, we’ll walk you through creating a form, adding it live to your website, and even show you how to view the responses. We’ll not let you go half away. You’ll learn everything you need, not just how to create a form!
So, without further ado, let’s dig deeper.
What Are The Types of Contact Forms for WordPress Online Form Builder
Have you ever wondered why you need a contact form? It’s a simple way to connect you and the visitor easily. Here are some of the most common types of contact forms you can create using a WordPress online form builder.
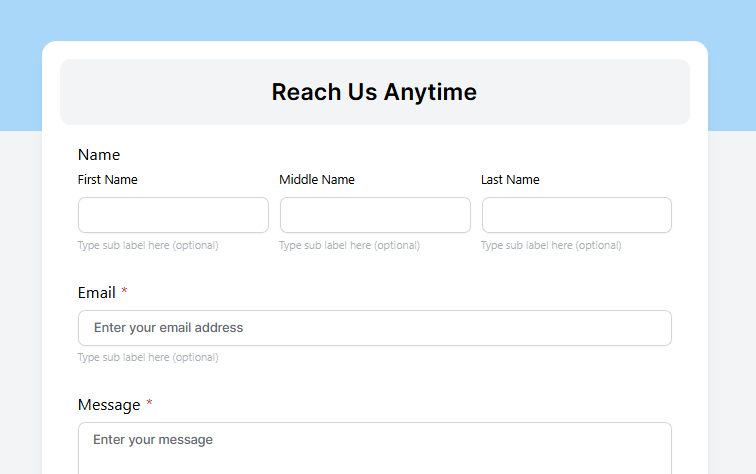
i. Simple contact form
This is a simple form to collect names, emails, messages, and contacts.
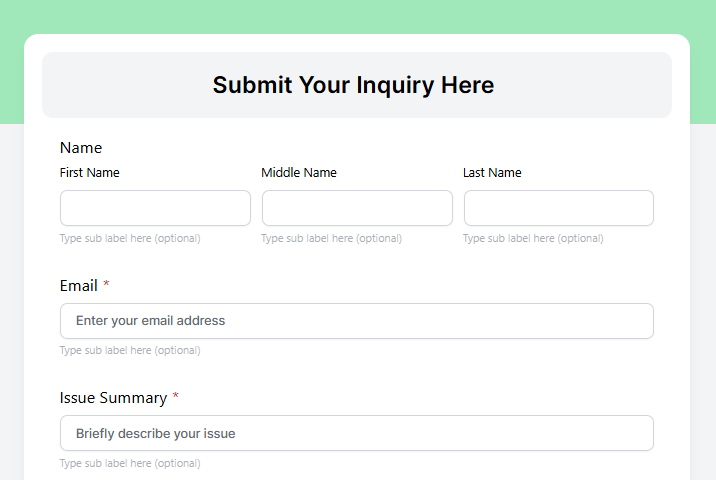
ii. Support or inquiry form
This form is for customer support and allows users to submit their issues and additional details
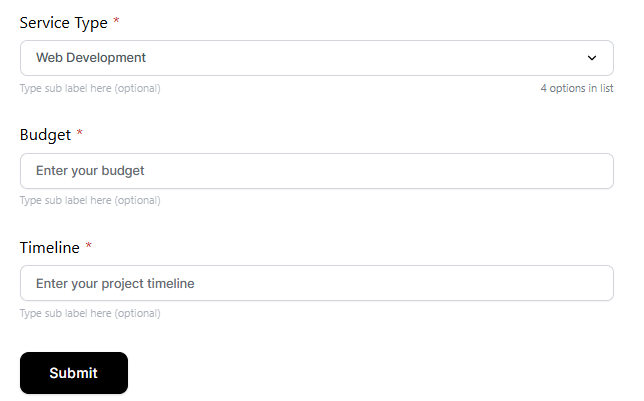
iii. Quote request form
It’s a good option for offering custom pricing to their customers.
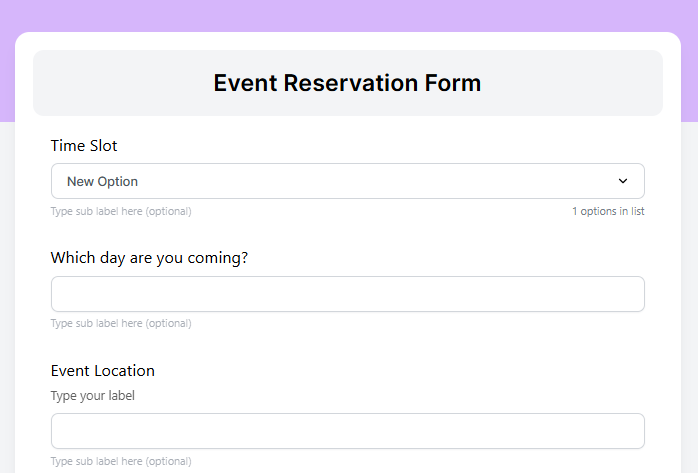
iv. Event registration form
Have you ever organized an event for your business? You can create registration forms with details, such as name, email, ticket preferences, and so on.
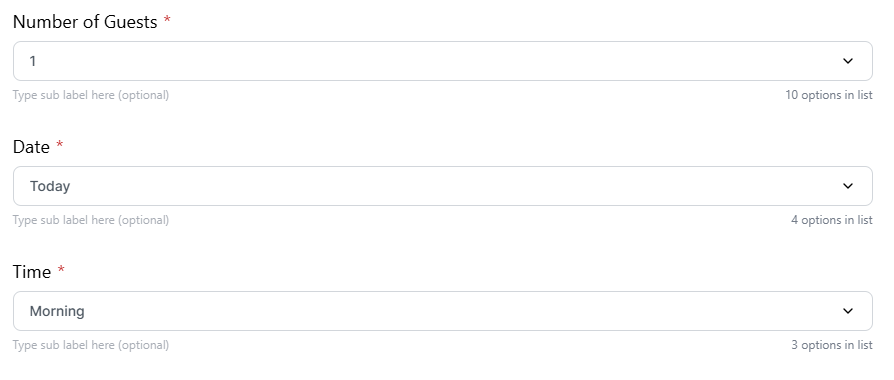
v. Appointment booking form
Do you need to make an appointment earlier? This form lets users book appointments by selecting a date and time and providing their contact details.
Benefits of Contact Form Builder for Creating Forms
1. Make it easy for visitors to reach you
Talking to someone should be simple, right? That’s exactly what a contact form does. It gives visitors an easy way to reach out without hunting for your email or phone number.
2. Keep your inbox spam-free
When you put your email address on your website, your mailbox kept filling up with junk mail every day. Using advanced Google reCAPTCHA only real visitors can reach you.
3. Stay organized with well-structured data
Contact forms let you collect the exact details you need. You can ask for name, contact, email, location, and other questions. Everything is organized and well-structured so that you can find information anytime.
4. Automate responses and follow-ups effortlessly
When someone fills out your contact form, they can get an instant reply, like a friendly “Thank you! We got your message and will get back to you soon.” You don’t have to send emails one by one. It happens automatically.
5. Save time with a hassle-free setup
Dealing with messy paperwork and installing tools with confusing setups is draining your hours. Everything happens on your computer or phone with a super easy online form builder.
Create Your First Contact Form Using Online Form Builder (FromGent)
Creating your first contact form is much easier if you use FormGent. In this section, we’ll picture the steps to make your contact form.
Whether you’re going to create your first form or switch to another online form builder you may find this blog post helpful.
Here, we’ll create a job application form.
Step 1 – Install a WordPress contact form builder plugin
We will use the online form builder FormGent to create a job application form. To install the FormGent form builder, follow these steps:
1. Log in to your WordPress dashboard > Navigate to Plugins > Add New.
2. In the search bar, type FormGent and press Enter.
3. Find FormGent in the search results and click Install Now.
Step 2 – Create a new contact form
Now you have installed the FormGent plugin on your Wp-admin dashboard.
The process is as simple as that.
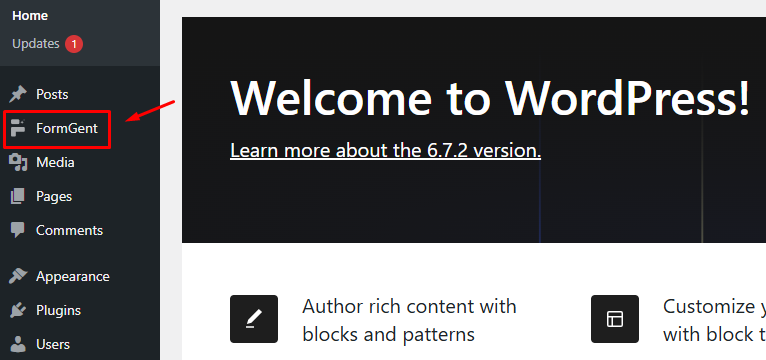
To create your form, navigate to FormGent
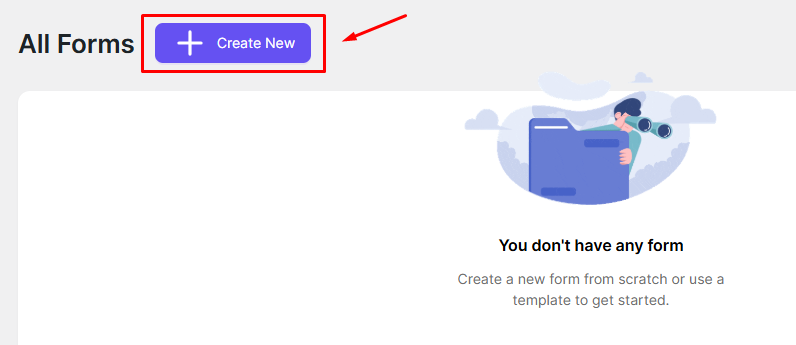
Now, the FormGent intuitive interface will pop up and you will click ‘Create New’. All of your forms will show here. To continue, follow the steps.
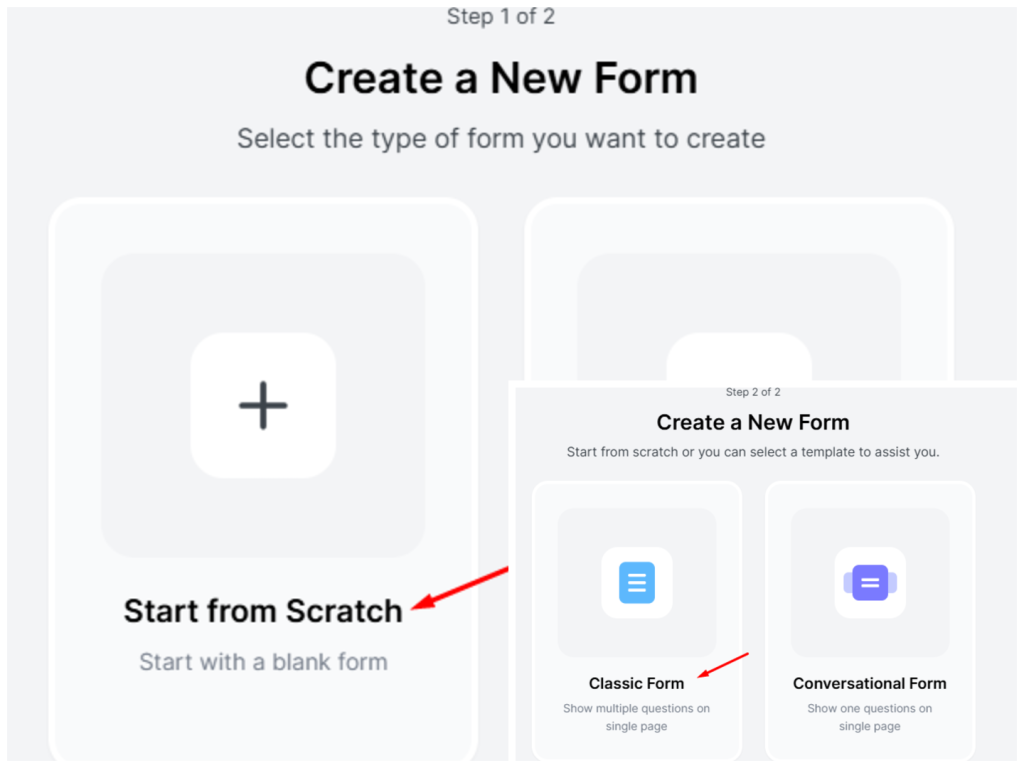
1. Choose a form type – You’ll first need to decide how you want to create your form. You can either :
- Start from scratch – Create a blank form and add fields manually
- Create with AI – Let the AI generate a form based on your description
(For this guide, we’ll proceed with “Start from Scratch.”)
2. Select a form layout – After choosing “Start from scratch,” you’ll be asked to pick a form layout :
- Classic form – Displays multiple questions on a single page.
- Conversational form – Shows one question at a time, making it more interactive.
(For this guide, we’ll proceed with “Classic Form.”)
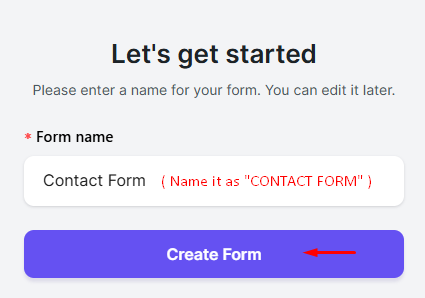
Step 3 – Give a name to your form
Here we’ll name the form as ‘Contact Form’
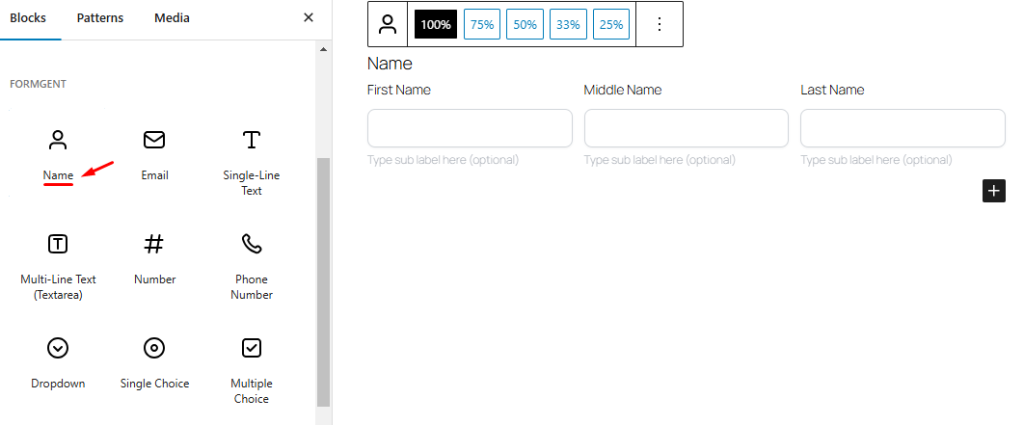
Step 4 – Add form fields and publish
After selecting the form type and layout, the next step is to add essential fields and publish the form. Follow these sub-steps:
- Name
- Phone Number
- Single line text
- Submit button
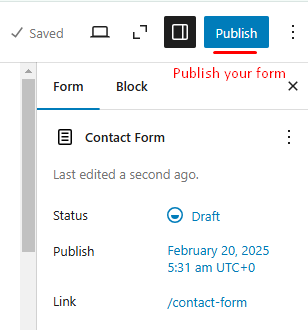
Once everything looks good, hit the Publish button to make the form live.
Add Contact Form to Your WordPress Site
Here, we will show how to add a contact form to your WordPress website step by step.
First, go to Pages in your WordPress dashboard and add a New Page where you want to display your contact form. This ensures your form has a dedicated space on your website.
Now follow these steps.
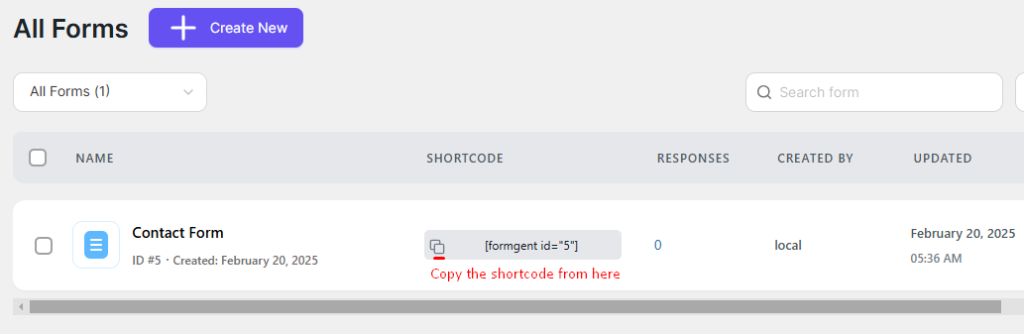
Step 1 – Copy the shortcode
Navigate to your form builder’s dashboard and locate the shortcode for your form. Copy this shortcode, as you will need it in the next step.
Step 3: Insert the Shortcode into the Page
Go back to the newly created page and do these things.
- Click on the “+” button to add a block
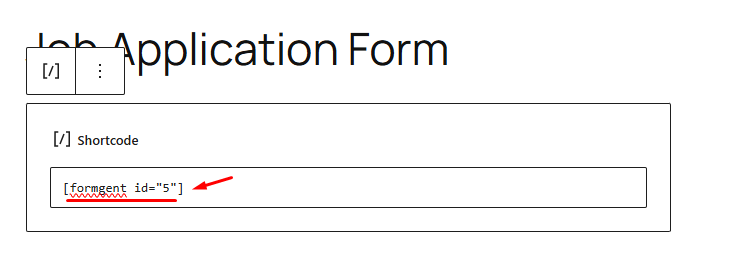
- Select the Shortcode block
- Paste the copied shortcode into the block
Want to make the form simpler? Here’s a pro tip for you.
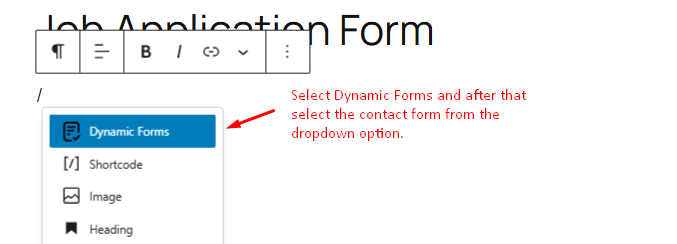
Select dynamic forms to make the Job Application Form live.
Why do you do that?
You don’t need to copy and paste the shortcode from the ‘All Forms’ dashboard.
FormGent early bird offer is going on its full swing. Get the advanced features at an affordable price today
Step 4: Preview and publish the form
Click Preview to see how your form looks. If everything appears correctly, click Publish to make the form live on your website.
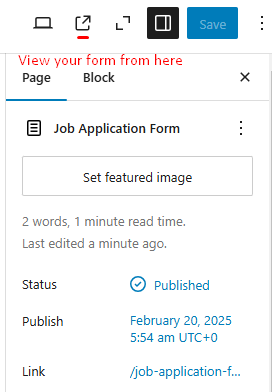
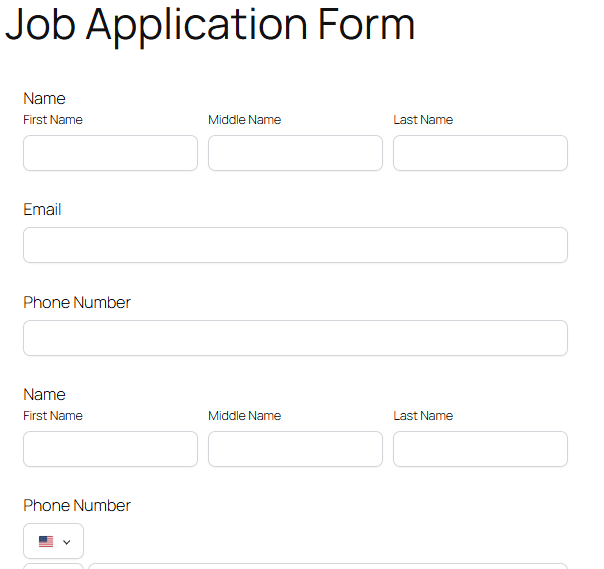
Congratulations on creating your ‘Job Application Form’.
(Bonus) Set Up Email Notification for Form Submission Confirmation
In this section, we’ll walk you through setting up email notifications for form submissions and how to view responses in your dashboard.
Step 1: Open the FormGent form builder
Go back to the FormGent form builder where you created your form.
Step 2: Access general settings
On the right-hand side, locate and click on ‘General Settings’ to configure form-related options.
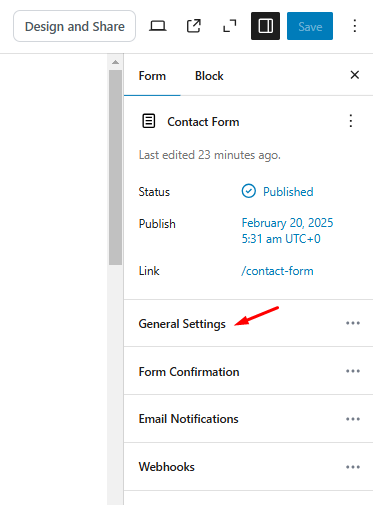
Step 3: Enable email notifications
Find the email notifications section.
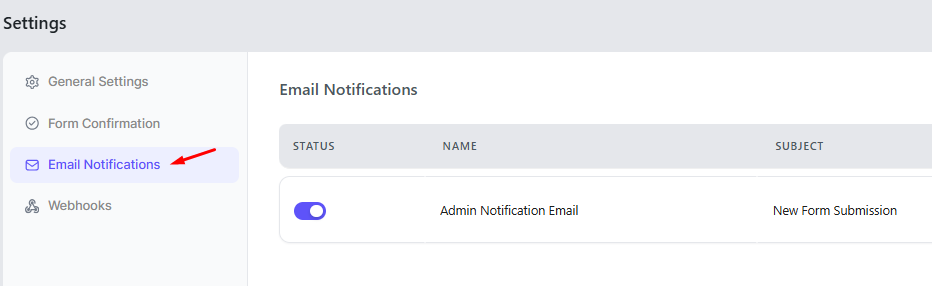
Click on add notification to set up a new email alert.

Step 4: Write the confirmation email
Customize the email content that users will receive after submitting the form.
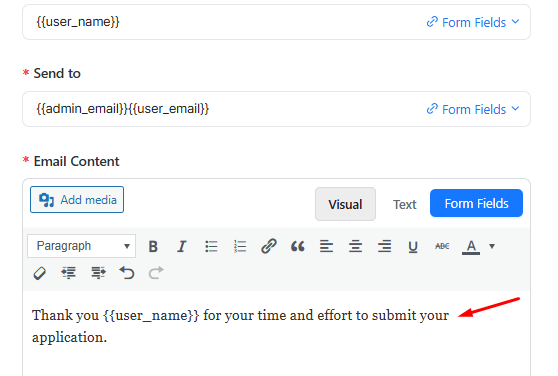
Step 5: Test the email notification
- Fill out the form with test data.
- Submit it and check your inbox to ensure you receive the confirmation email.
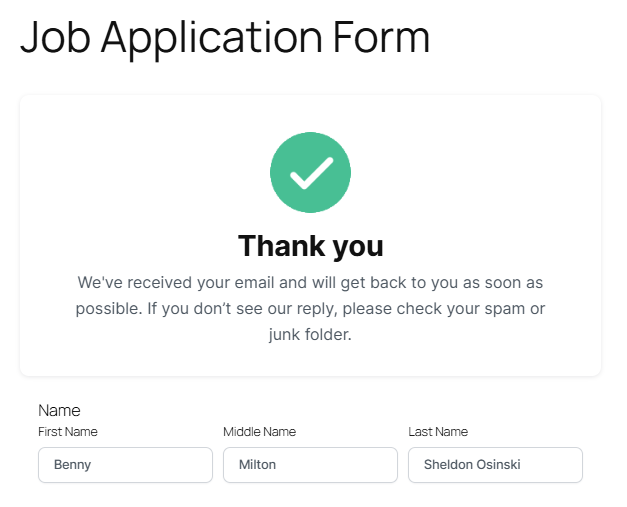
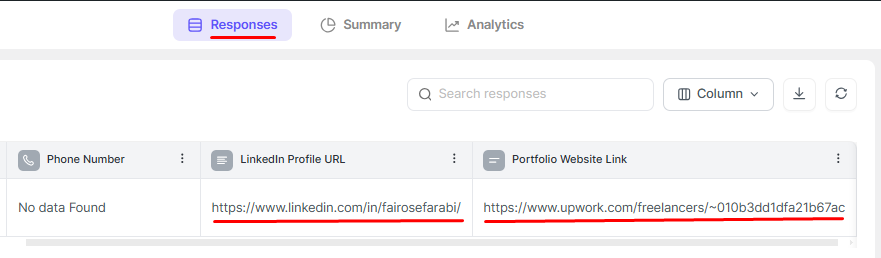
Step 6: View form responses in the dashboard
- Navigate to the FormGent dashboard
- Locate the responses section to view recorded responses
Step 7: Review and manage responses
- Click on any submission to see detailed form data.
- Use filtering or export options to organize responses efficiently.
Let’s Sum Up
Building forms doesn’t have to be tricky. We guided you through a complete form-building journey without skipping any steps and hope you realize that.
FormGent aims to give you a feeling that you know nothing, but still, you can make forms without knowing coding. FormGent’s AI is designed in a way that anyone can do it, even if it’s a simple form or a multi-step form.
So, if you have questions, drop them in the comments below. Would love to help you.


Leave a Reply