
How To Automate Website Form Submissions Into Zapier (Step-By-Step With FormGent)
-
- FormGent Integrations
- 7 mins read
Tired of manually checking every new website form submission?
Or missing out important leads, customer inquiries, or sign-ups?
You’re not alone. Many website owners struggle with managing incoming form data efficiently. As your business grows, this problem only gets worse. Manually organizing, responding, or forwarding every submission becomes a serious productivity killer—and leads to costly delays, missed opportunities, or disorganized workflows.
But here’s the good news: You don’t have to keep doing it the hard way.
With Zapier, you can automate your website form submissions, so that every time someone fills out a form on your site—like with FormGent—you can instantly get an email alert, push it to your CRM, log it in Google Sheets, or even send a Slack message.
In this blog, we’ll show you exactly how to connect FormGent to Zapier step by step, and automate your form submissions to save time, boost efficiency, and never miss a response again.
Let’s get started!
What Is Zapier

Zapier is a powerful no-code automation platform that connects your favorite apps and services so they work together—without you having to write a single line of code.
Think of it as a digital bridge between tools like Gmail, Google Sheets, Slack, Mailchimp, FormGent, and over 7,000+ other apps. It helps you automate repetitive tasks, streamline workflows, and save hours of manual work.
Zapier works using a simple “Trigger → Action” format.
Here’s how it functions:
- Trigger: The event that starts the automation. For example, someone submits a form on your website.
- Action: What you want Zapier to do when the trigger happens. For instance, send you an email, add the data to Google Sheets, or notify your team on Slack.
These automations are called Zaps. A single Zap can be as basic or complex as you need. You can even chain multiple actions together for more advanced workflows.
For example: A user submits a form via FormGent → Zapier triggers → Sends you an email + Logs data in Google Sheets + Notifies your team in Slack — all automatically.
Whether you’re a marketer, entrepreneur, agency, or business owner, Zapier is your silent team member that works behind the scenes—24/7.
Why Use Zapier With WordPress Form Plugins Like FormGent?
When someone submits a form on your WordPress website, what happens next?
If the answer is “you manually check and respond”, you’re wasting valuable time—and possibly missing out on leads, sales, or opportunities. That’s where Zapier steps in.
Integrating Zapier with a powerful form builder like FormGent allows you to automate what happens after a website form submission, with zero coding. Here’s why that’s a big deal:
1. Eliminate Manual Tasks
With Zapier, you can set up automations:
• Send a follow-up email to the user
• Notify your sales team in Slack
• Add the lead to Google Sheets or your CRM
• Trigger a support ticket
No more downloading form entries or copying data—everything flows automatically.
2. Connect With 7,000+ Apps
FormGent + Zapier opens the door to thousands of integrations. You can link your form to:
• Marketing tools (Mailchimp, ActiveCampaign, ConvertKit)
• CRMs (HubSpot, Zoho, Salesforce)
• Project management tools (Trello, Notion, ClickUp)
• Online shopping sites, help desk software, and others
Whatever tools you choose, it’s likely that Zapier can integrate with them.
3. Real-Time Responses (or as Close as Possible)
Zapier runs most tasks in near real-time—especially on premium plans. Even on free plans, it checks for new form responses every 15 minutes. That means your workflow stays fast, responsive, and automated. Note that the time can be different depending on your plans.
4. Focus On What Matters Most
Instead of worrying about checking website form responses, you can focus on growing your business, closing deals, or nurturing leads—while Zapier handles the repetitive stuff behind the scenes.
Why FormGent + Zapier = A Winning Combo
While most WordPress form plugins charge for Zapier support or require paid add-ons, FormGent offers built-in Zapier integration and premium features for free. That’s a big advantage for small teams or solo entrepreneurs.
With FormGent, you get:
• Native Zapier support
• Seamless data forwarding
• Easy-to-use multi step form builder
• Smart fields & conditional logic
All without needing to upgrade—making it one of the most automation-friendly form plugins on the market today.
Want to see it in action? Let’s explore how to Automate Website Form Submissions into Zapier (step-by-step)
Step-by-Step: Automate FormGent Submissions Into Zapier
Automating your form submissions with Zapier is easier than you think. Follow this step-by-step guide to connect FormGent to Zapier.
Step 1: Create Your Zapier Account
Visit Zapier.com and create a free account if you haven’t done so yet.
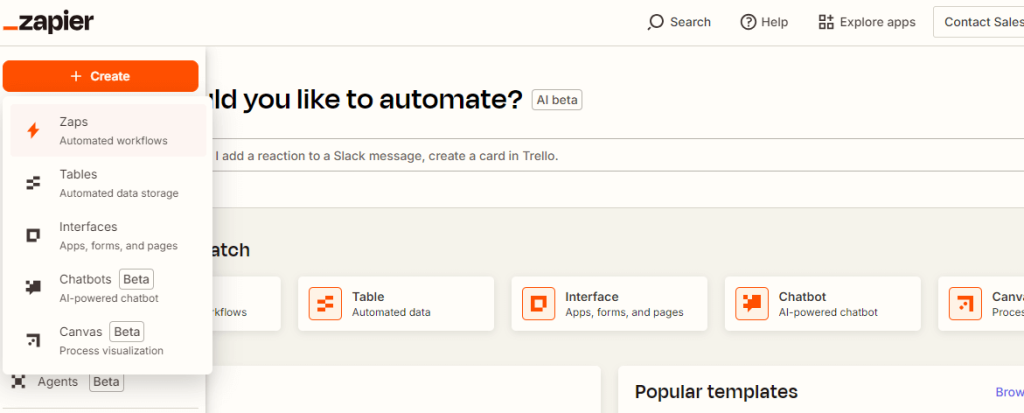
Step 2: Start A New Zap
Start by clicking “Create Zap” from your dashboard.
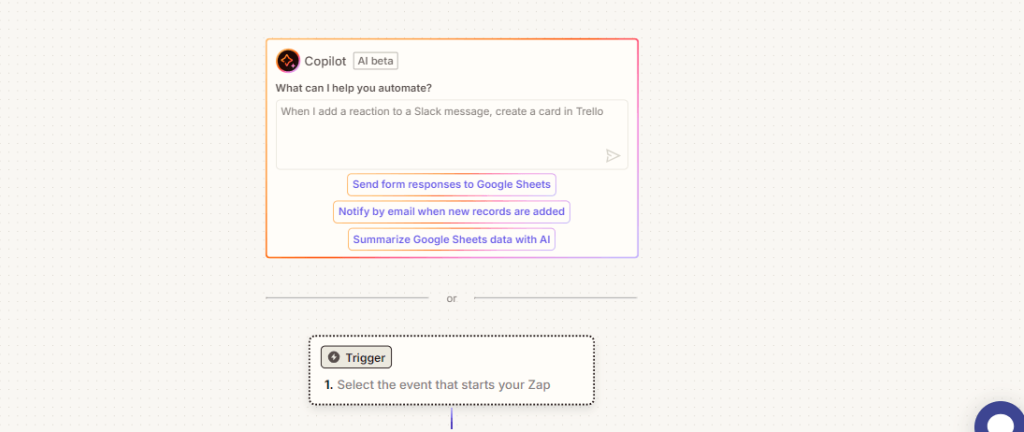
You can use AI to create automation workflows, but in this tutorial, we’ll show you the manual setup for better technical clarity.
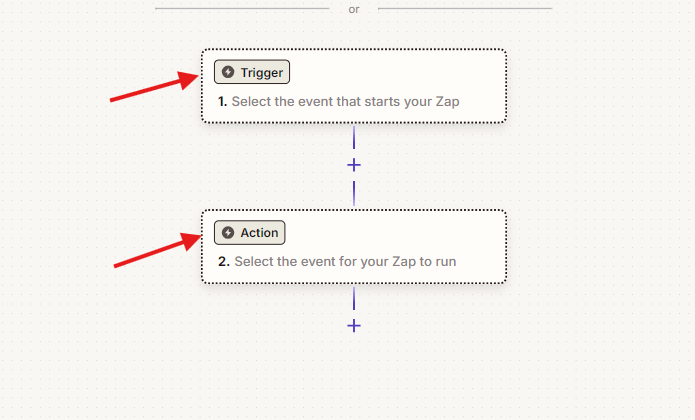
Step 3: Understand Zapier’s Structure
Zapier automations (called Zaps) are made up of two key components:
Trigger – the event that initiates your Zap
Action – what you wish Zapier to execute after the trigger activates
Step 4: Set FormGent As The Trigger
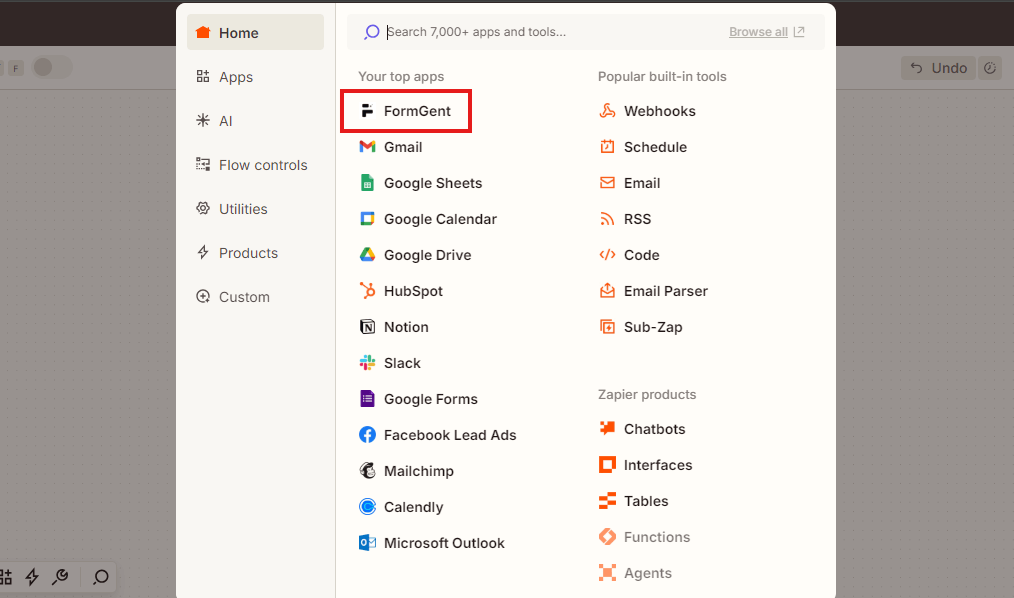
In the Trigger section, search for and select FormGent as the app.
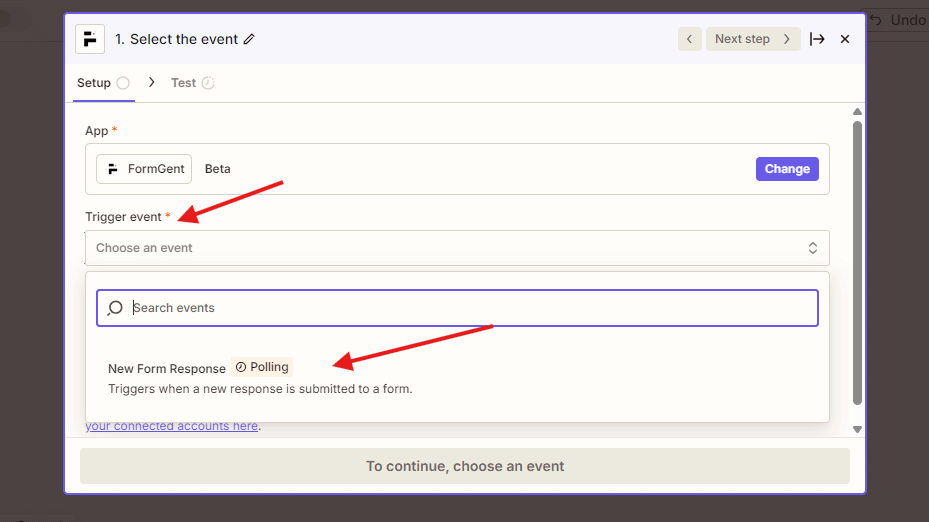
Choose the trigger event: New Form Response.
Note: This trigger uses a polling method, meaning Zapier checks for new form submissions every 15 minutes. (Time can be different based on your subscription)
Step 5: Connect Your FormGent Account
Click Continue, and you’ll be prompted to connect your FormGent account. For integrating FormGent with Zapier, you need to validate by authorization URL & secret Key. For authorization, please check our Zapier Integration documentation section.
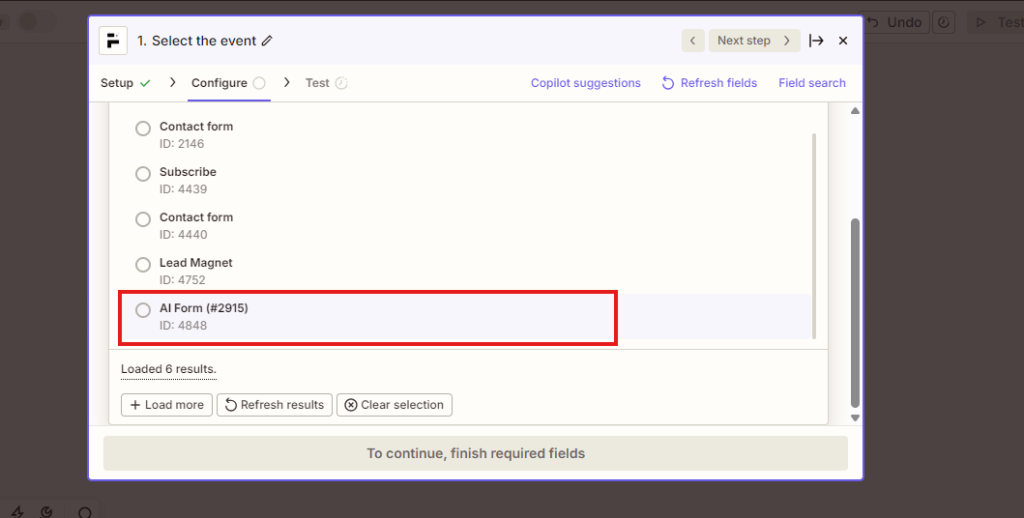
Once connected, you’ll see a list of forms you’ve already created in FormGent.
Pick the form you like to automate with Zapier.
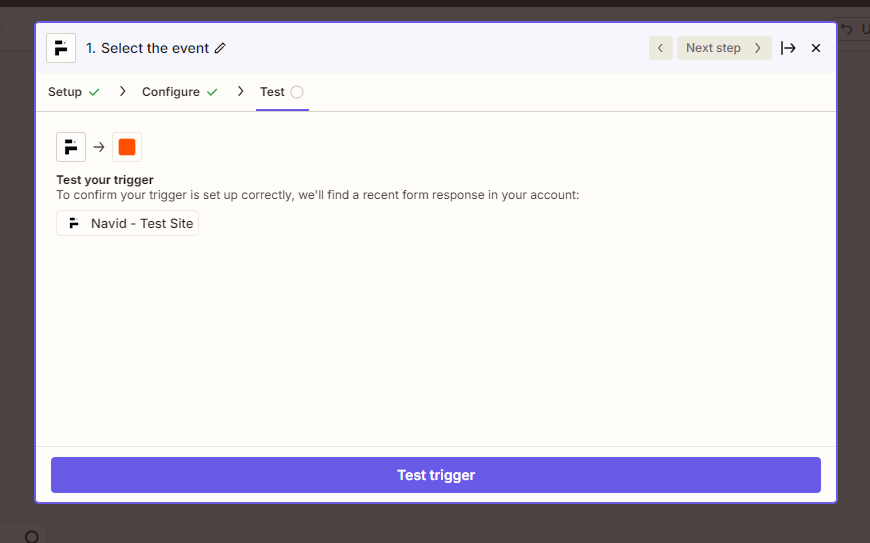
Step 6: Test Your Trigger
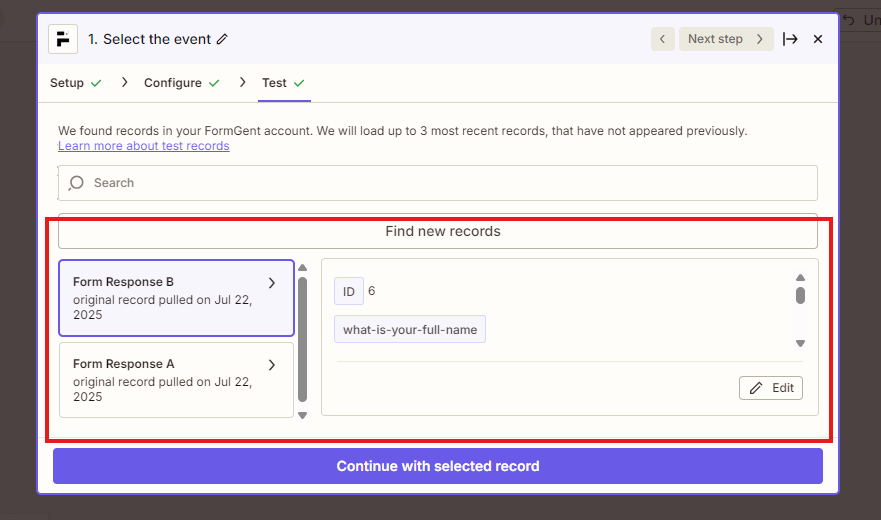
Click “Test Trigger” to confirm that Zapier can fetch sample form responses.
When successful, Zapier will present the information taken from your selected form. This ensures the setup is working correctly.
Step 7: Establish The Action
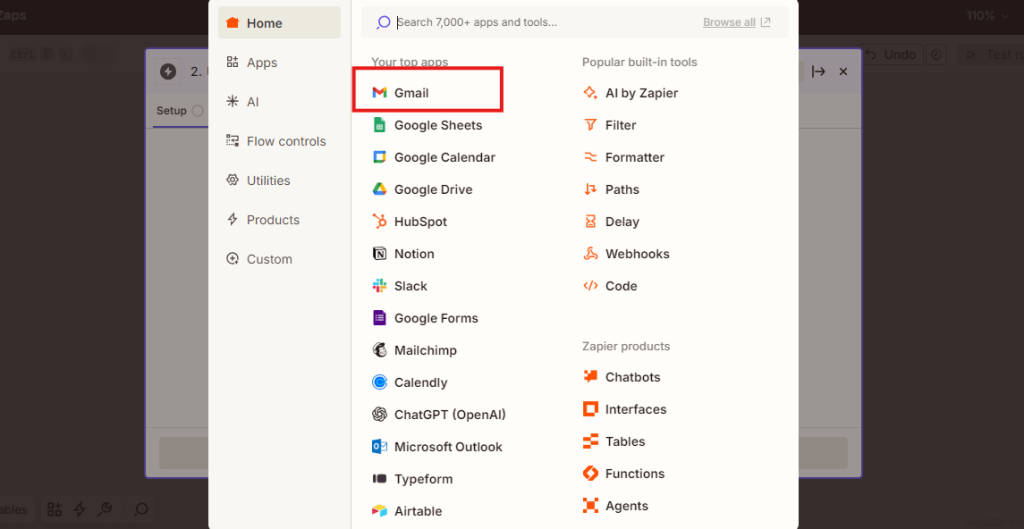
Since your trigger is working, it’s time to define the Action. You can automate your website form submission from the endless list. This time we’ll do automated Gmail. This flow will like if someone submit a form, we’ll receive an email alert. For this, search for Gmail and pick it as your Action app.
Step 8: Configure The Email Details
Now, set up how the email will be sent after a form is submitted. This time we’ll select the “Send Email” event as we are planning to receive an alert email on form submission.
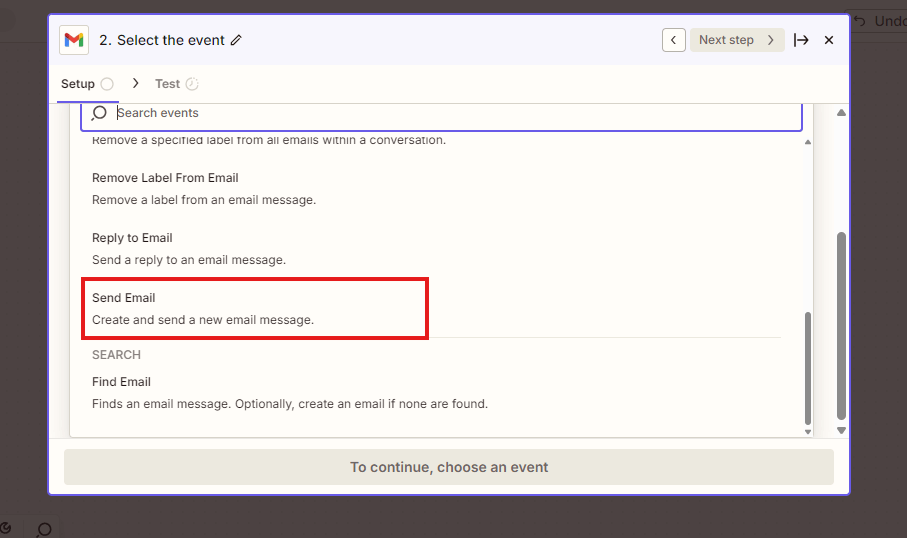
Connect the Gmail account you want to send mail from.
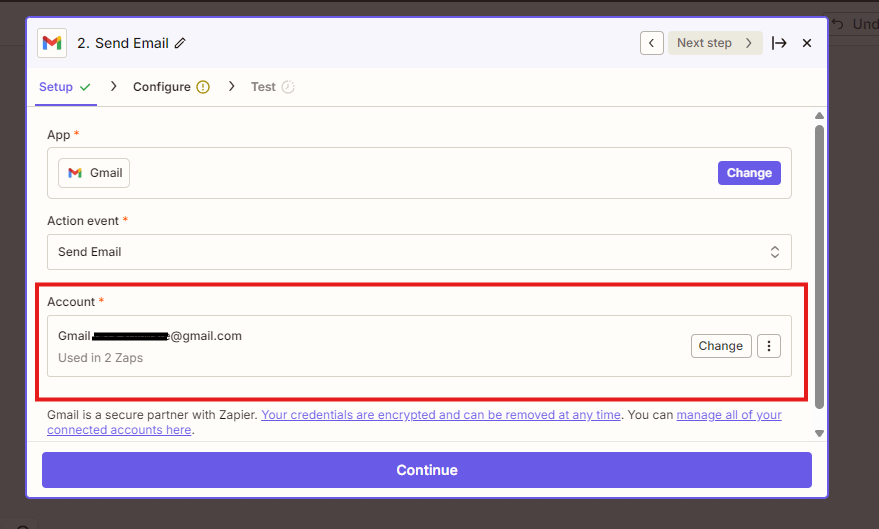
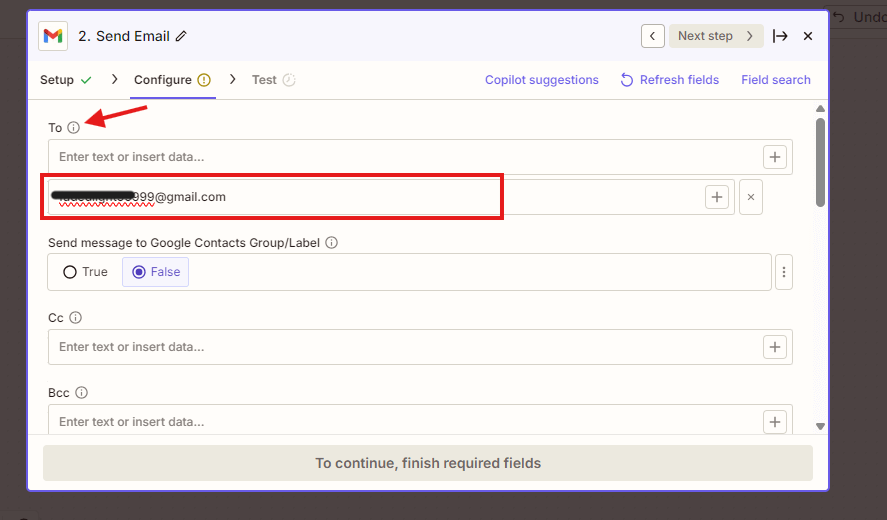
To: Input your email address.
You can also add CC/BCC, attachments, and other advanced options based on your needs.
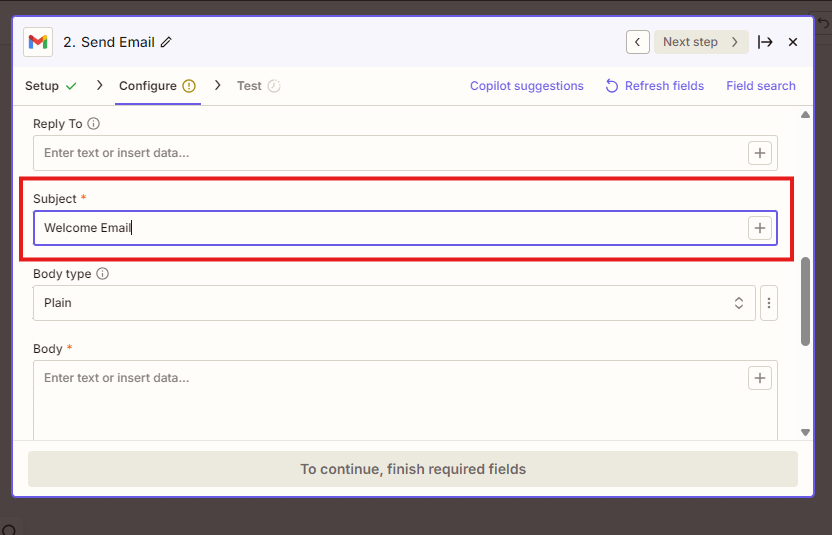
Subject: e.g., “Welcome Email”
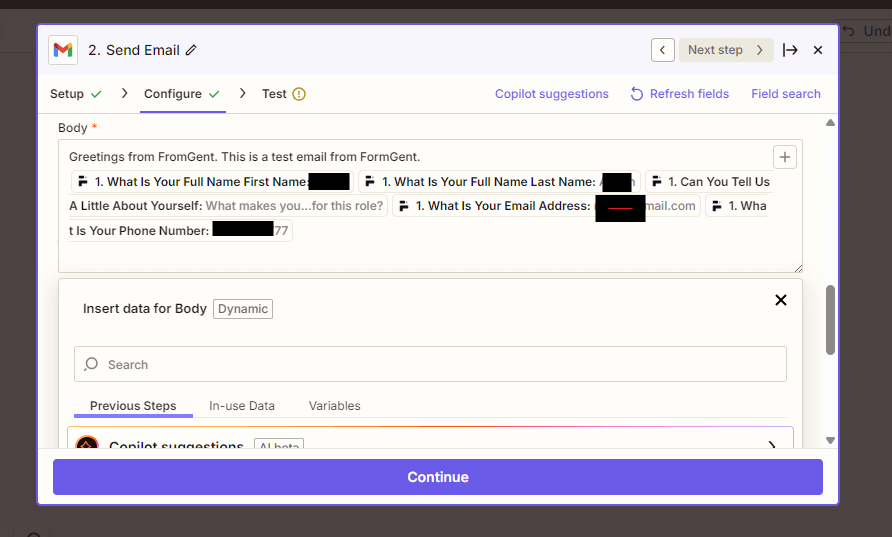
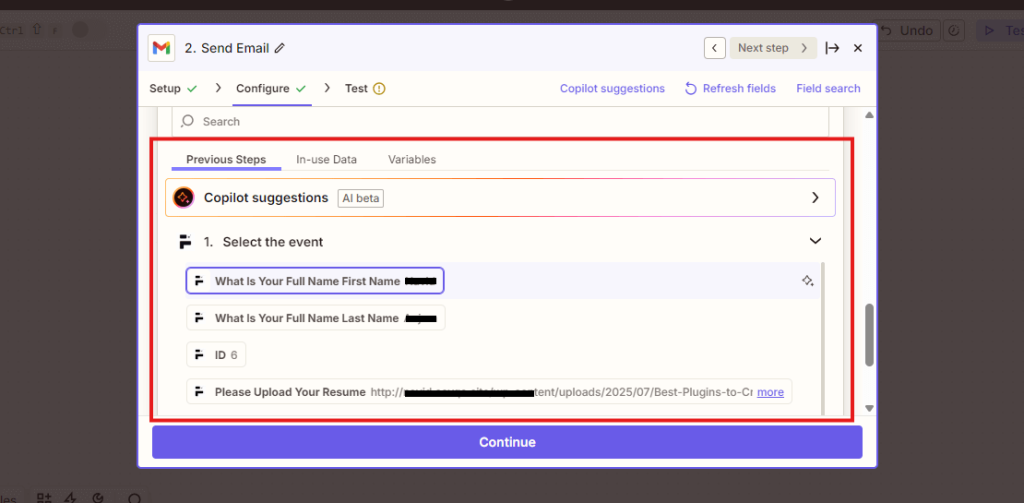
Body: You can write custom text and insert form fields dynamically (like name, email, message, etc.) to personalize the content
Step 9: Test The Zap
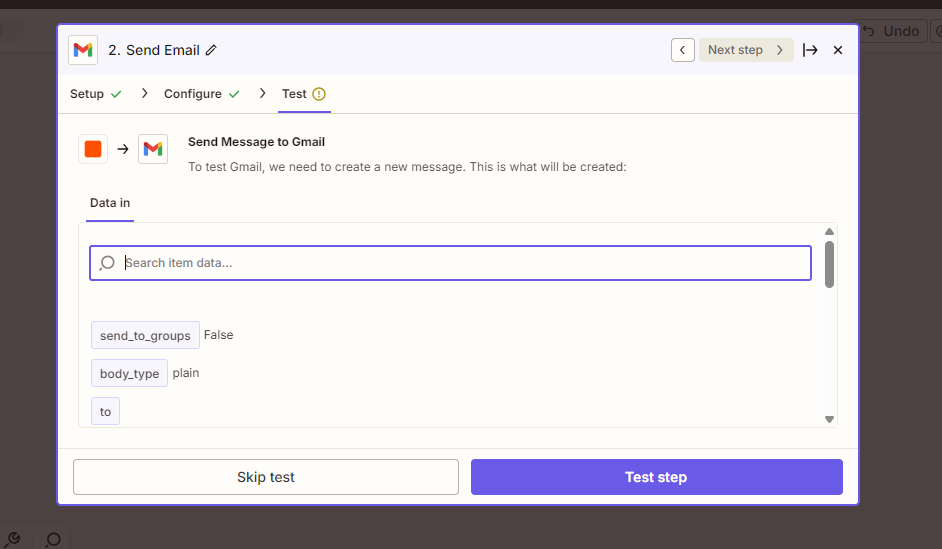
Press “Test Step” to send a test email to your attached Gmail.
If the test email lands in your inbox successfully, everything has been set up correctly.
Step 10: Publish The Zap
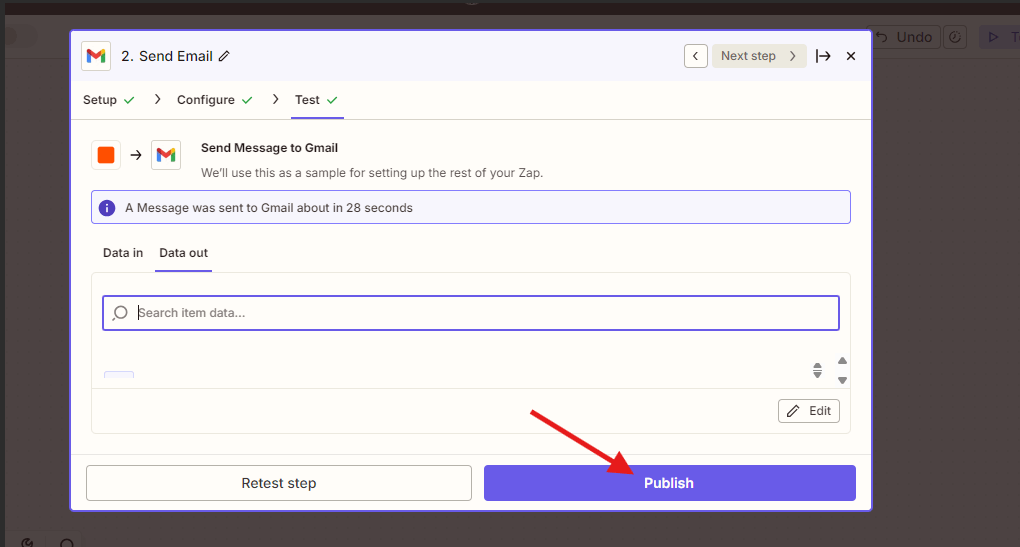
Once the test is successful, click “Publish” to activate the automation.
From now on, whenever someone fills out the chosen FormGent form, you will automatically get an email containing the website form details.
Final Check
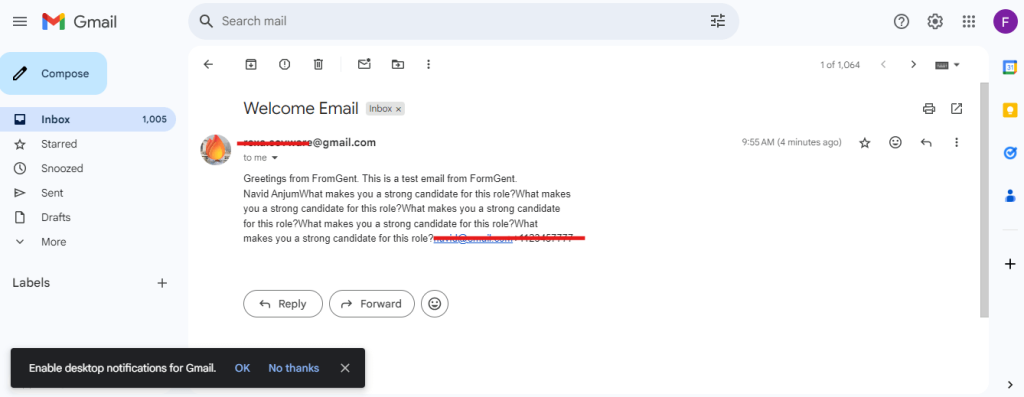
You should now see a test email in your inbox that confirms the integration is working. Going forward, your workflow will run hands-free, automating your response process in real time.
Final Thoughts
In today’s fast-paced digital world, automation is no longer a luxury—it’s a necessity. Manually managing website form submissions wastes time, slows down responses, and increases the risk of errors or missed opportunities.
With tools like Zapier, you can automate your entire form workflow—from collecting data to sending emails, updating spreadsheets, or triggering follow-ups in your CRM. It’s like having a virtual assistant working 24/7 behind the scenes.
And when you pair Zapier with FormGent, the process becomes even easier.
No complicated setup
No premium plugin lock-ins
Just smooth, no-code automation right from your WordPress dashboard
Whether you’re collecting leads, booking appointments, or running surveys, FormGent + Zapier is the ultimate combo to save time, stay organized, and scale your efforts.
Ready to automate like a pro?
Try FormGent free today and unlock the full potential of form automation—without paying a premium. Your smarter, faster, and more efficient workflow starts now.
Frequently Asked Questions (FAQ)
1. What is Zapier and how does it work with WordPress?
Zapier is a powerful automation platform that connects your WordPress site with over 7,000+ apps—like Gmail, Google Sheets, Slack, and more. When used with a WordPress form plugin like FormGent, Zapier listens for new form submissions and automatically performs follow-up actions, such as sending an email or adding data to your CRM—without any manual input.
2. Is FormGent Zapier integration available in the free version?
Yes! FormGent offers Zapier integration even in its free version, unlike many competitors. This means you can automate workflows, connect tools, and save time—without paying a cent.
3. Can I send form data to multiple apps at once?
Absolutely. Zapier allows you to create multi-step Zaps, meaning a single form submission can trigger actions in multiple apps simultaneously. For example, you can add a lead to your email list, send a confirmation email, and notify your team on Slack—all from one FormGent submission.
4. Do I need coding skills to automate forms using Zapier and FormGent?
Not at all! One of Zapier’s biggest strengths is its no-code setup. Also, FormGent is simple and did not require any coding skill. Whether you’re a beginner or a pro, you can use Zapier’s & FormGent intuitive interface to automate form actions—no coding skills required.
5. Can I connect my website form to external tools like Google Sheets or Gmail?
Yes! With automation tools like Zapier, you can easily connect your website form (built with FormGent or similar plugins) to tools like Google Sheets, Gmail, Slack, and more. This means every new form submission can instantly be sent to your preferred app—without any manual work
6. What’s the easiest way to automate a website form without coding?
The easiest way is to use a WordPress form plugin like FormGent paired with Zapier. You simply set up a trigger (e.g., a new website form submission) and choose your desired action (e.g., send an email, store data). No coding, no complications—just simple drag-and-drop automation.

Rezaul Karim
Rezaul Karim is a passionate Digital Marketer driven by curiosity and creativity in the ever-evolving world of online marketing. With over 6 years of hands-on experience in Content Writing, Copywriting, SEO, and Social Media Marketing, he brings a strategic edge to crafting content that engages and converts. Always eager to explore new trends and tools, Rezaul thrives on finding smarter ways to connect brands with their audiences. Outside of work, he enjoys diving into books or recharging in nature.


How to Add a File Upload Field to a WordPress Form (Free)
August 24, 2026[…] email notification the moment a file comes in, free in FormGent’s core plugin. You can also send the submission, file included, straight into Zapier to push it into hundreds of other tools, also free in FormGent’s core plugin. If you’d […]
How to Create a Payment Form in WordPress - FormGent
August 30, 2026[…] How To Automate Website Form Submissions Into Zapier (Step-By-Step With FormGent) […]