

How to Create an RSVP Form in WordPress (Step by Step)
-
- Tips and Tricks
- 8 mins read

Are you wondering how to create an RSVP form in WordPress?
Whether you’re organizing a high-profile conference, an intimate wedding, or a virtual webinar, a well-crafted RSVP form is the cornerstone of seamless event management. Yet, building a professional, user-friendly RSVP form in WordPress can feel daunting—especially if you’re juggling design flexibility, data collection, and mobile responsiveness.
Creating a professional RSVP form with WordPress is easier than ever—no coding is required! In this step-by-step guide, we’ll show you how to build a fully functional RSVP form, customize it to suit your needs, and streamline event planning with automation. Let’s get started!
For demonstration purposes, in this article, we’ll use FormGent, the ultimate WordPress form builder that transforms complexity into simplicity. In this step-by-step guide, you’ll discover how to create stunning, conversion-focused RSVP forms without touching a single line of code. From customizable templates to automated guest tracking, we’ll show you how to:
- Design a polished RSVP form that aligns with your brand,
- Streamline attendee management with smart integrations,
- Boost response rates with intuitive user experiences,
- And ensure every detail is mobile-ready and secure.
Say goodbye to manual spreadsheets and missed RSVPs. Let’s turn your WordPress site into an event-planning powerhouse—one click at a time.
How to Create an RSVP Form in WordPress
In WordPress, creating an RSVP form is easy as you can make it effortlessly. There are plenty of plugins like FormGent to make it happen. FormGent offers multiple methods for creating various types of forms, including RSVP forms. You can either build an RSVP form manually, following a step-by-step approach, or use one of the available streamlined options. In this article, we will explore both methods, starting with a detailed, step-by-step guide to help you create an RSVP form effortlessly.
Creating an RSVP Form From Scratch
Creating an RSVP form manually is conventional and pretty much easy using FormGent. Here are the step-by-step guide to do so:
Step 1: Install the FormGent Plugin
To start, you need to install the FormGent plugin on your site. You can do that using only the FormGent free form builder. If you haven’t installed the plugin yet, you can download the free version from the WP Org, and for the pro version, you can get it from the official website.
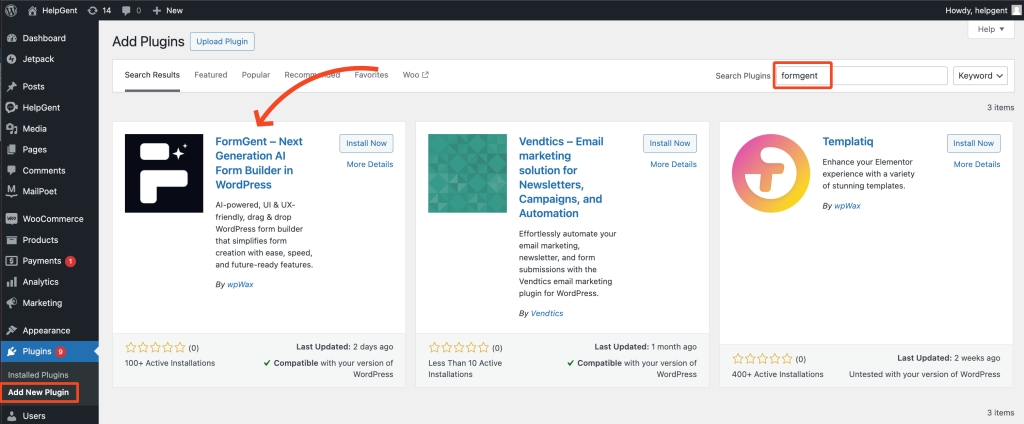
After installing FormGent, you’ll find it in the left sidebar of your dashboard. Using FormGent, you can create any type of online form in two ways. One is by manual, another one is by using AI capabilities. First, I’m sharing how you can create an RSVP form from scratch. To do so, go to the FormGent located on the left sidebar, and click to move further. Then you’ll be taken to the FormGent Interface where you’ll find the Create New form option.
After installing FormGent, you will find it in the left sidebar of your WordPress dashboard. With FormGent, you can create online forms using two methods: manual creation or AI-powered automation.
Step 2: Create an RSVP form from scratch
To demonstrate, let’s walk through the process of creating an RSVP form from scratch:
- Navigate to FormGent – Click on FormGent in the left sidebar of your dashboard.
- Access the Interface – You will be directed to the FormGent All Forms interface, where you can manage and create forms.
- Create a New Form – Click on the “Create new” button to begin building your RSVP form.
From here, you can customize the form fields, configure settings, and publish it seamlessly.
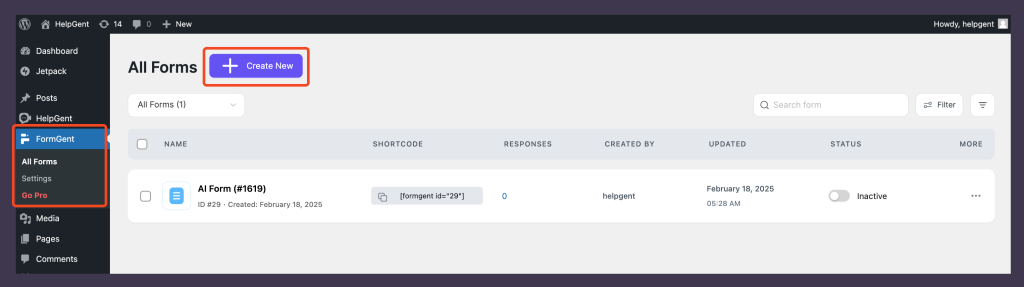
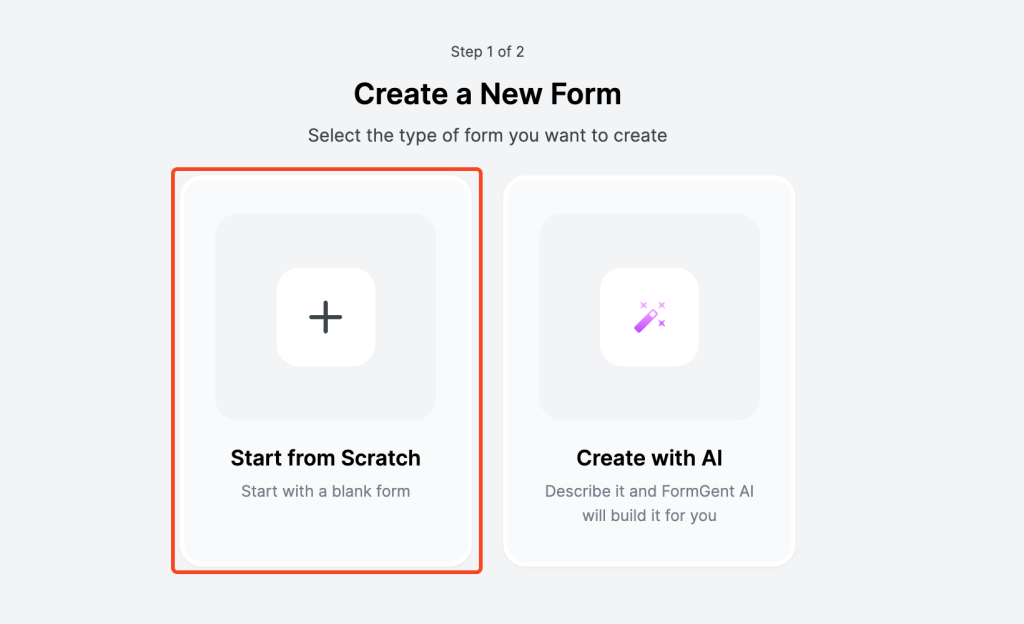
Click the “Create New” button to open a new page with two options. Select the “+” icon under “Start from Scratch” to begin.
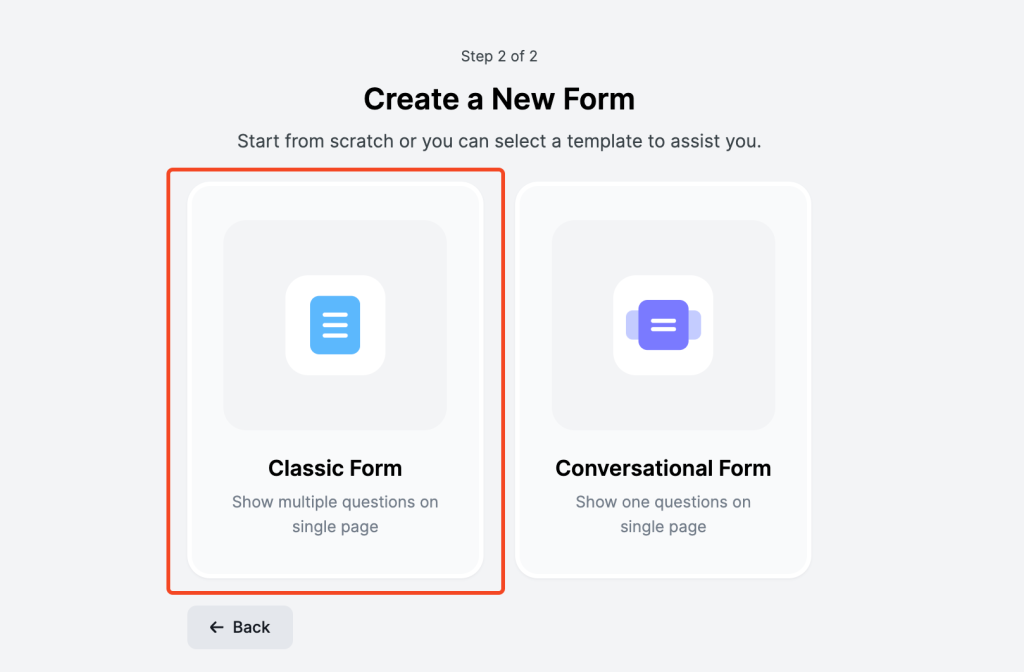
Once you click on the Start from Scratch option, you’ll be taken to a page where you need to choose the Classic Form option.
Step 3: give a form name
Once you click on the Classic Form option, a pop-up will appear for the form name.
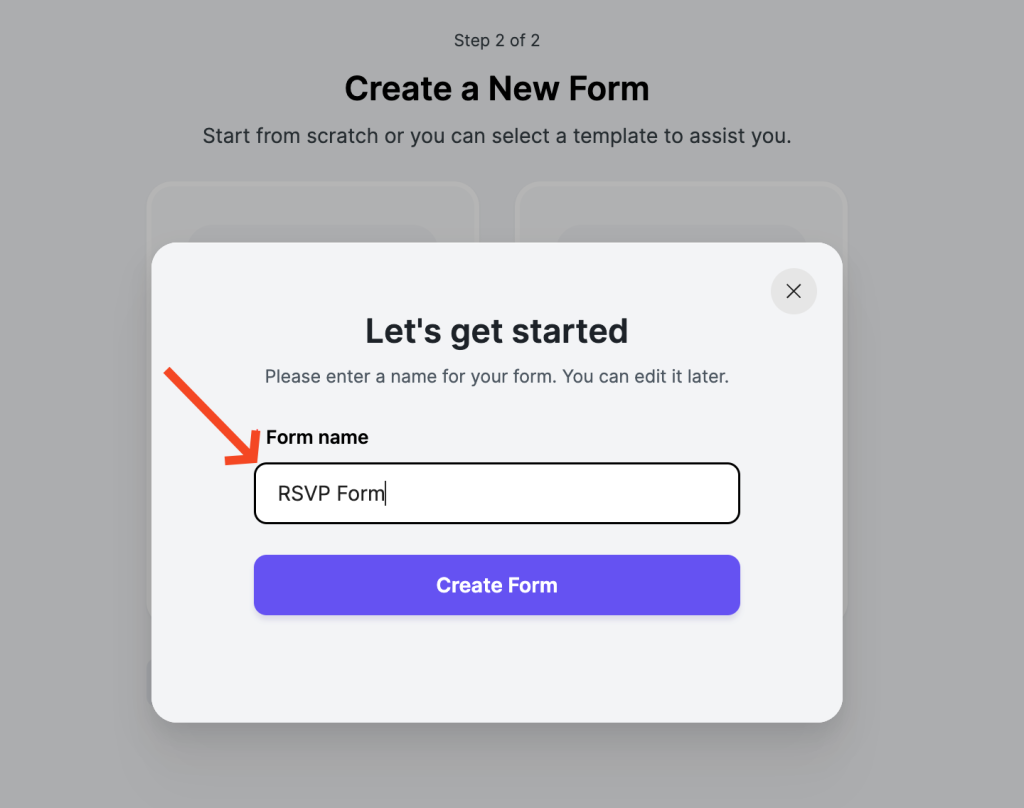
Step 4: Choosing the form elements
Once, you give the form name, you’ll be taken to the block-based manual form builder option of FormGent.
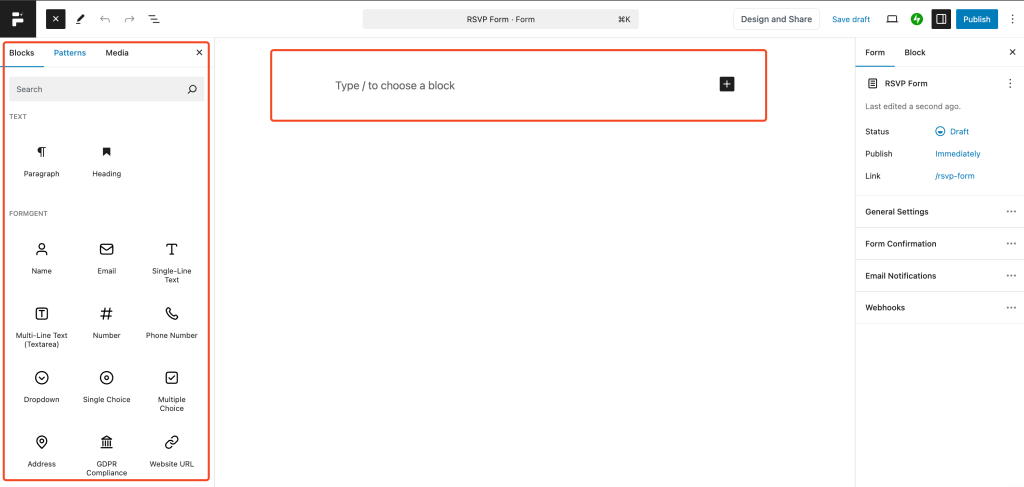
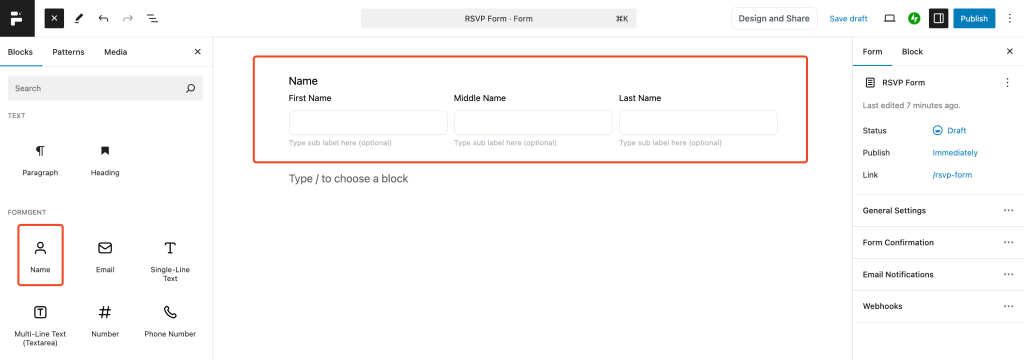
Now, you have full control over customizing your form by adding the necessary elements. Since we are creating an RSVP form, we will begin by adding a Name field from the form editor. To keep this demonstration clear and easy to follow, we will maintain a simple structure. Additionally, hovering over each form element provides a preview of how it will appear in the builder once placed.
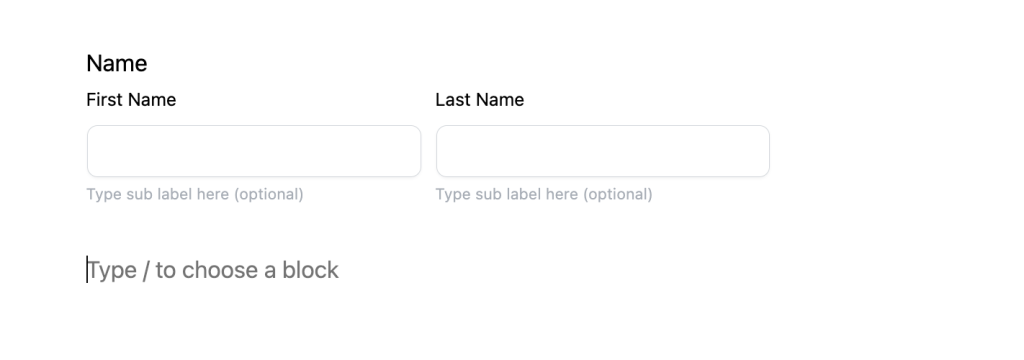
Once, you click on the Name field, it will be added with three input fields to the builder.
To make the form simple, we can delete the Middle Name by clicking on the input field.
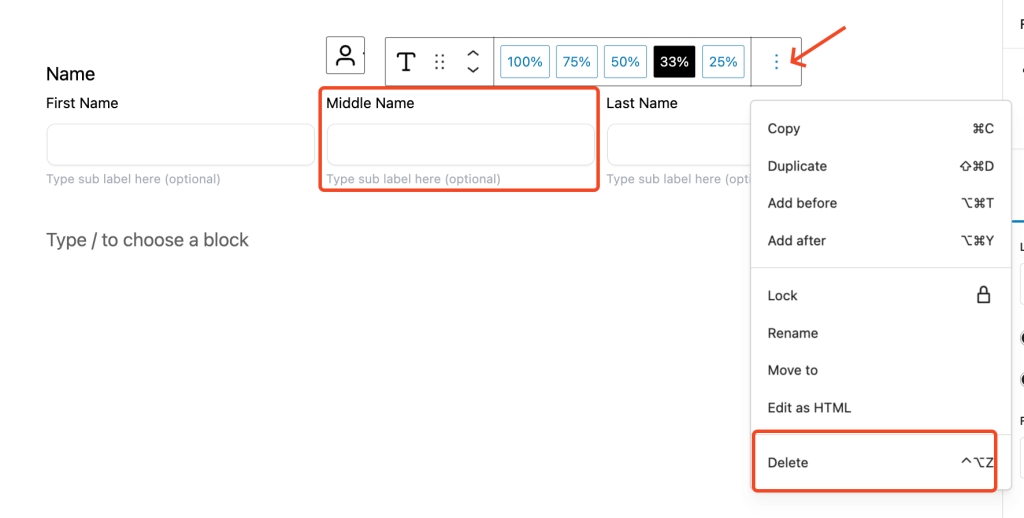
Now, it looks cool, isn’t it?
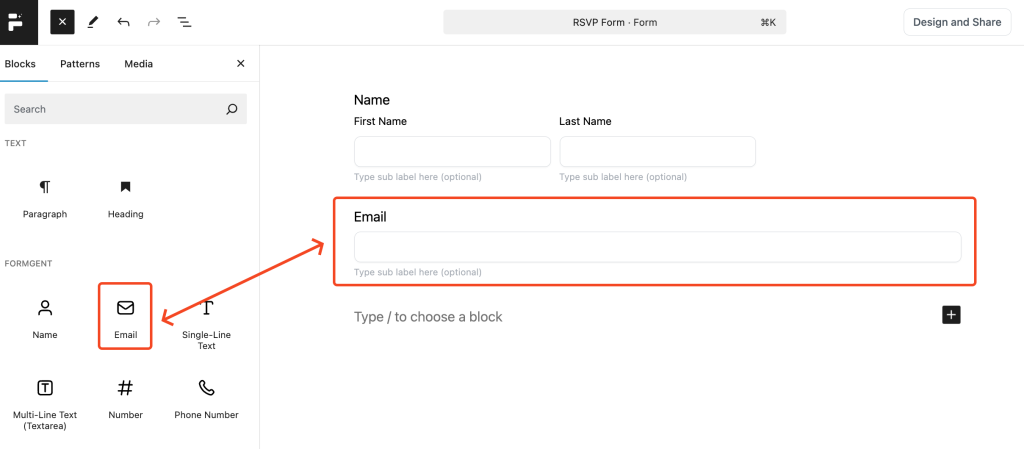
Once we’re done with the Name field, now we need to add another input field named Email for our RSVP form. Here, click on the Email field from the input field options located on the left of the builder.
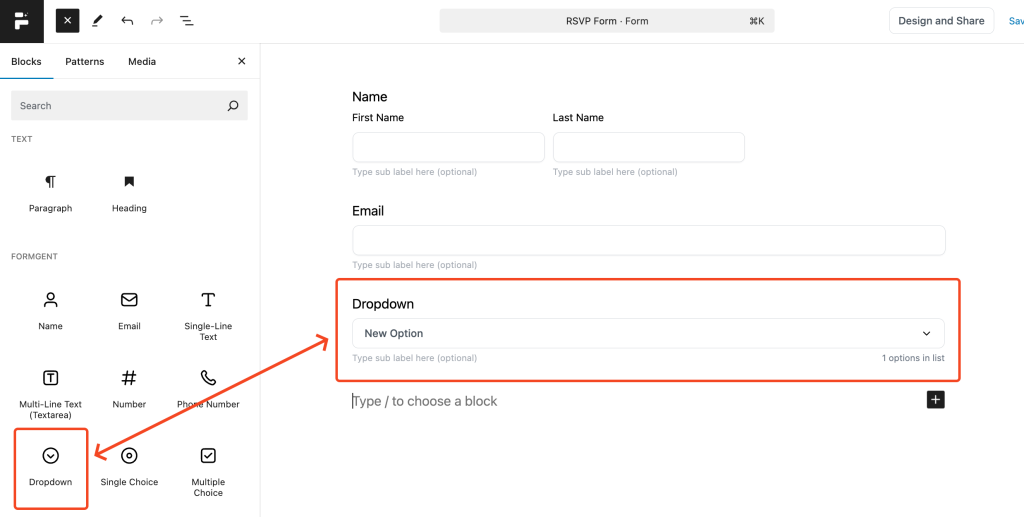
Now, we need to add a drop-down field to collect some feedback from the end users. To do so, click on the Dropdown field from the left panel.
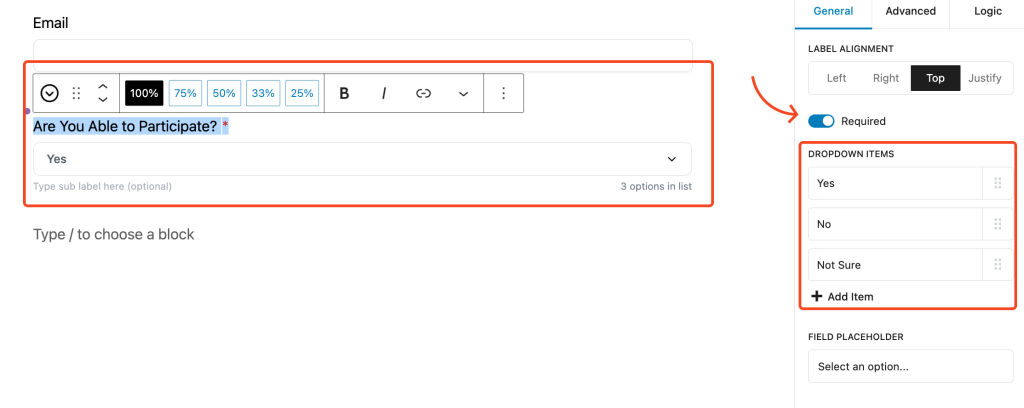
Customize the field label to meet your specific requirements by selecting from Left, Right, Top, or Justify alignment options. Additionally, use the right panel to configure the input field, including adding customized drop-down options as needed. To ensure the field is mandatory, enable the Required option from the right sidebar. You can also modify the placeholder text for the input field from the same panel for better user guidance.
Once you add the drop-down, we need to add the last input field named Single-line Text input field to collect another feedback.
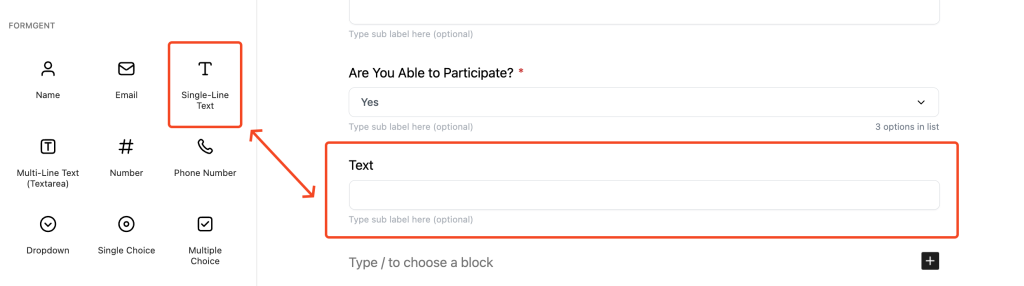
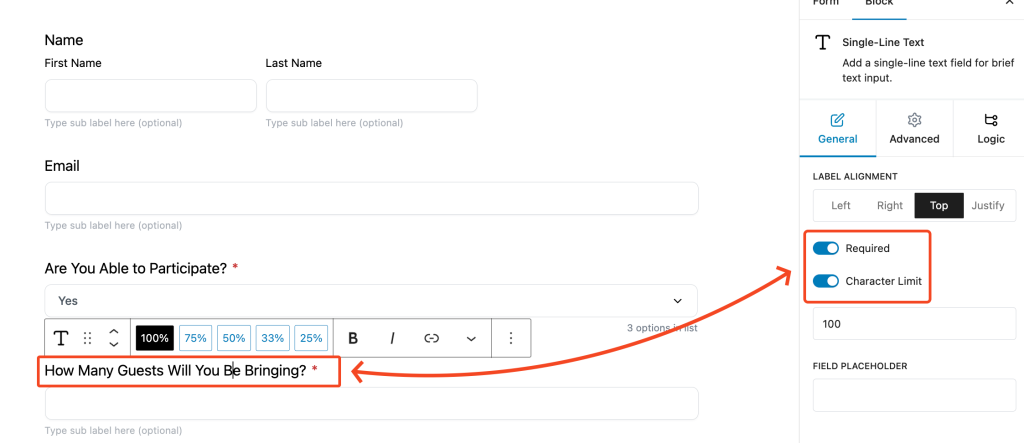
Now, you can change the label based on your asking in the RSVP form. Make the field as required by enabling the option. You can also limit the character for the field. Here it is –
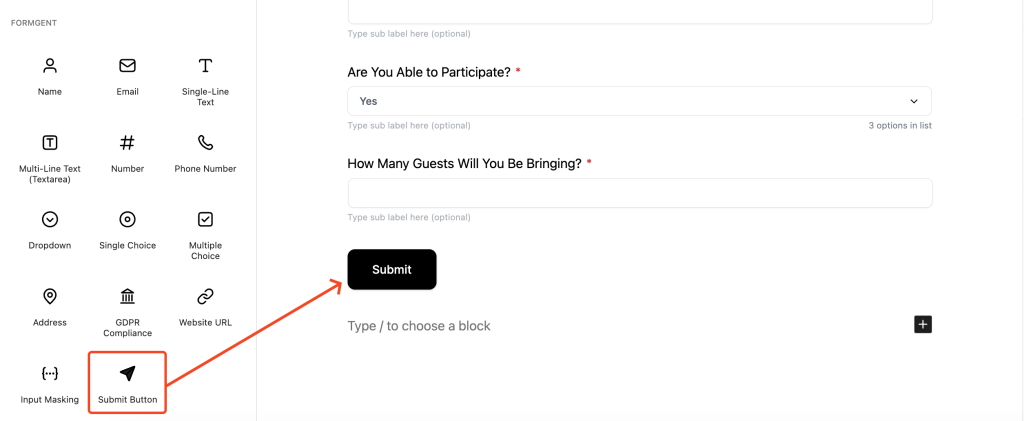
To finalize the RSVP form, a submit button must be added at the bottom. To do this, select the Submit Button input field to insert the button into the form. Additionally, you can align the button to the left, right, or center, ensuring optimal placement for user convenience. Here you go –
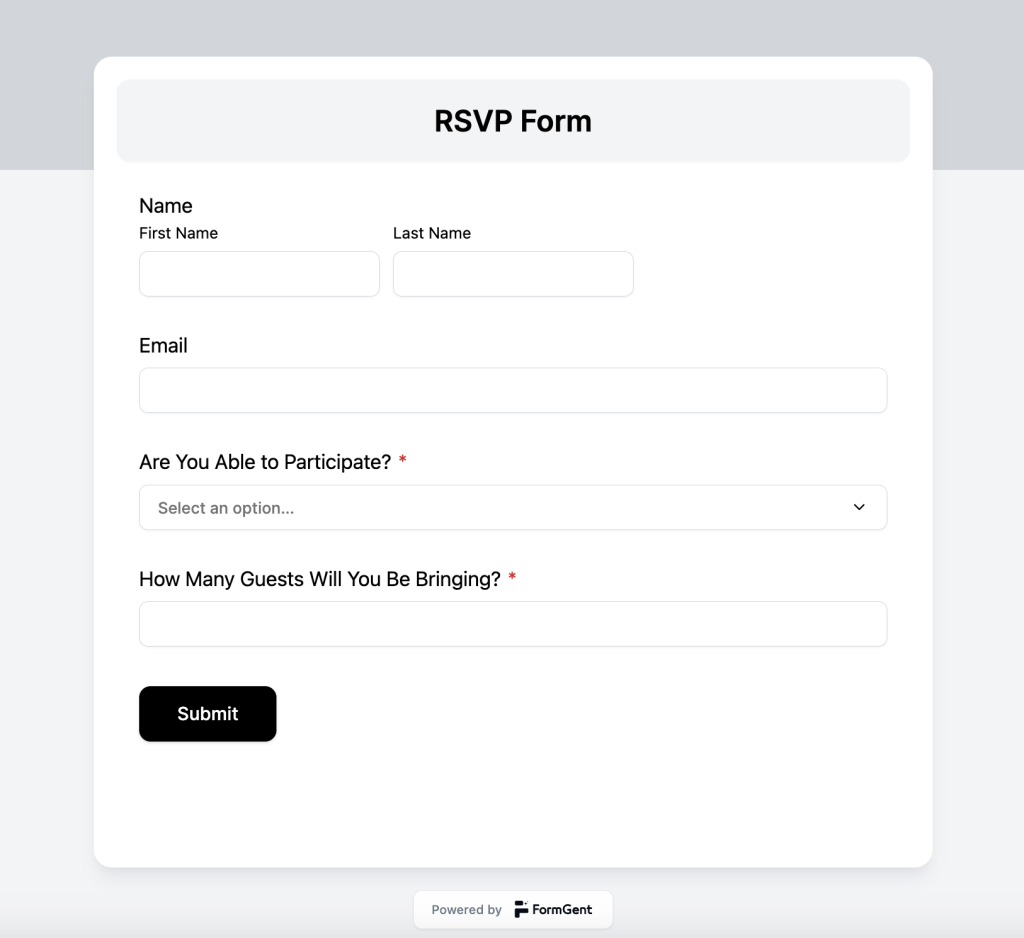
That’s it, a simple RFVP form has been created using the FormGent form builder plugin. Now, see the final preview/output of the entire RSVP form in the preview mode created by FormGent.
Step 5: Publish the created form
Now, you need to publish the created form from the back end to use it on any of the pages of the website.
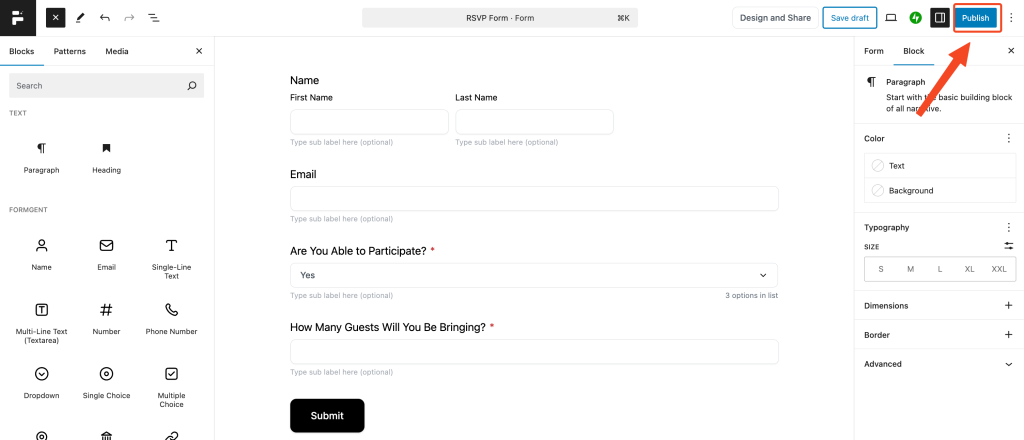
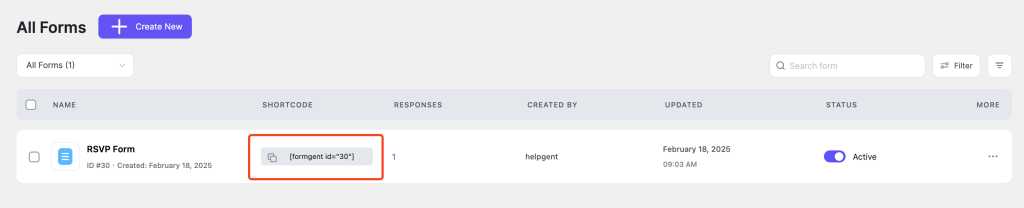
Step 6: Using the shortcode
The form is published. Now, you can use the created form on any of the pages of your website. To do so, just copy the shortcode and paste it into the desired page. That’s it.
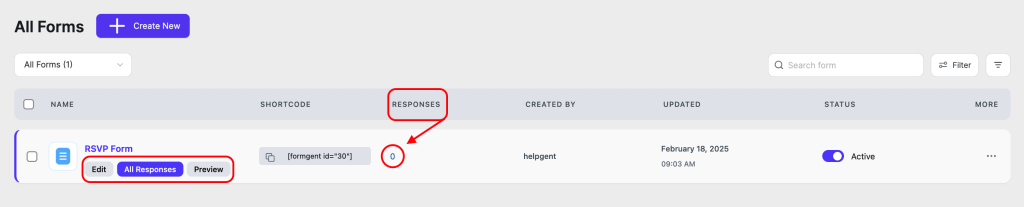
Step 7: Managing entries/responses
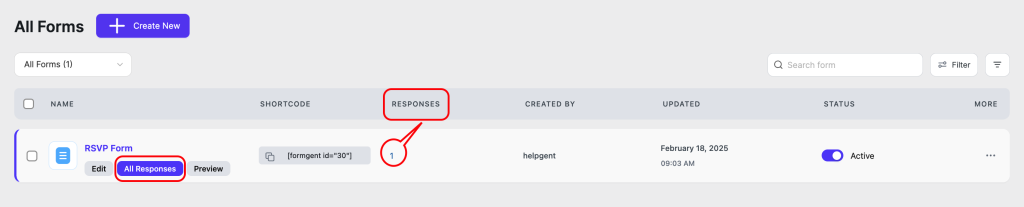
Now, if a user submits any form, you can find the from the RESPONSES option. You will see the number of responses a form gets from the user end. Here, we see zero submissions as we haven’t submitted any entries.
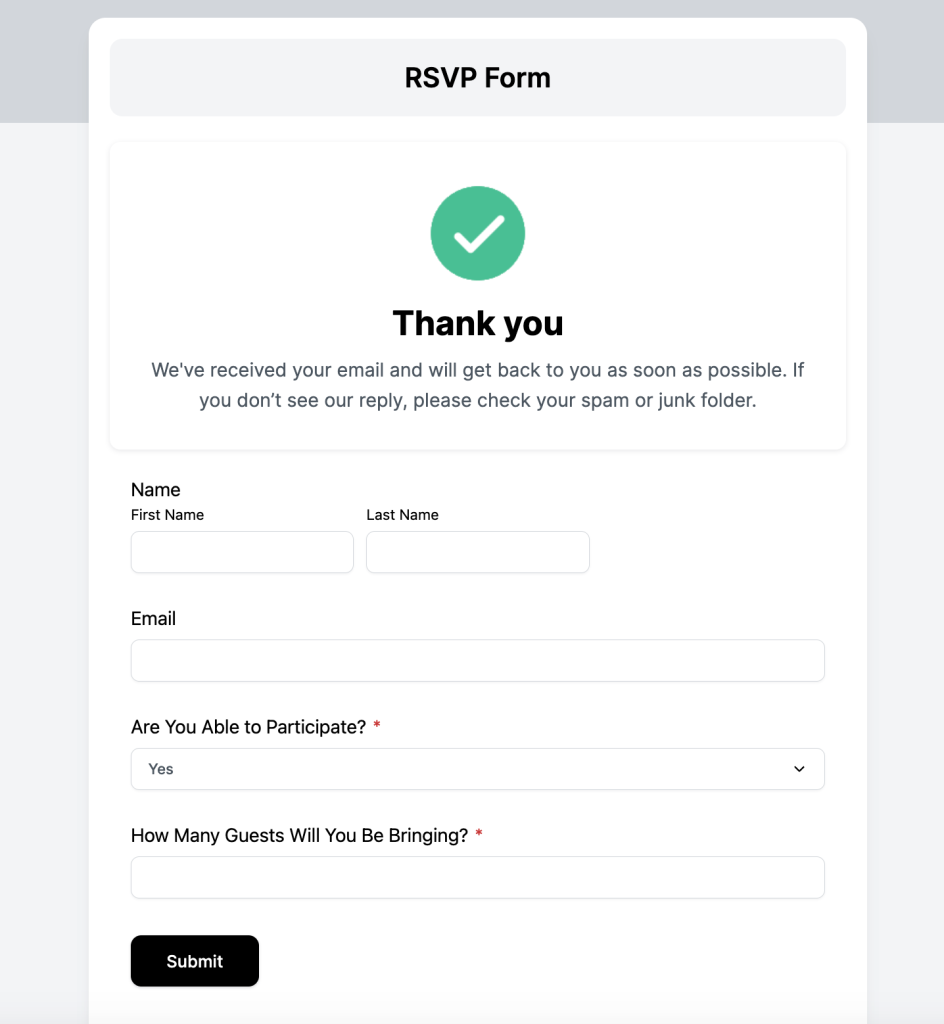
Now, if we fill up the created form as follows –
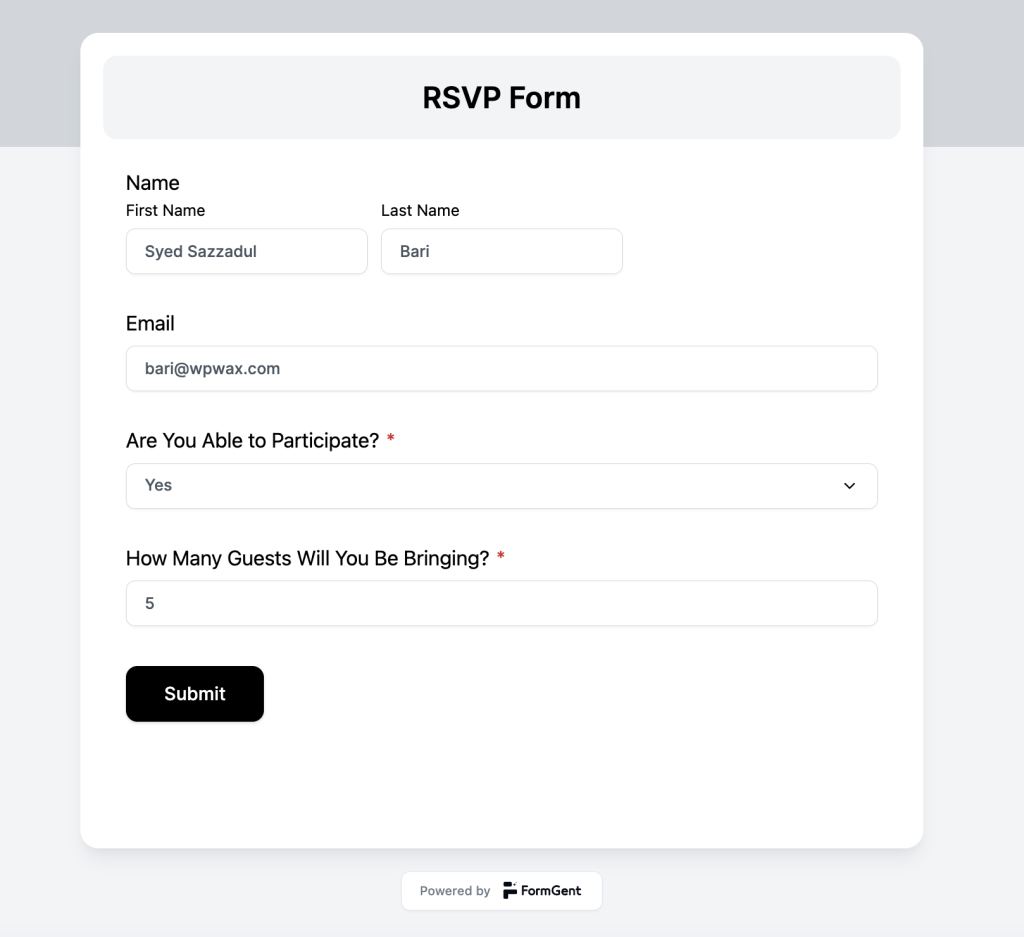
Once, you click on the Submit button, you’ll be shown the Thank you message. Now, you can see the submitted entries from the Responses option.
Now, you can see one entry has been added under the All Responses tab.
Now, if you want to see the response, just click on the All Responses tab, and you’ll be taken to the All Responses page. Here you can see the entry has been stored –

To see the submitted entry, head over to the Summary tab located top bar, then you’ll find the entry submitted by the form user. Here it is –
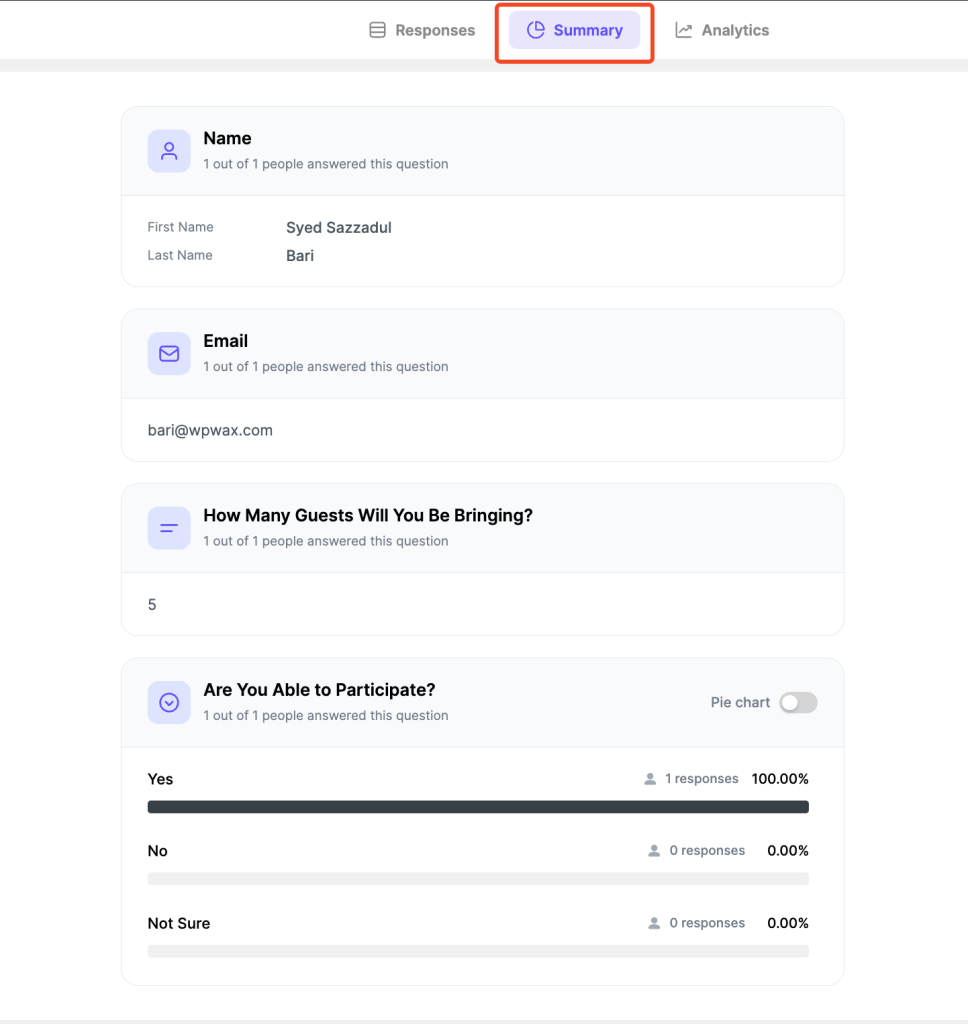
You also can see the form analytics heading toward the Analytics tab. Since we’re using the free version of FormGent, it’s not showing the full analytics.

That’s all it. Hope, you got a total picture of how to create & use an RSVP form from scratch using FormGent.
Creating an RSVP form using the AI feature of FormGent
FormGent allows you to create any type of form instantly. The same happens for the RSVP form. We can create an RSVP form in no time and customize it based on our needs. To do so, head over to FormGent from the left sidebar and click on the Create new button.
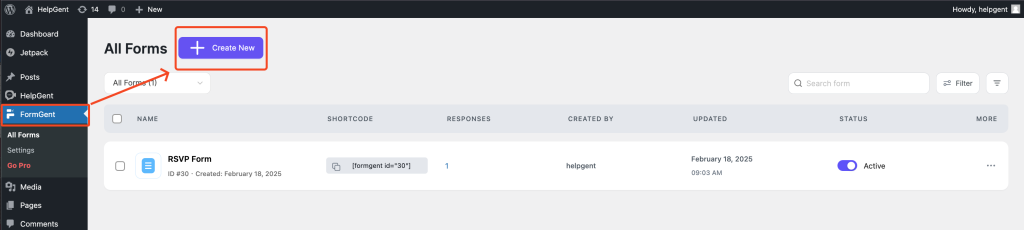
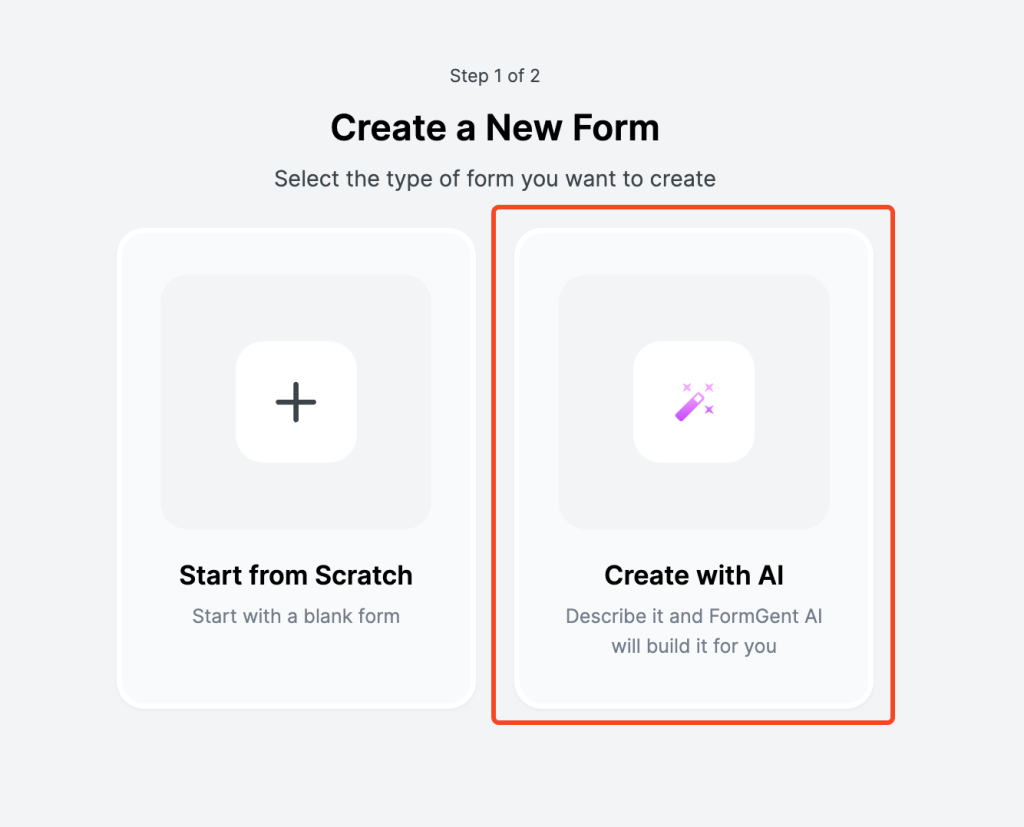
Once you click on the Create new button, a page with two different options will appear. Choose the option where it says Create with AI.
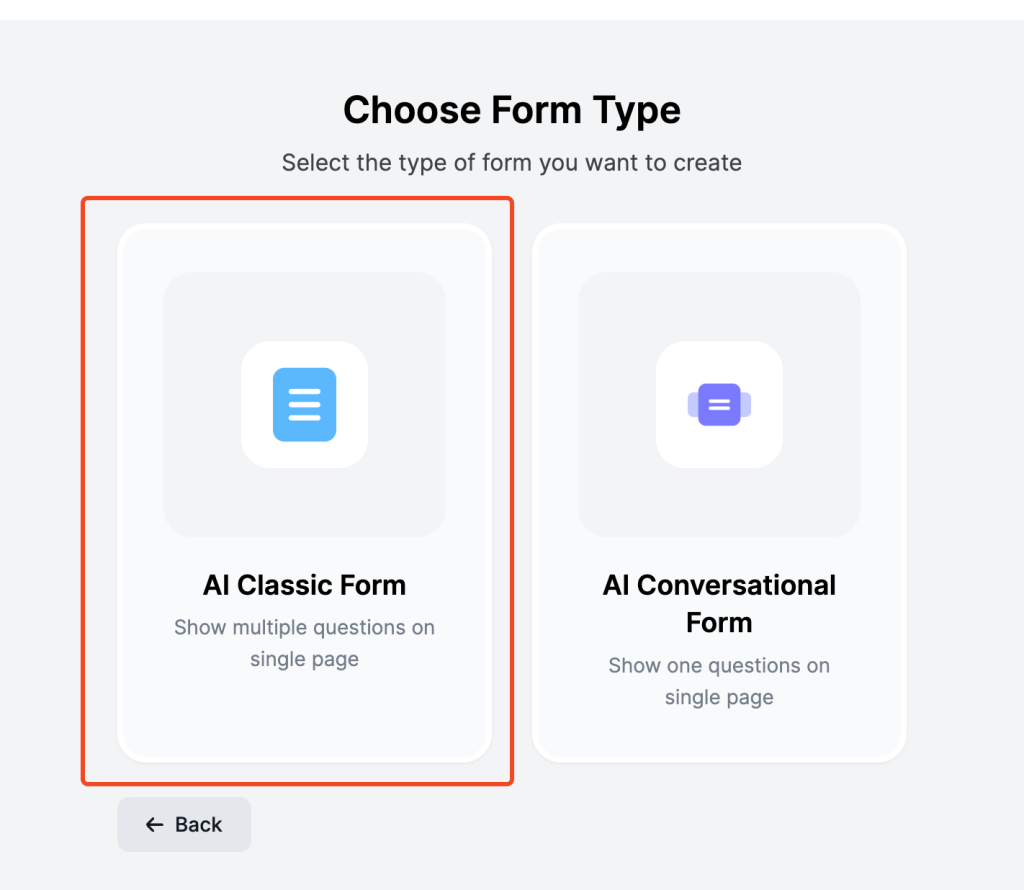
Once you click on the Create with AI option, you’ll again get to a page where you need to choose the form type, click on the AI Classic Form option.
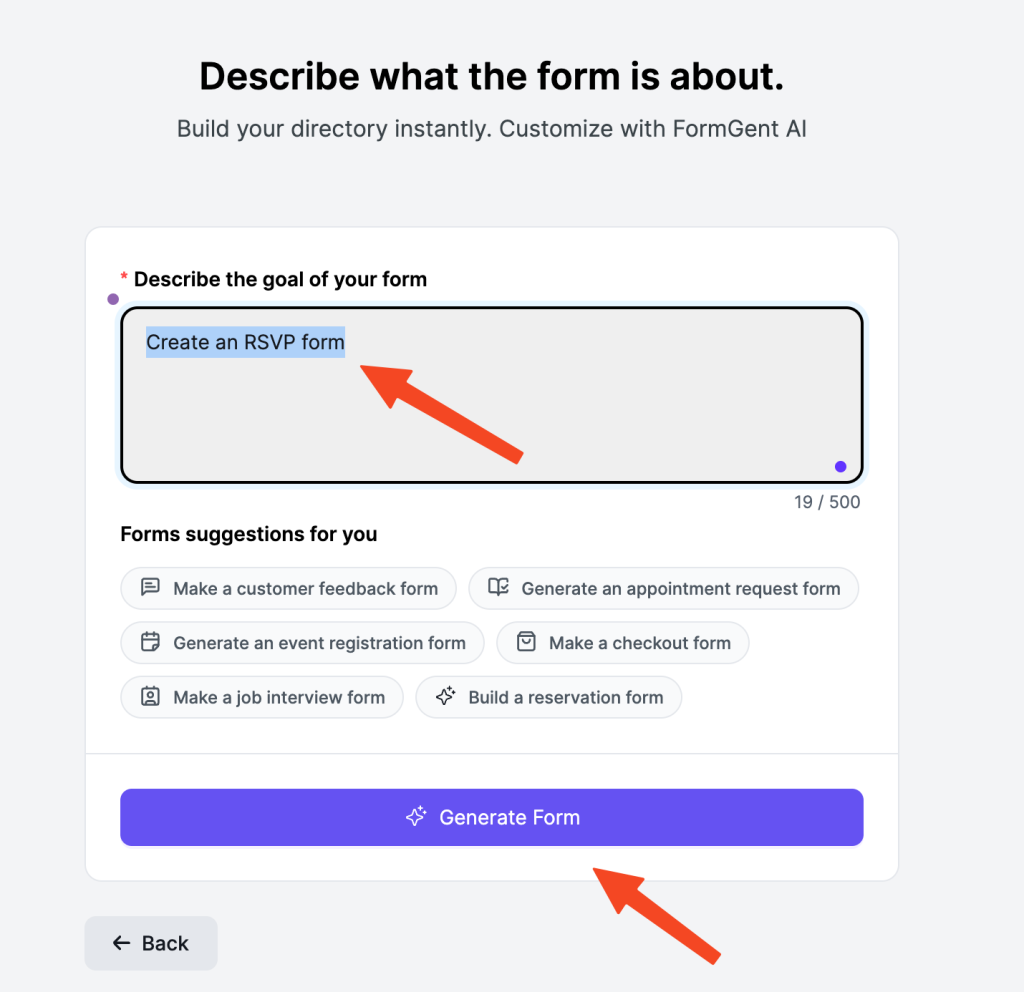
This will bring you to a page where you’ll get an input field to describe the goal of your form so that AI can able to understand your purposes. Type ‘create an RSVP form‘ in the input field. Then click on the Generate Form button.
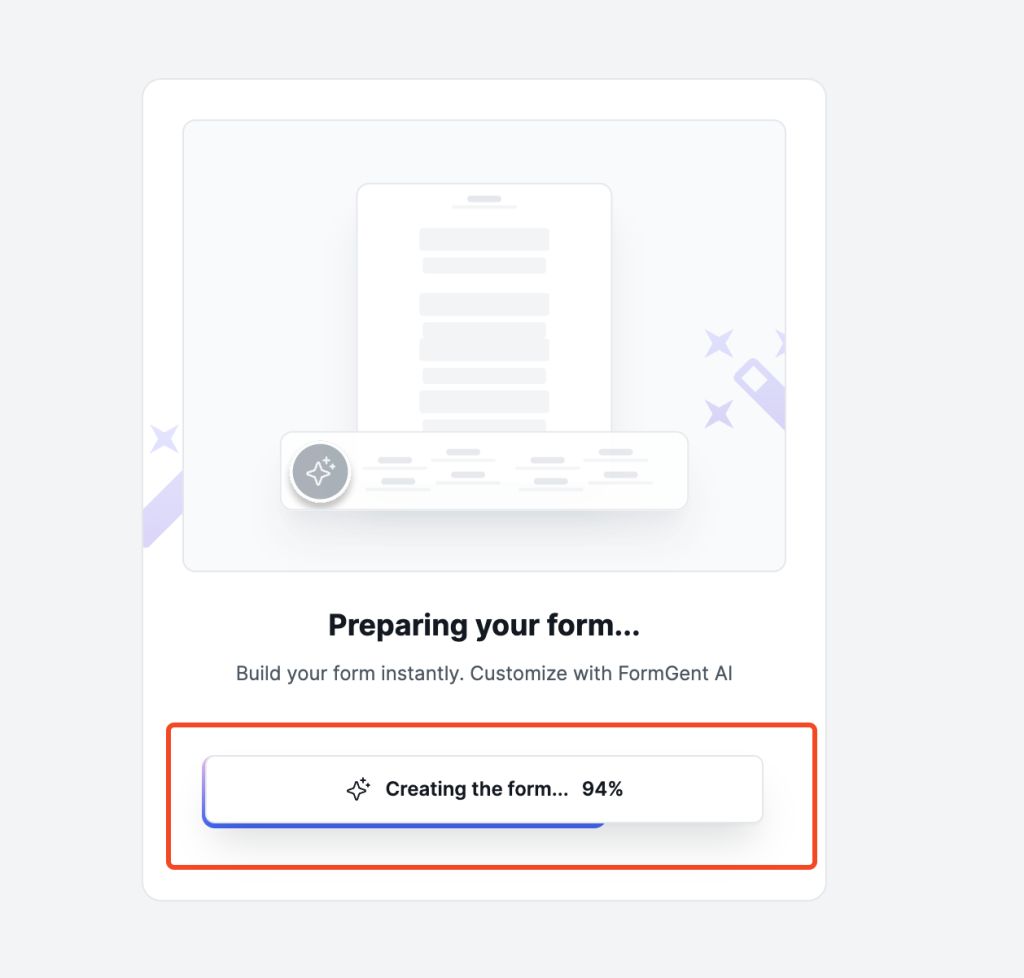
Once you click on the button, you will see the command is being populated with a progress bar. That means the form is generated through AI capabilities. Here you go –
After 100% done, you’ll see a form has been generated based on your command. This is a very rapid form-creation process. You only need to have some clicks. We see a very basic RSVP form has been created here –
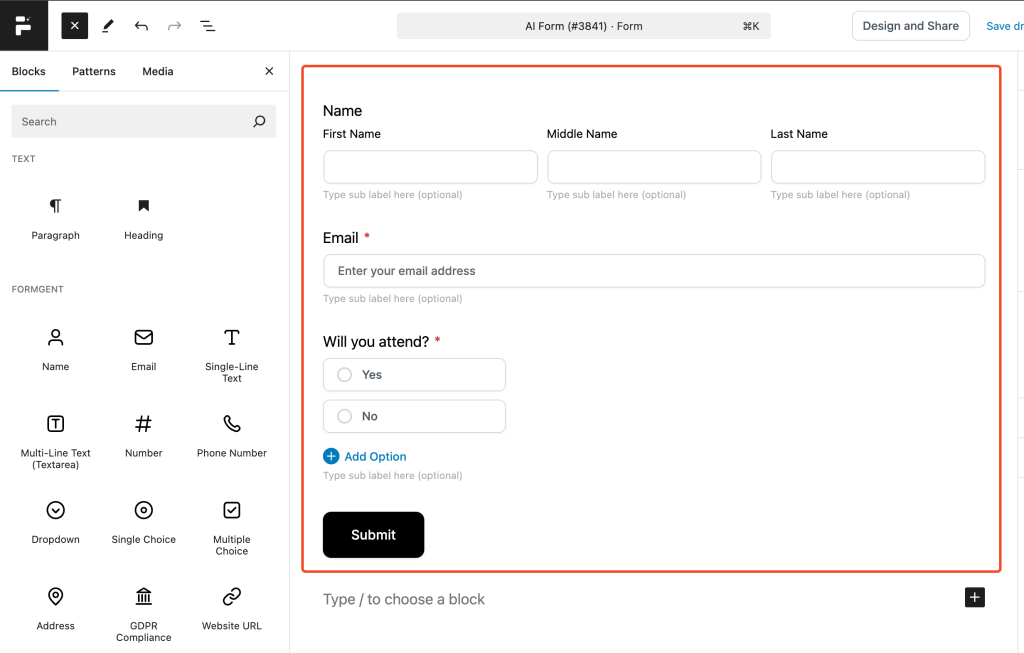
Now, we can customize the created form or we can keep it as it is if it serves the purposes. If we see the preview of the generated RSVP form, here it is –
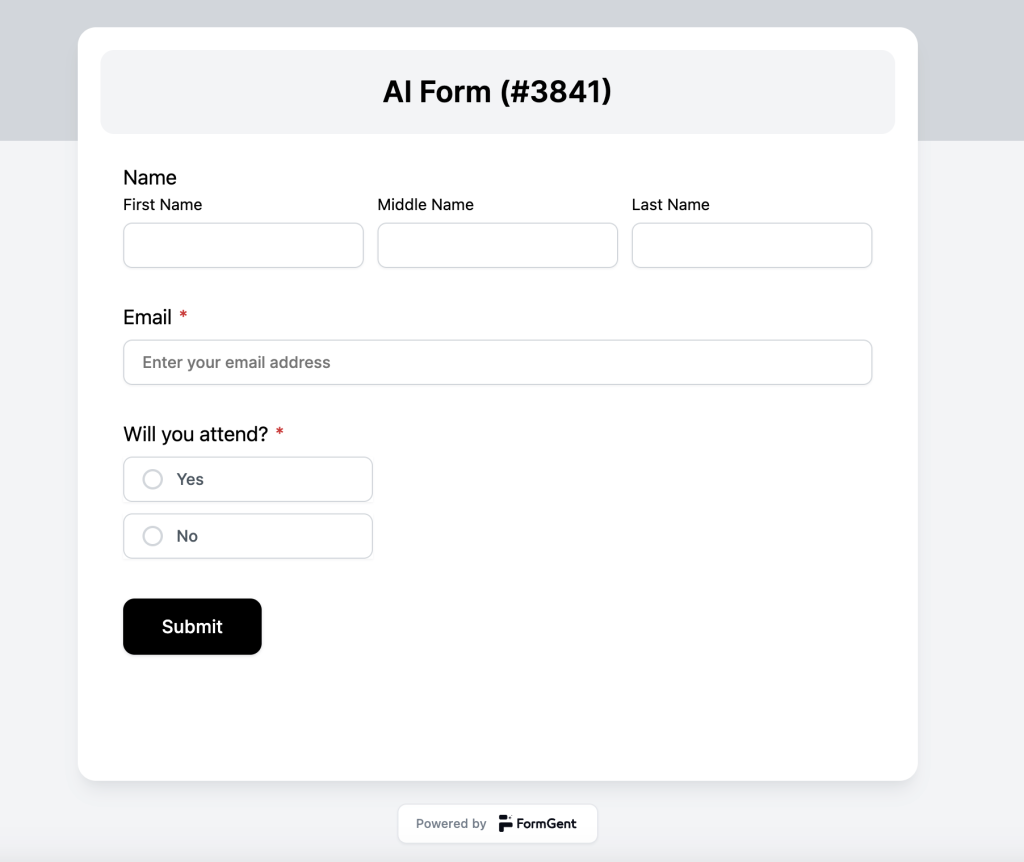
For the demonstrated purposes, we’re keeping this generated form as it is. Now, we need to publish the created form.
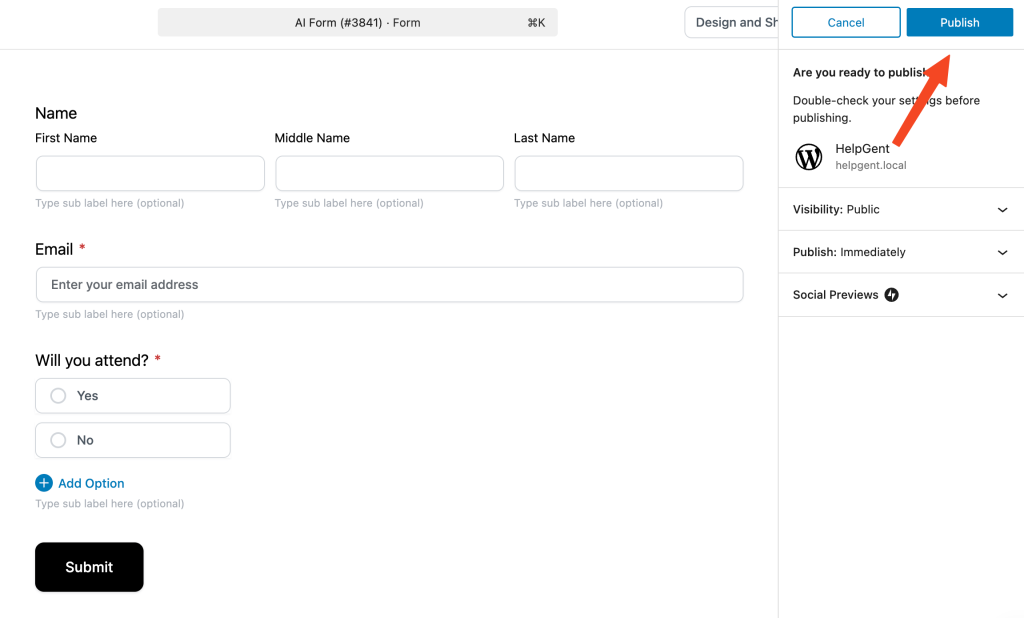
Once you click the Publish button, the process is complete, as we have manually built it from the ground up.
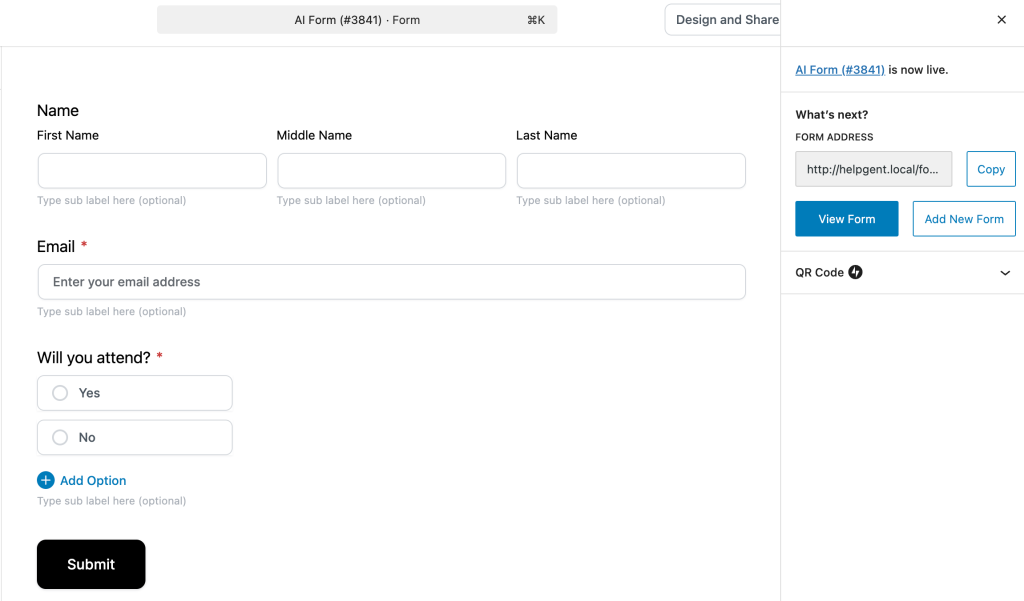
Your AI-generated RSVP form has been successfully published. You can now integrate it into your desired page using the provided shortcode.
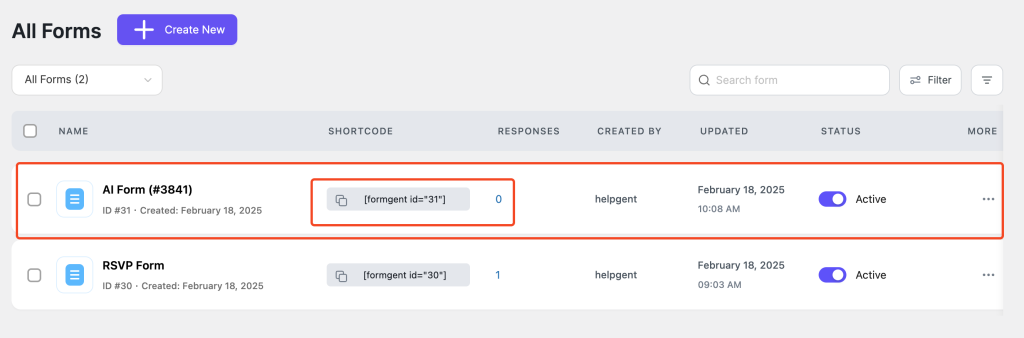
All the entries are available, as demonstrated in the previous section of this article while describing how to create an RSVP form manually from scratch. I think you have all the information you need.
Thank you for reading! Now that you’re equipped with the essentials, elevate your website’s functionality by creating seamless forms with FormGent – the intuitive WordPress form builder designed for efficiency and flexibility.
Why choose FormGent?
- Access free AI form creation and manually as well.
- Enjoy peace of mind with our 14-day money-back guarantee.
- There are many more to come.
If you still have anything potential, feel free to share your queries in the comment box below. I would love to cooperate with you in the best way possible. Hope, you have understood how to create an RSVP form in WordPress.
Stay informed with the latest WordPress insights: Follow us on Facebook and Twitter for expert tutorials, updates, and actionable guides.

Leave a Reply